How can I use a webcam in two applications at the same time?
Is it possible to add several web cameras to one Ivideon Server application?
How to change video parameters for web cameras in Ivideon Server?
1. How to add a webcam to Ivideon Server?
Video surveillance using webcams can be a good fit for home use and does not require much time for the setup of the connection to our service. In order to set it up:
Plug the camera into your computer’s USB port.
Download an up-to-date driver for your webcam on the manufacturer’s official website. It is recommended to use the manufacturer’s driver instead of the default driver from the OS of your PC, since the latter might not work properly.
Launch Ivideon Server. If you have already had the program launched, restart it – press the Exit button and then re-open the application again.
Start the server.
The webcam will automatically appear in the list of cameras.
Note that the live stream from the webcams is raw and needs to be processed in order to be transferred to our service, which heavily on the performance of your computer’s CPU.
In order to reduce the load on the CPU, you can change the webcam’s recording settings:
Open Ivideon Server and press Stop.
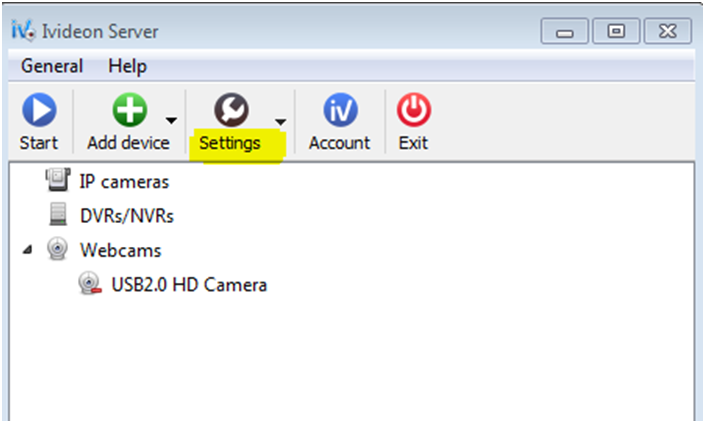
Click the Settings button on the toolbar of the main window.
Pick the Advanced tab.
Change the codec from H.264 to MPEG-4. MPEG-4 still creates a load on the processor, however, it is smaller in comparison to H.264.
If these changes are still not enough, try lowering the resolution, bitrate and FPS.
Press OK to save the changes.
2. How can I use a webcam in two applications at the same time?
Sometimes you need to use the same webcam for Ivideon video surveillance and another application (e.g., Skype). Since a web camera can operate only in one application at a time, you will have to install a splitter application, which will create a copy of your camera (for example, a free ManyCam application, which can be downloaded here).
1) Download and install ManyCam application on your PC (i.e., the same PC with Ivideon Server installed).
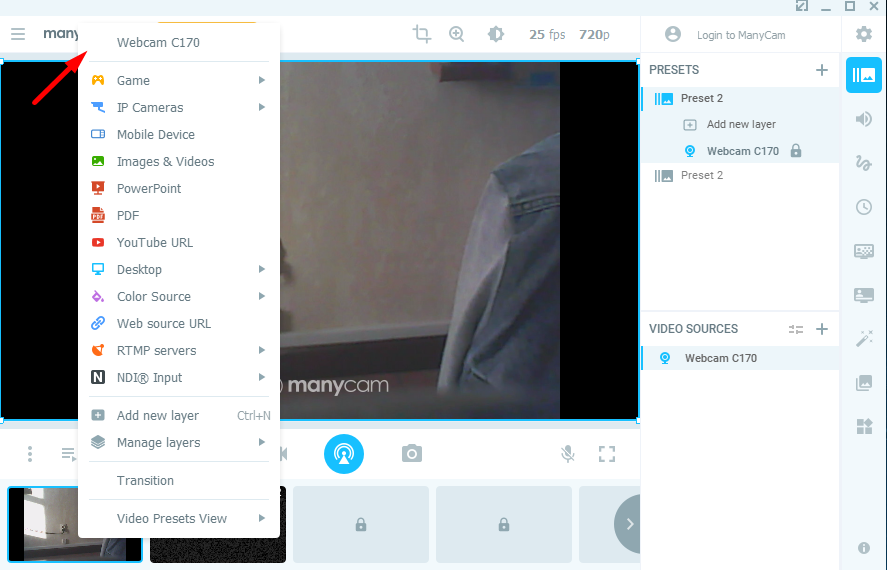
2) Open the ManyCam app, and, if you do not see your webcam automatically available in it, right-click on a blank black screen and choose your camera from the context menu list.
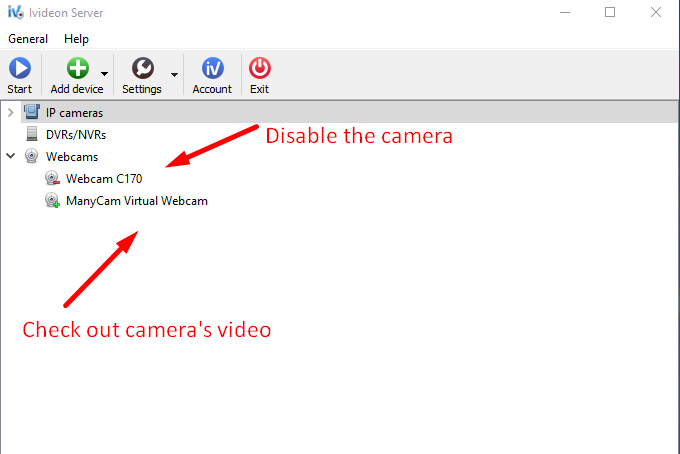
3) Open the Ivideon Server application, disable the USB camera added via ManyCam app within the list (right-click on its name and pick the Don’t use this camera option).
4) After this, check out the live feed from the ManyCam Virtual Webcam camera (double left-click on its name to open the preview window, where its video should appear). You can also alter the settings of the camera, if necessary, by right-clicking its name and picking Settings from the context menu.
5) Now, Ivideon Server will be using the virtual copy of your webcam, so the camera itself should be available to use via the other application.
3. Is it possible to add several web cameras to one Ivideon Server application?
Yes, it is possible, however, two or more webcams, added to one server at the same time would likely lead to instabilities in how Ivideon Server will function, as well as to higher load of system resources of your PC.
This is related to the fact that the live stream from the webcams is raw and needs to be processed in order to be transferred to our service, which generally leads to a heavy load on your computer’s CPU. In case it is necessary to connect multiple cameras to the same Ivideon Server, it is recommended to use IP cameras and not webcams.
4. How to change video parameters for web cameras in Ivideon Server?
Specific video parameters of webcams (resolution, encoding, bit rate and frame rate) can be adjusted in the Ivideon Server application.
To do that, please perform the following actions:
1. Stop the application, clicking on the Stop button on the toolbar:

2. Click on the Settings button in the same window, then choose the Advanced tab.
3. Under the Webcam recording settings section, feel free to alter the settings necessary. To save the new settings, click OK.

NB! Kindly note that additional video settings besides the ones mentioned above for the majority of webcam devices can only be changed using the camera’s native application (usually distributed along with its driver).
Video parameters for IP cameras/DVRs are unavailable via Ivideon Server, if necessary, please access the devices’ respective web interfaces to control these parameters for them.