How do I enable local recordings in Ivideon Server?
You can save camera archive recordings to the internal or external hard drive connected to your PC. To do so, please follow the instructions below:
Stop the server if started. Open the Settings window by clicking the Settings button on the toolbar.
Open Archive menu, click "Add" within left bottom corner to add a new directory for local archive recording or choose already existing one from the tab on the left
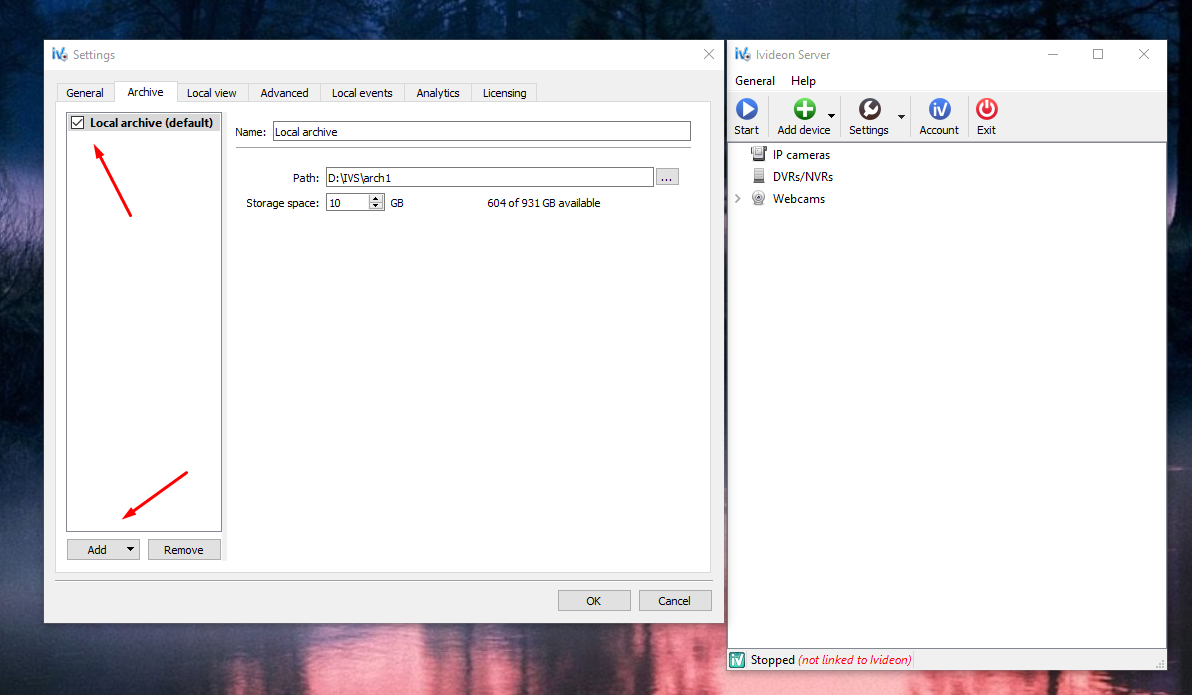
Specify the path to the folder where video recordings will be stored.
Allocate the amount of space to be used for storing recordings.
Click OK to confirm.
The recording mode chosen by default is When detector is triggered. i.e., motion- or sound-based detection. This can be changed for each specific camera/channel in its settings. To locate camera settings of your specific device, please do the following:
When the server is stopped, right-click the name of your camera in the list in the main window of the program;
Choose the Settings… option from the context menu;
Switch to the Recording tab. This is where you will see the list of recording modes available:

NB! The allocated archive size must be less than the free space available on the hard drive in order for the recordings to function properly.
The local archive records loop, meaning that the older recordings get overwritten by newer ones in case the allotted storage space runs out.
You can find more information on archive recordings and their storage in the Recording and Storing archive section of our knowledge base.
How do I configure the location and the size of the local archive?
Size and location of archive
Ivideon Server has parameters of the local archive recordings made to the hard drive of your PC. You can alter the maximum amount of storage space they will take up and their location.
To manage these settings, please do the following:
Stop the server and click on the Settings button on the toolbar of the main window.
Open Archive menu, choose archive directory from the list on the left to change its settings.
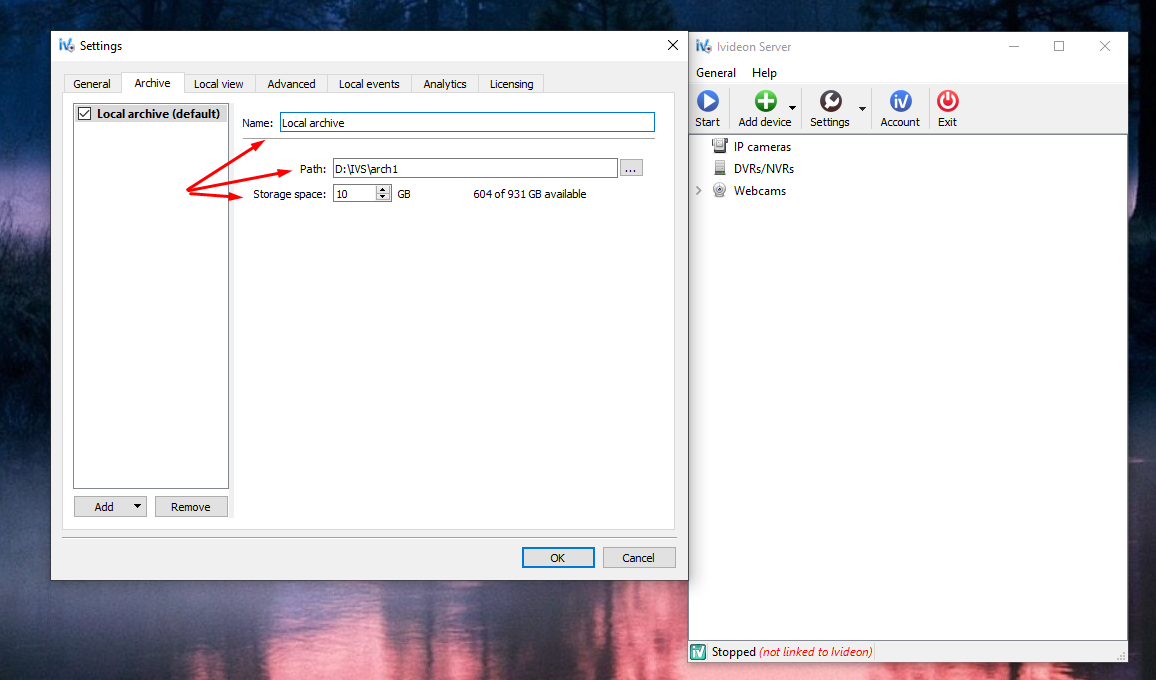
You can change directory name, path and storage space within this menu.
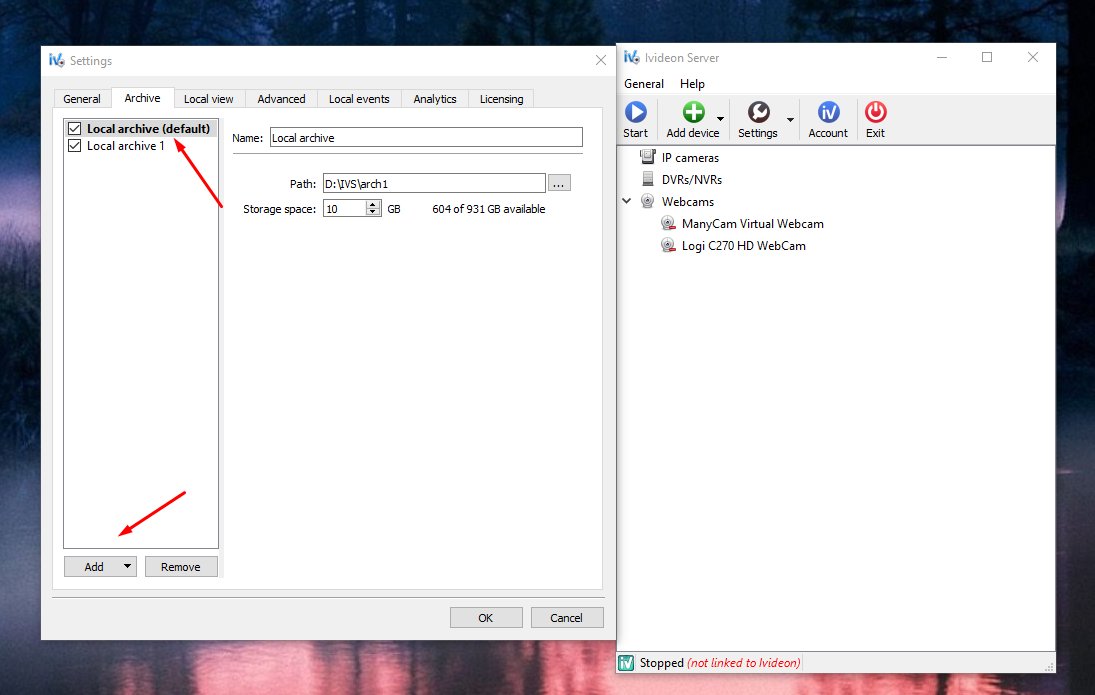
If it's needed, you can add additional directories to setup local archive recording for different cameras to different archive directories to optimize disk usage.
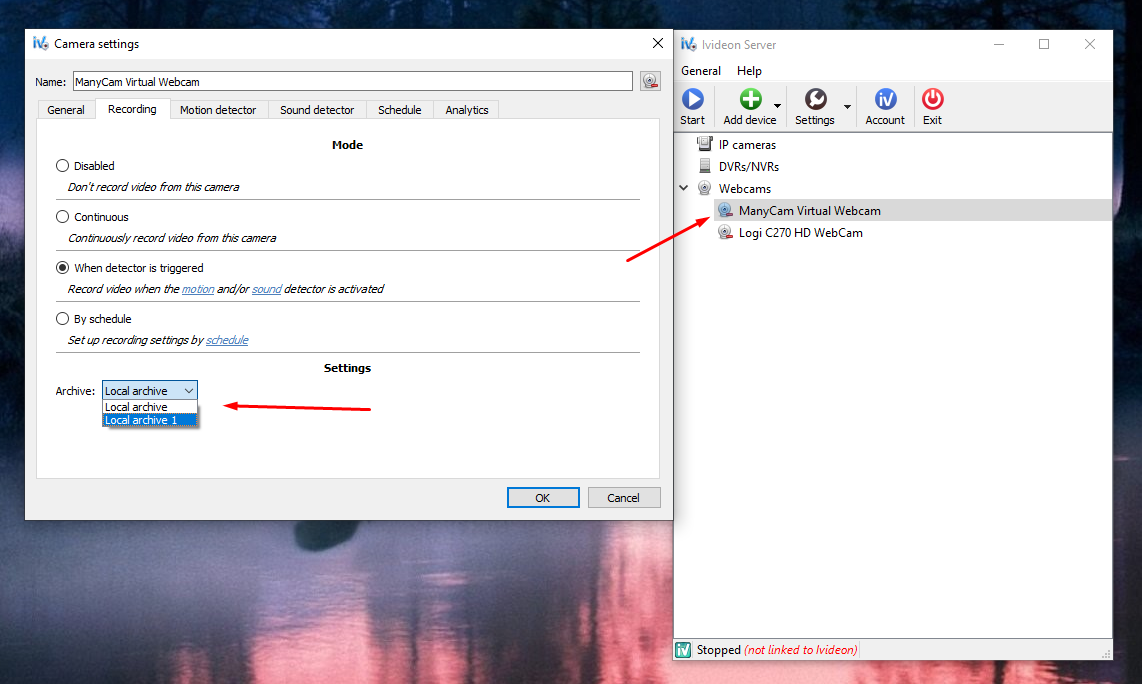
When setting up multiple archive locations for the server, you can specifically select the location that will be used for each of the cameras. To do so, go into this camera’s settings and on the Recording tab find the Archive option in the Settings section of the tab:
NB! Please note that when the archive reaches its maximum allocated size, the oldest recordings will start to be replaced with new ones (i.e., overwritten).