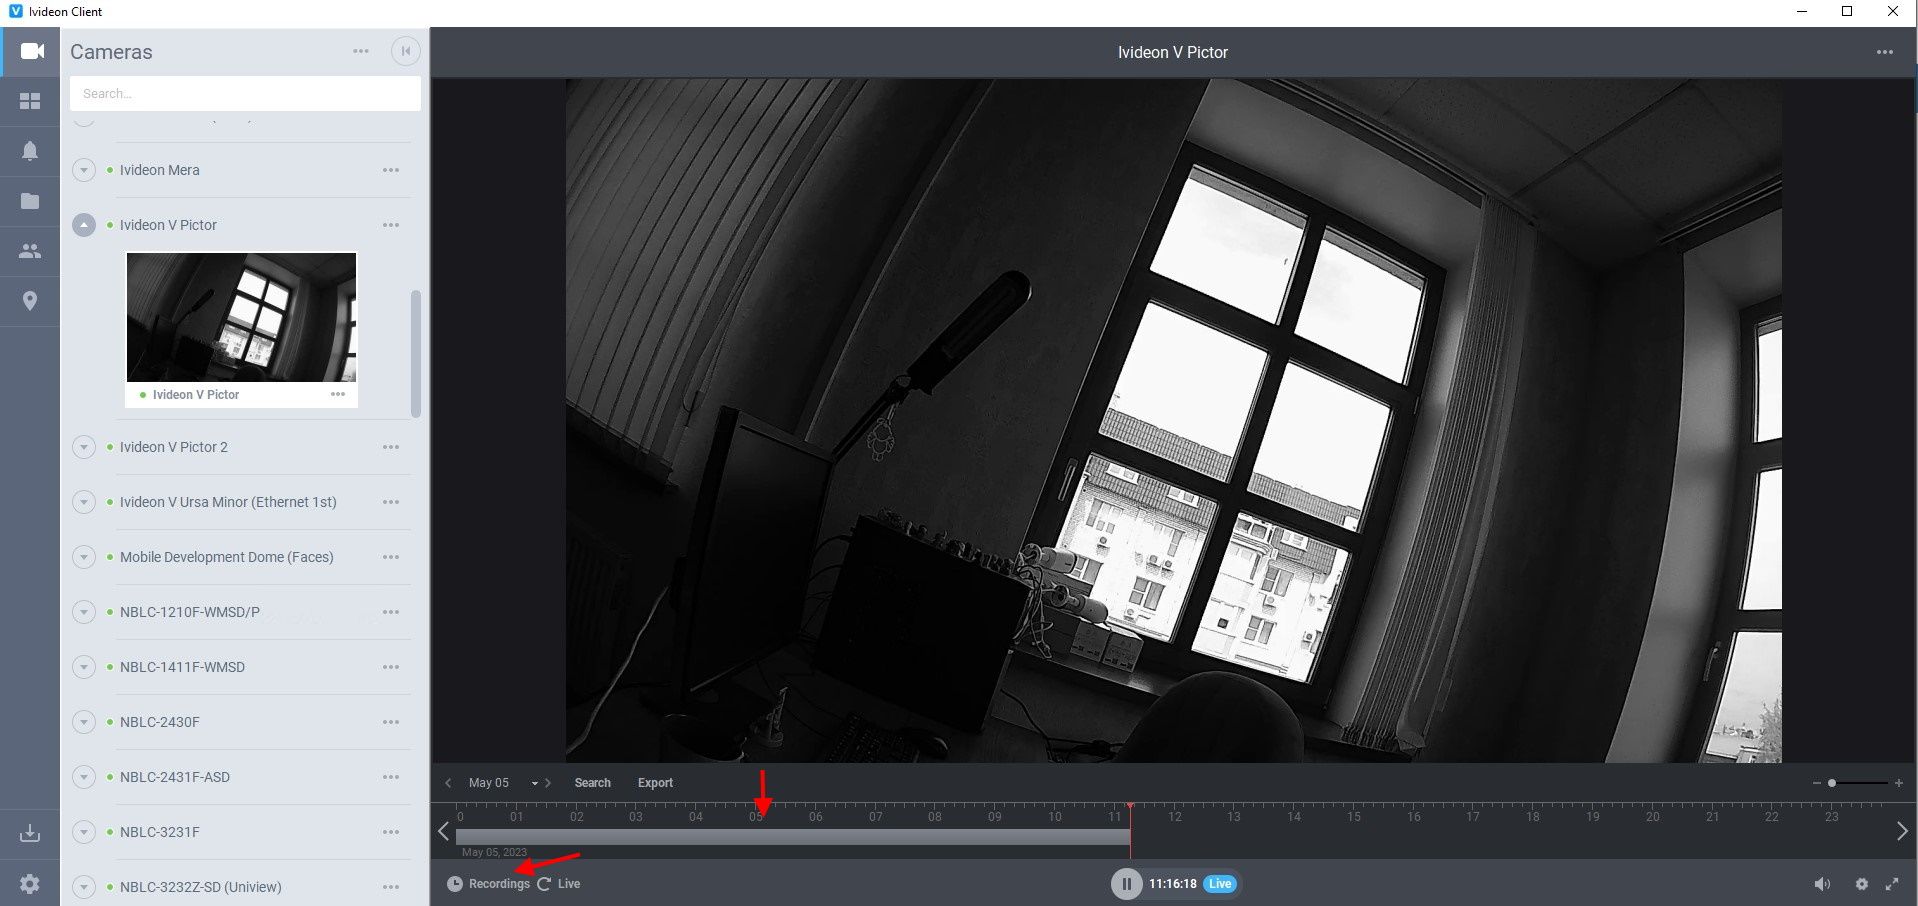
There is a timeline shown below the video player showing playback from your camera when in its live view mode. In case the camera records archive, the marks of the recorded archive are shown in gray in Ivideon apps, as well as in Ivideon Personal Account.
Please note that archive recordings on the timeline additionally can be colorized so that you would be able to distinguish between which recordings are stored in our cloud and which are stored locally: both in your Personal Account and in the Ivideon Client application, if the necessary option is enabled, the cloud archive recordings are shown in light blue, and the local recordings – in dark red.
Here is what the archive looks like:
in Ivideon mobile app | in your Personal Account on our site | in Ivideon Client desktop application |
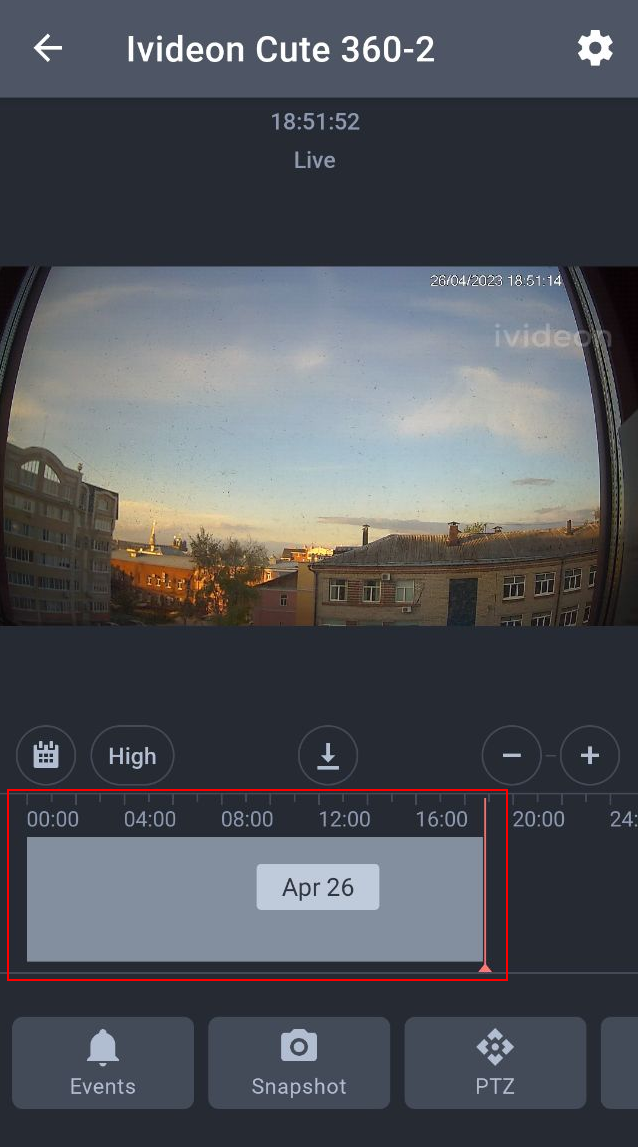 | 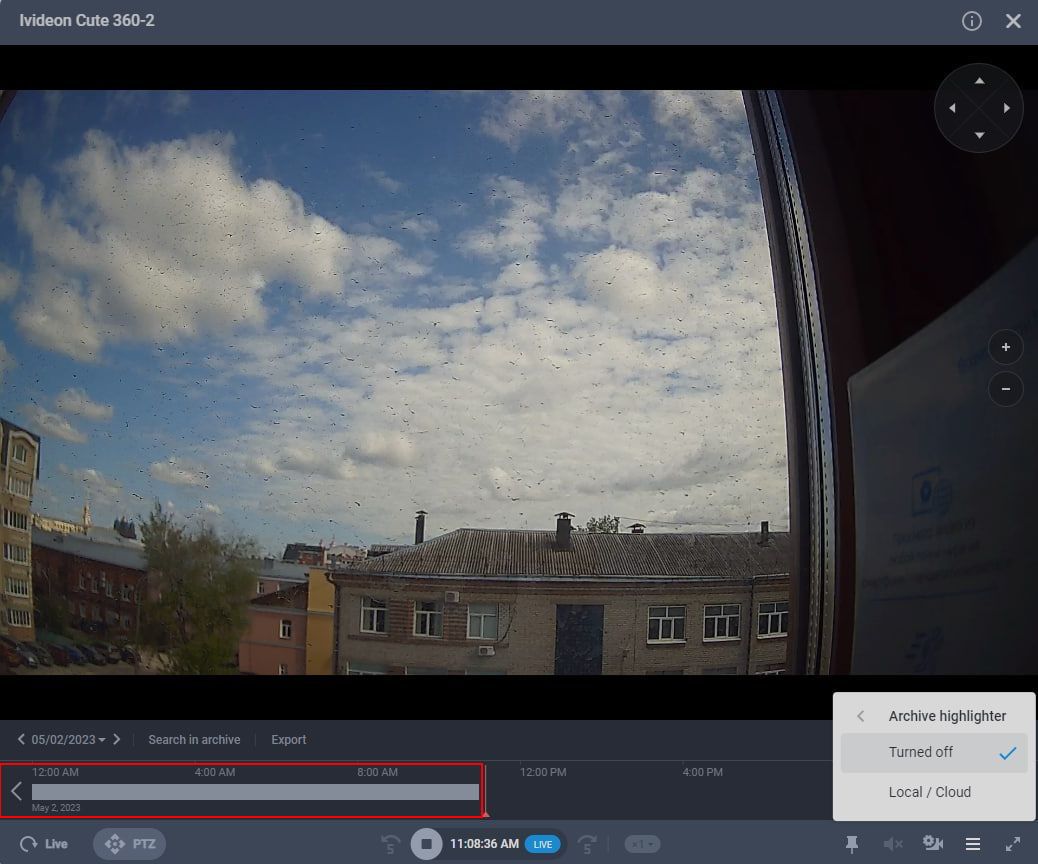 | 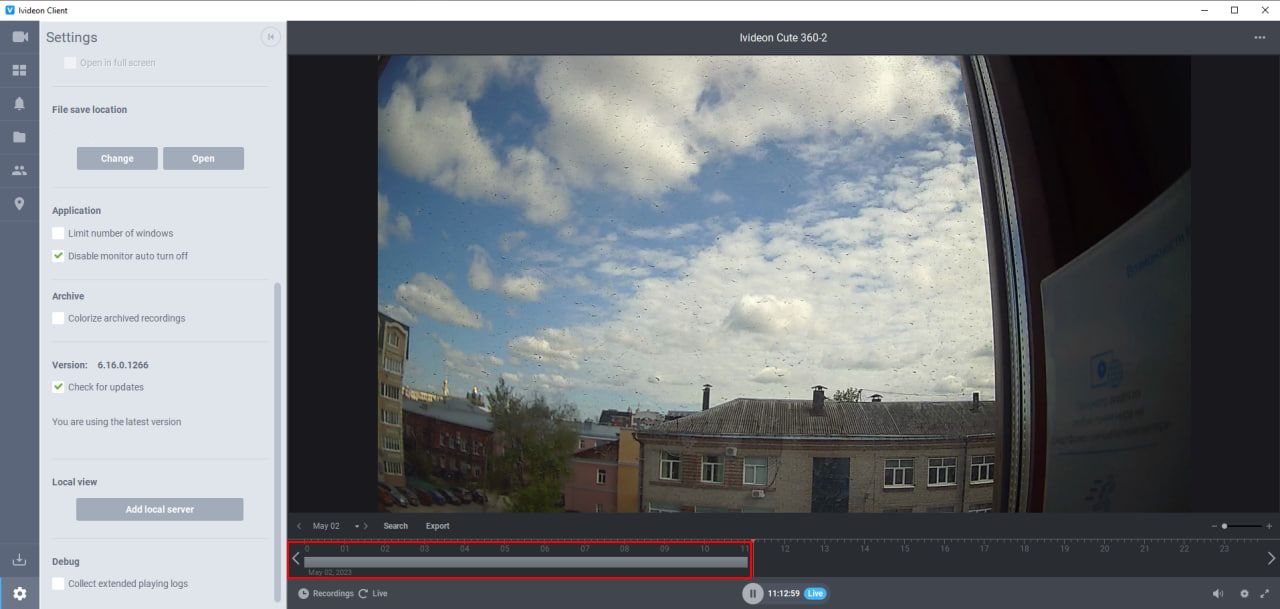 |
You can view archive from your camera in a couple of different ways:
In Ivideon mobile app:
Launch the application.
Open the live view mode from the camera in question.
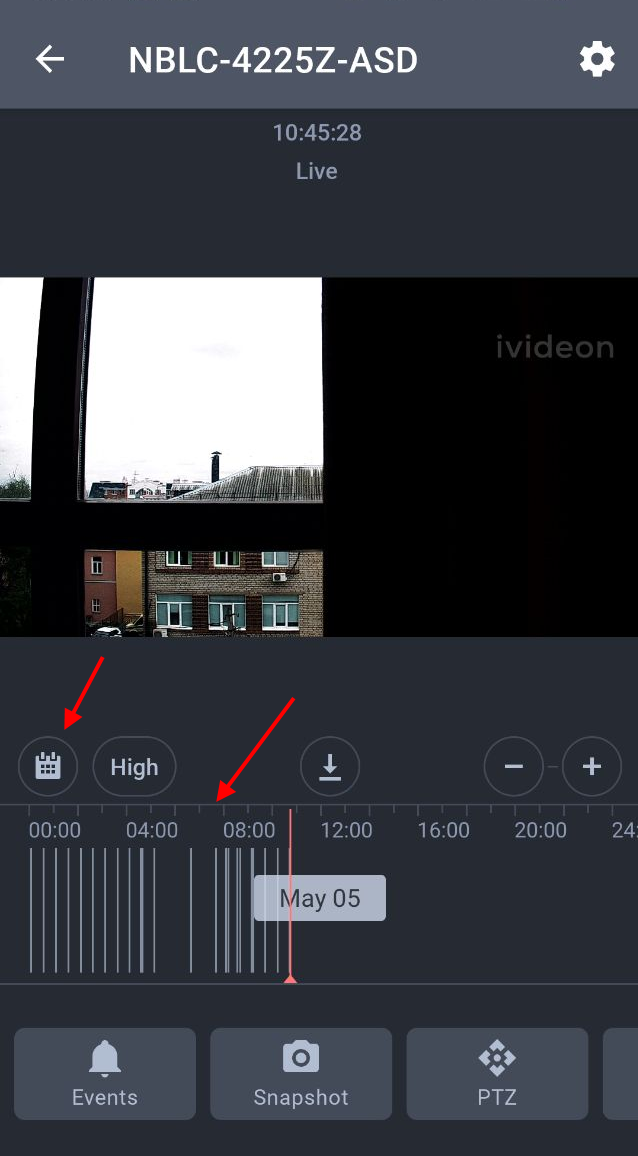
Tap on the time on the timeline to put the red playback cursor there. Click on the calendar icon above the timeline to pick the necessary date.
In your Personal Account on our site:
Open your Personal Account on Ivideon website.
Open the live view mode from the camera in question.
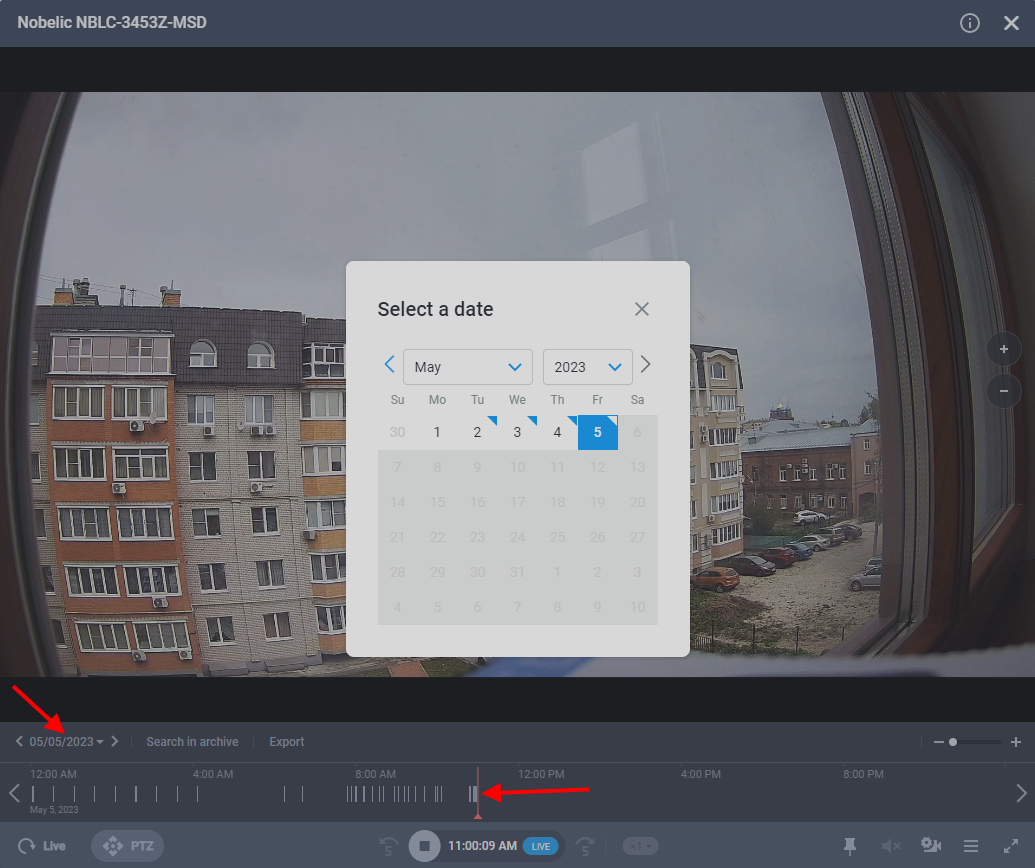
Click on the time on the timeline to put the playback cursor there. Click on the selected date located above the timeline to open a calendar and pick the necessary date from it. The + and - buttons can be used for timeline scaling.
In Ivideon Client desktop application:
Open the Ivideon Client software installed on your PC.
Open the live view mode from the camera in question.
Click on the Recordings button and then on the necessary time to place the playback cursor. Click on the selected date located above the timeline to open a calendar and pick the necessary date from it. The + and - buttons can be used for timeline scaling.
