At the moment, it is possible to change face recognition detection settings not only within the Ivideon Server application directly, but also via Personal Account at my.ivideon.com. To access these settings please go to the Faces tab, open the Settings menu and choose the necessary camera from the list, open its settings menu (a button with a cogwheel icon).

There should be 2 tabs within the opened menu: Detection areas and Connection type
Detection areas menu allow setting up a custom detection zone using the exact part of the frame. It is possible to pick several detection zones, which will be used for detection, disabling it for the rest part of the frame.
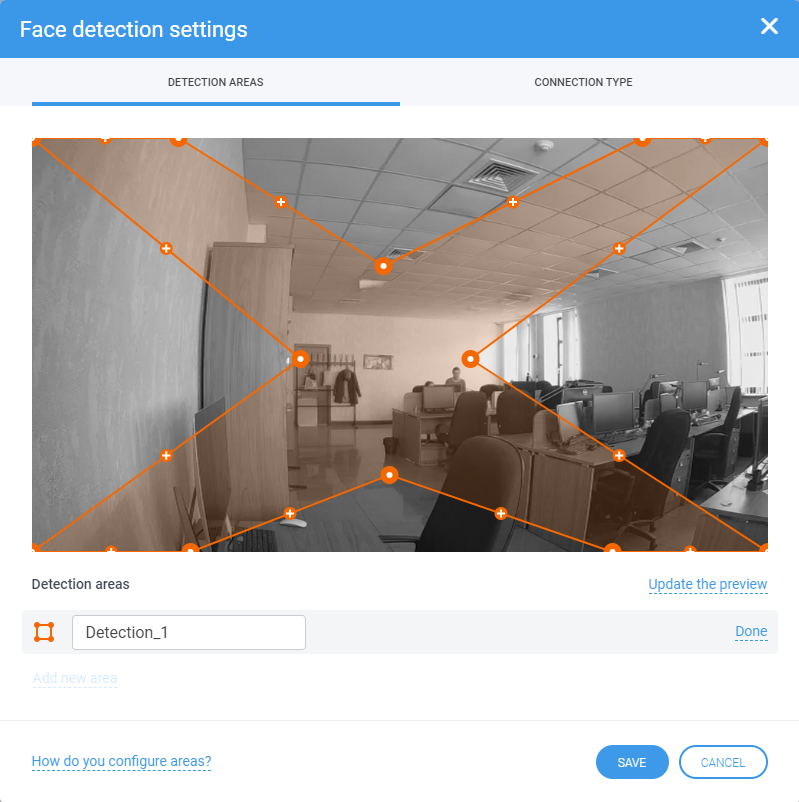
To add a new detection zone tap on Add new area button, select the required zone, dragging the points or the whole detection area, then click on Done.
Connection type menu allows changing the type of analytics modules, that are used for face recognition. By default, for all cameras, connected to the face recognition system, data is processed on Ivideon cloud servers. If the camera is connected via the Ivideon Server desktop application with analytics modules, you can change the connection type, it should reduce traffic consumption (in this case analytics will be processed locally).
