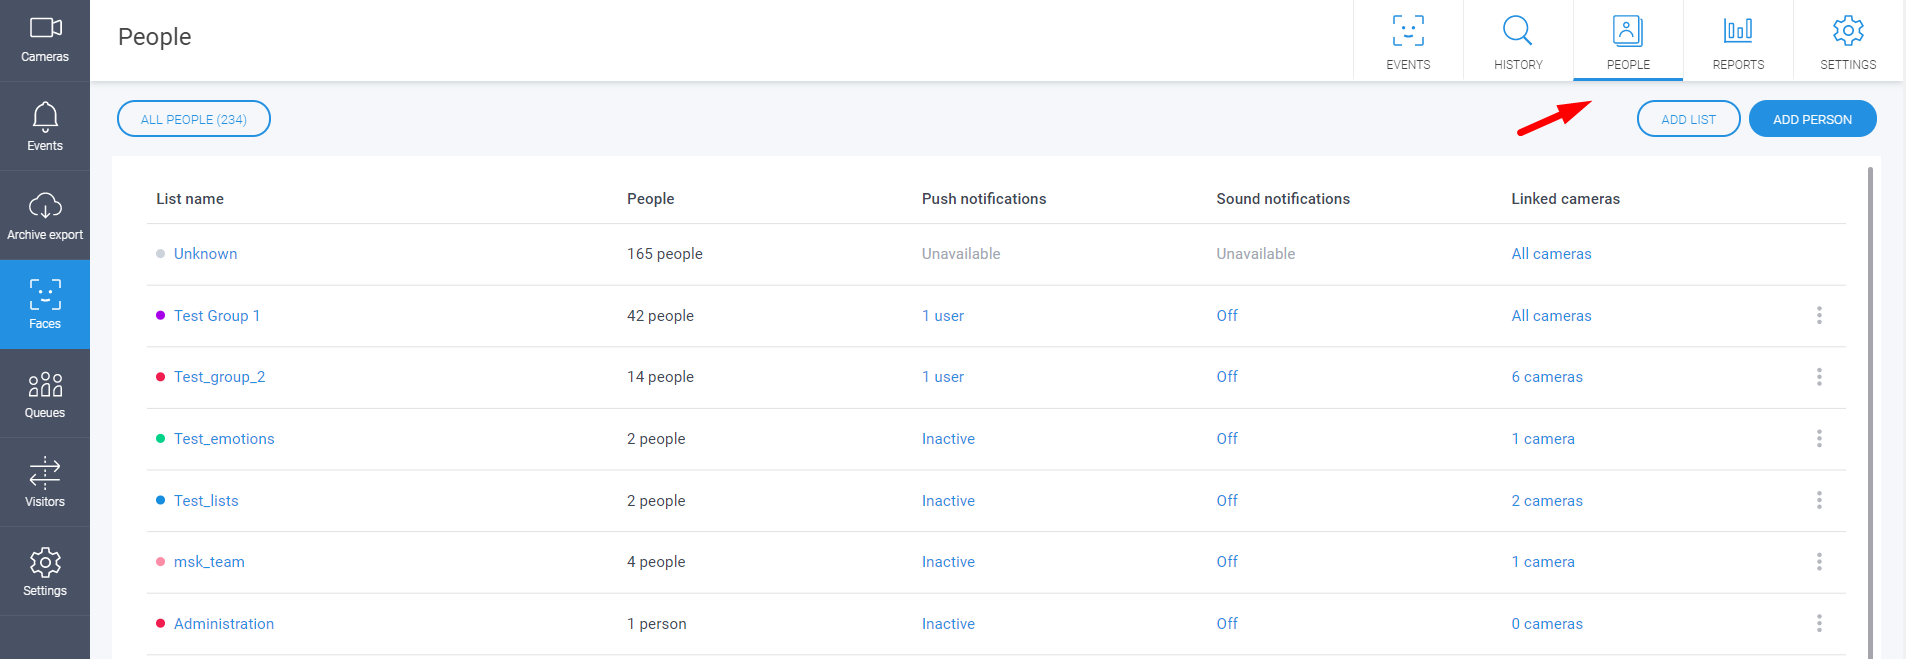
Within the People menu, you can create your personal face recognition lists, which will be used to gather detection statistics and events’ creation upon this or that detected person.
1. How to create a new list?
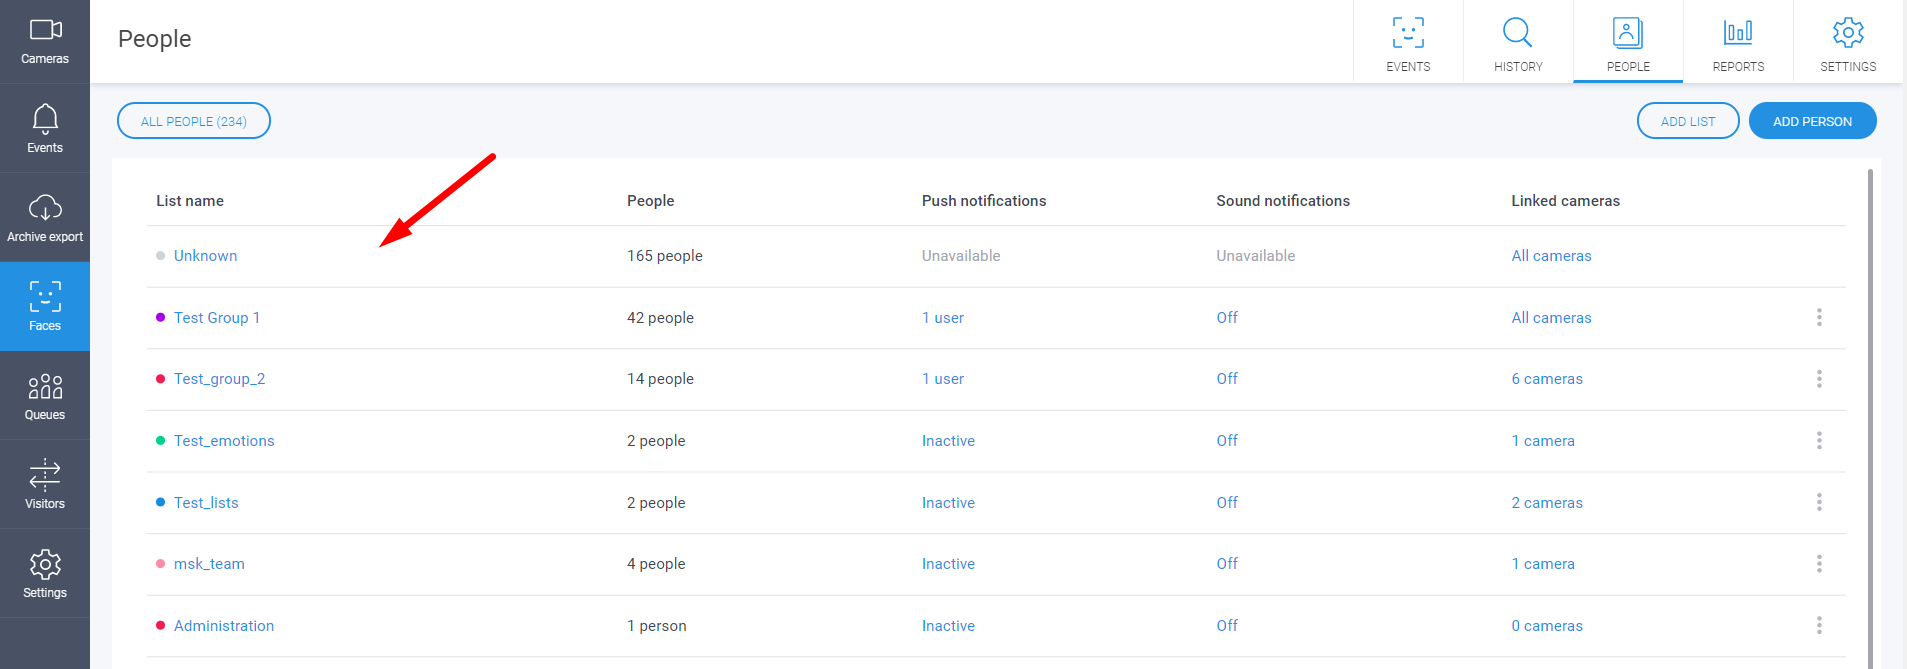
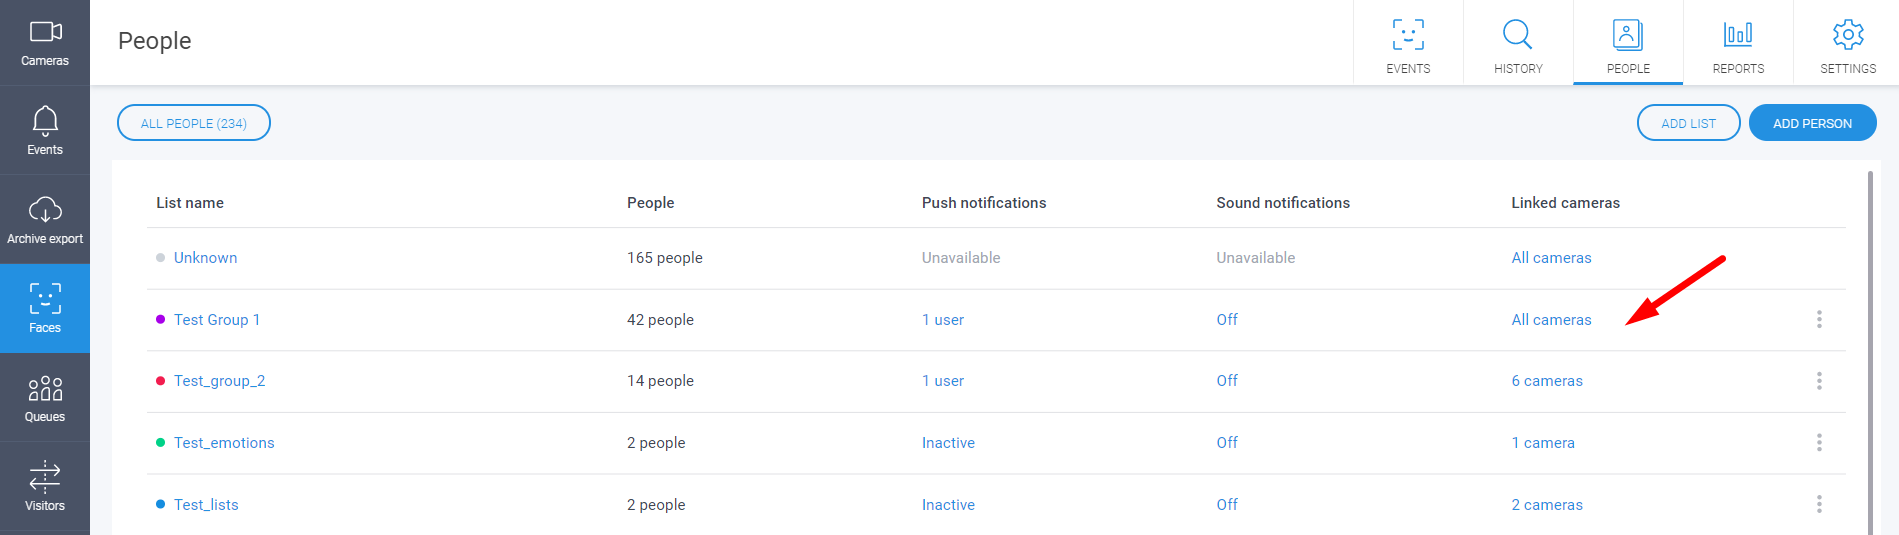
Lists’ creation is available within the People menu, for this, please tap on Add list button in the upper right corner.
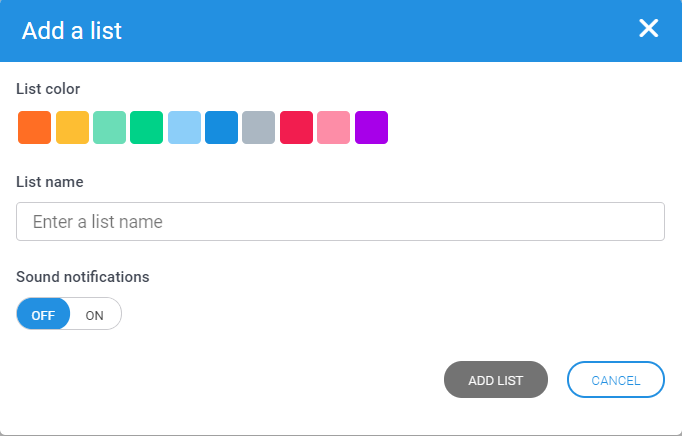
Please choose a new list’s color (you can choose from 11 colors, different lists can have one and the same color) and create its name. To save the list, please click on Add list button.
Once created, the list should become available for further configuration within the main menu.
2. How to create a new person for face recognition?
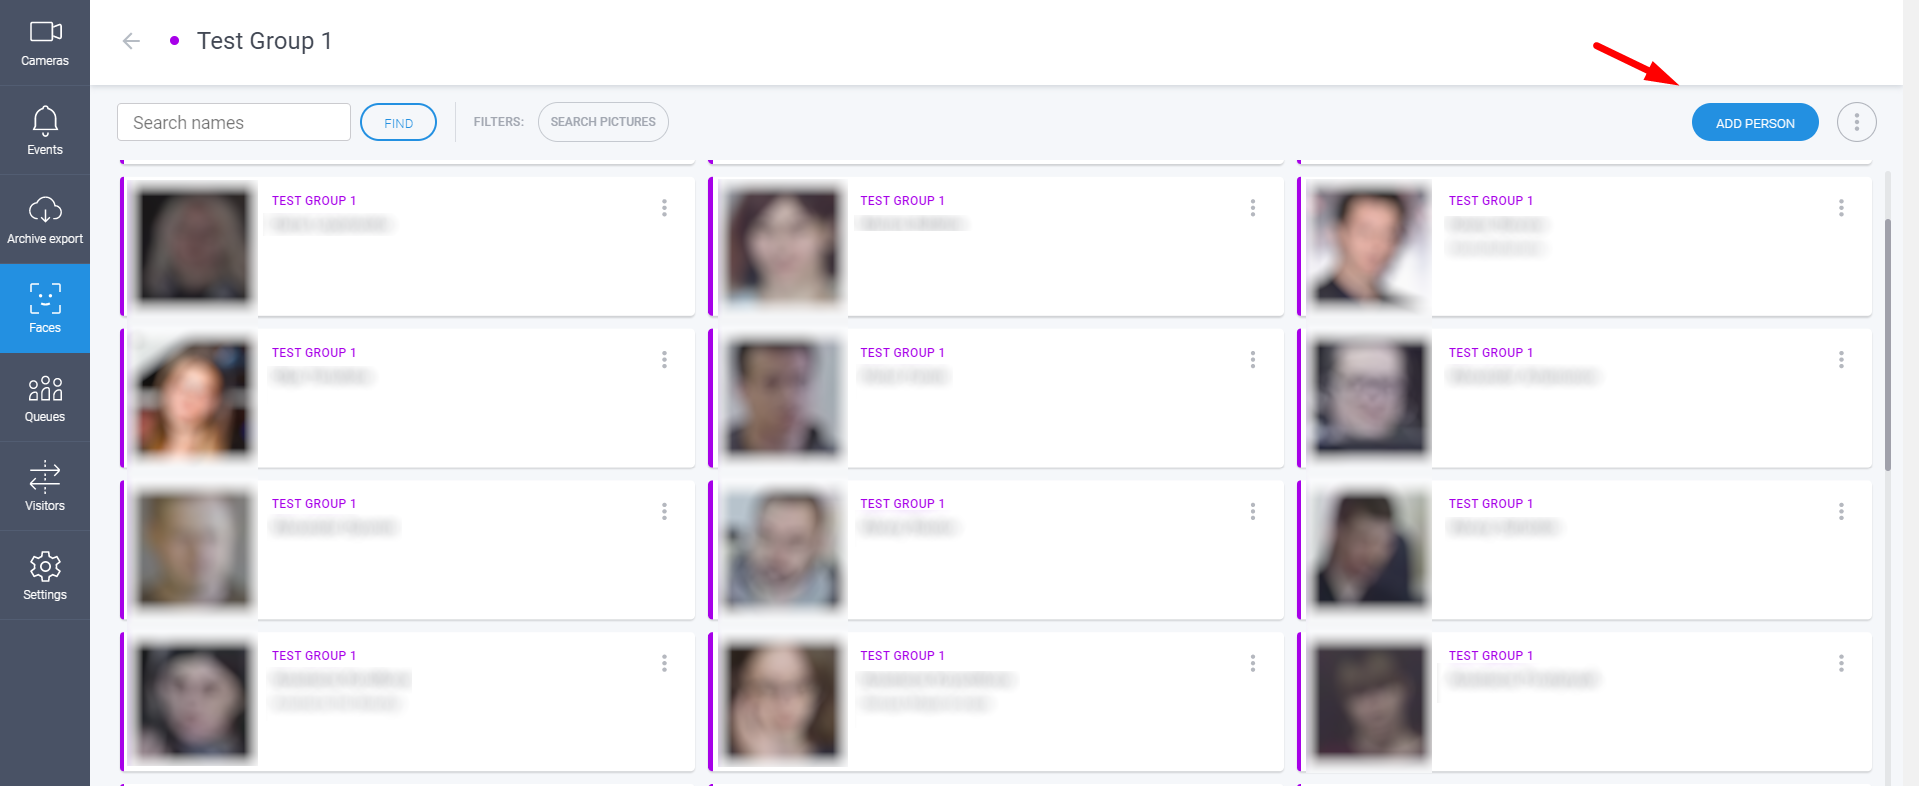
To create a new person for a face recognition list, please select the required list, then click on Add person button.
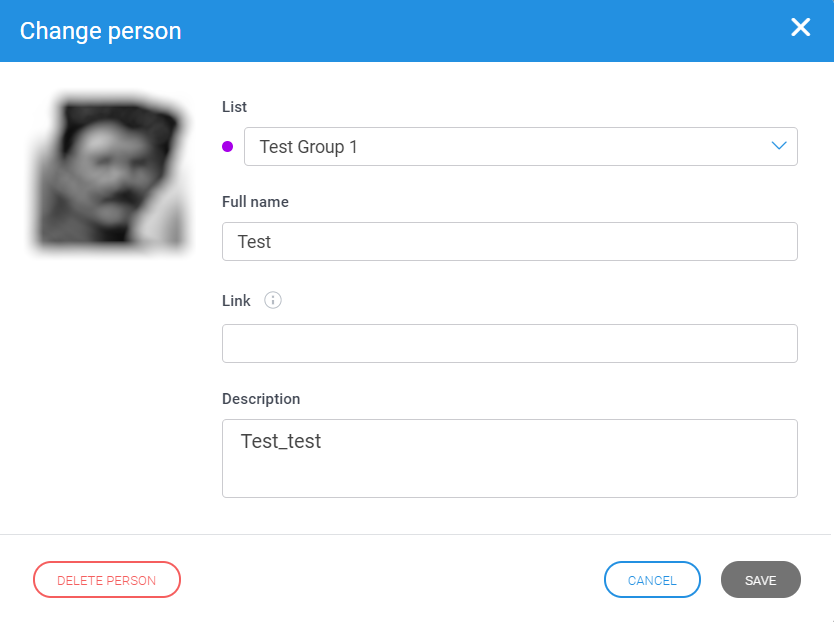
To create a new person, please type in his/her name and a short description. Tap on Create a person button to save changes.

Please add the main image for a newly created person, it’s required for further work of face recognition system.
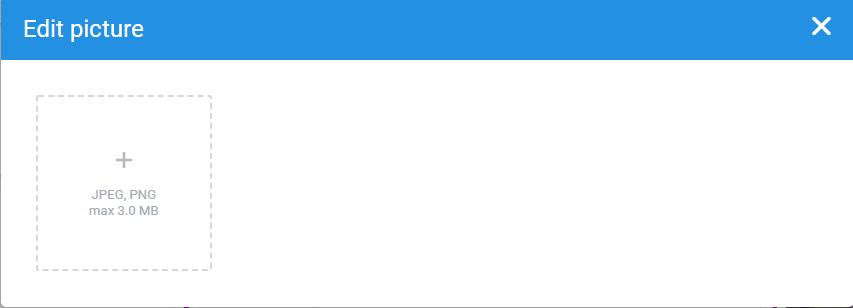
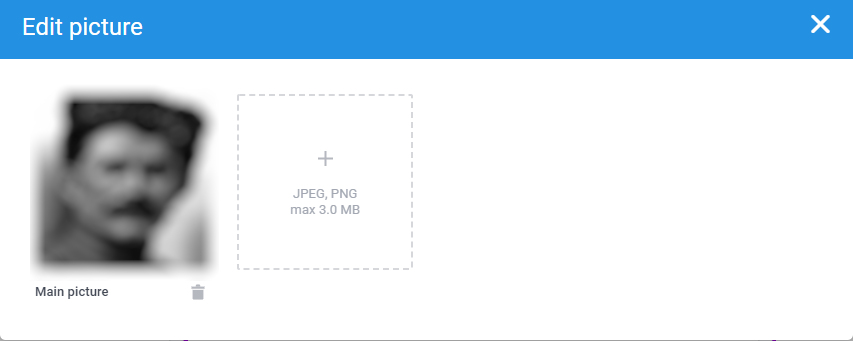
Important! Size of the uploaded images for recognition is restricted by 3 MB, it’s only possible to use images with JPEG and PNG formats. You can add up to 8 images to each person to improve quality of face recognition. Minimum resolution for image - 200*200 pixels, maximum resolution - 4096*4096 pixels. |
You can easily change or add required data for this or that person at any time: change description, name, add new images or completely delete the exact person from the list.
3. How to link a recognition list to cameras?
For proper work of face recognition system, it is required to link recognition lists to cameras, used for analytics. For this, please click on Linked cameras button within the People menu.
Here please choose available cameras from the list, they’ll be used for analytics. To complete configuration, please click Apply.
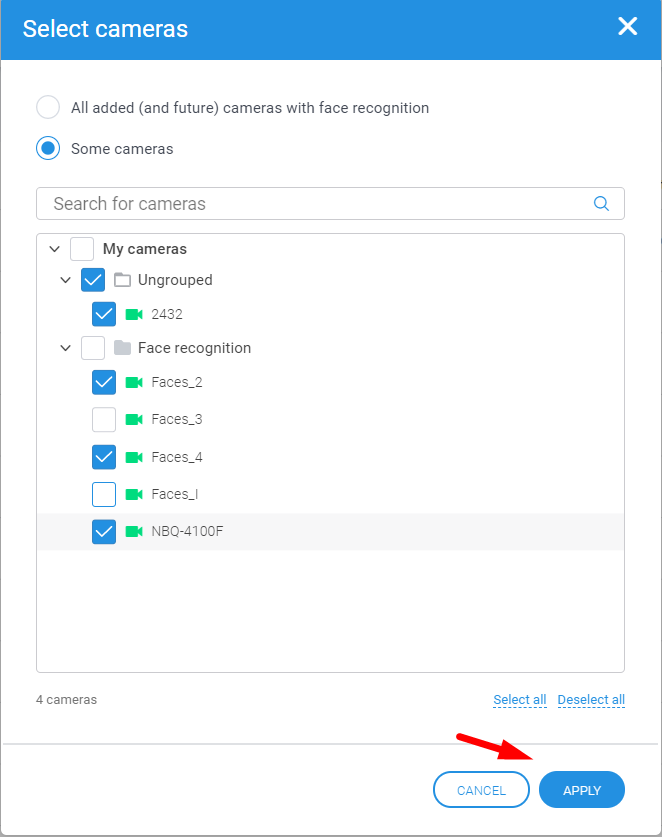
Important! If camera is not linked to any recognition list, recognized faces from its video stream will not be referred to the list. E.g.: if the camera from dining zone is not linked to “Employees” list, you will not receive any notifications upon detection of persons from this exact list even if they are detected by the camera. |
4. How to set up notifications upon recognition lists?
Notifications upon face recognition are configured for each list separately. It means that you’ll receive notifications upon recognized faces from the cameras, which are currently linked to the exact list. At the moment 2 main types of notifications upon face recognition are available within the service: push-notifications (Ivideon mobile application is required for this) and telegram-notifications (are linked to some personal contact/group chat).
Push-notifications
1. To configure push-notifications, please open the People menu and select the necessary camera in the Notifications column. | 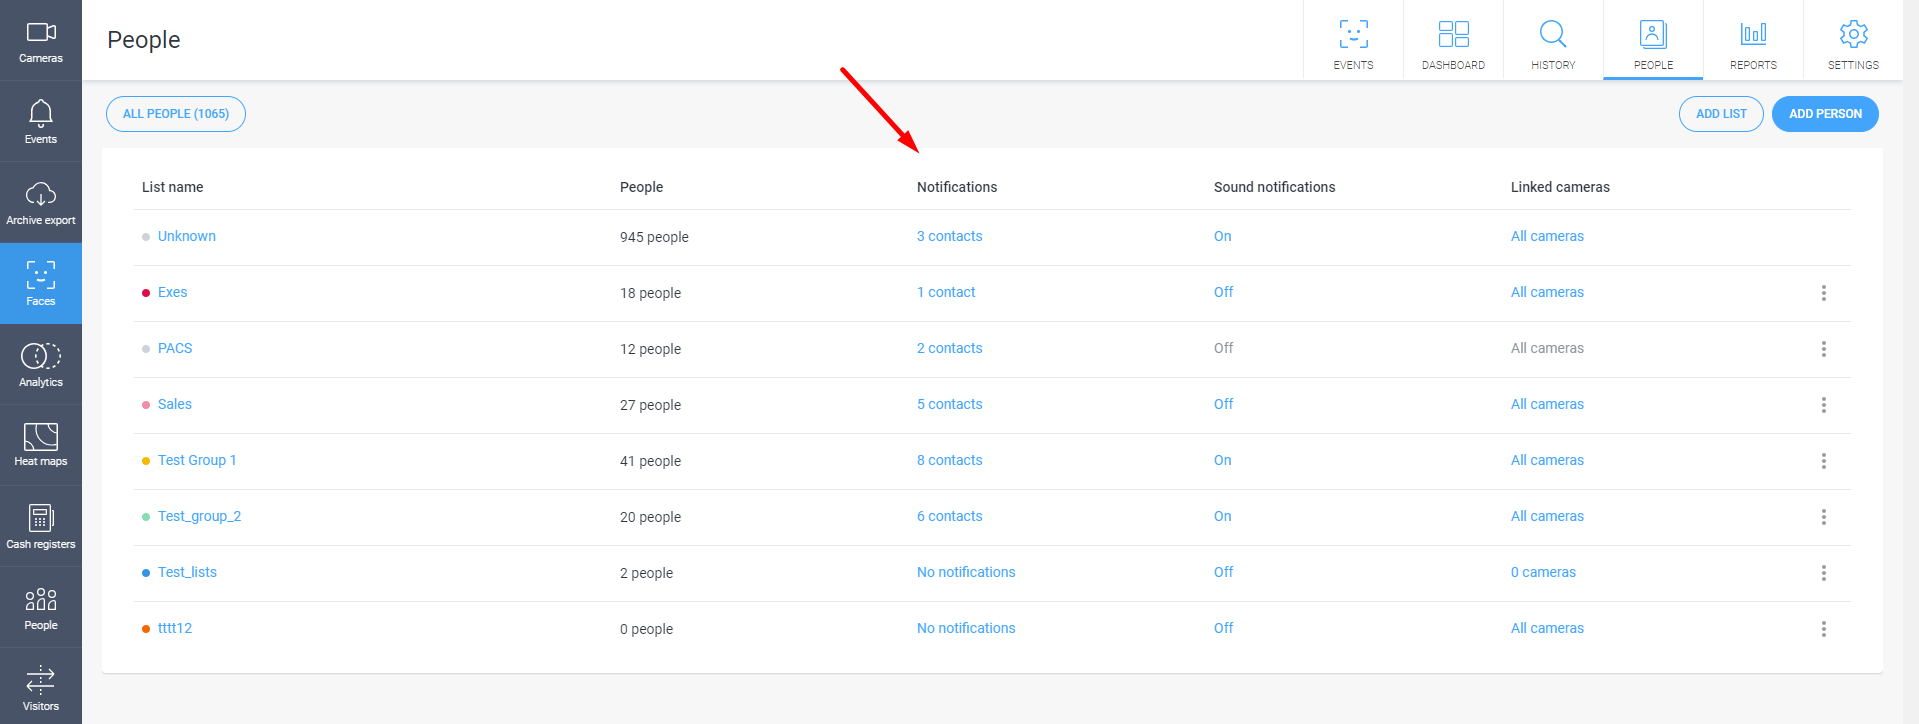 |
2. Open Add contacts - Create new contact menu, type in new contact's name and email-address of the account, which should have access to notifications. | 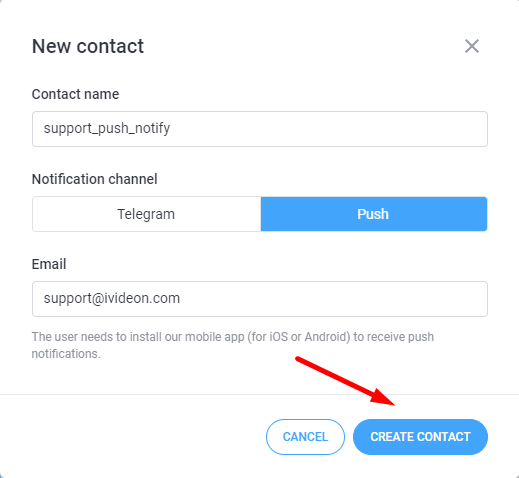 |
3. If the stated address is not used within the service, you'll see proper notification. Within opened tab click on Send button to send invitation for account's creation within the service. | 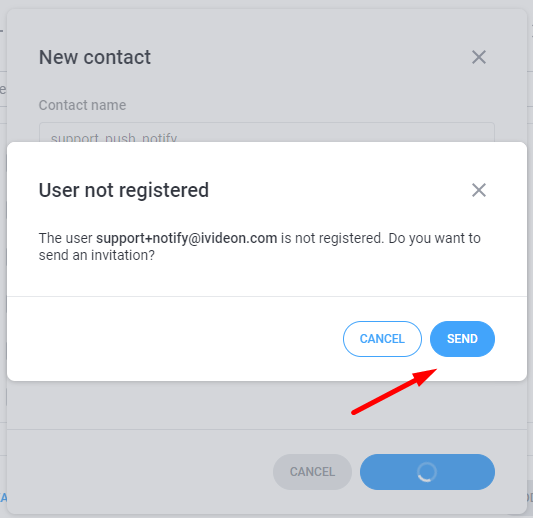 |
4. Once configuration process of push-notifications is finished its status for the exact contact will be changed to Activated. To complete configuration press Done button. | 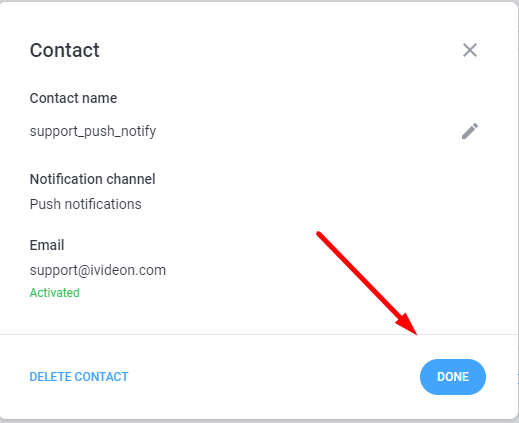 |
5. Once push-notifications are configured you'll receive notifications upon newly created face recognition events within Ivideon mobile application, each notification should contain information upon person name, list name/color and camera name (it'll also include a preview picture). Click on the notification to get to the main tab with faces events for the last 3 days. | 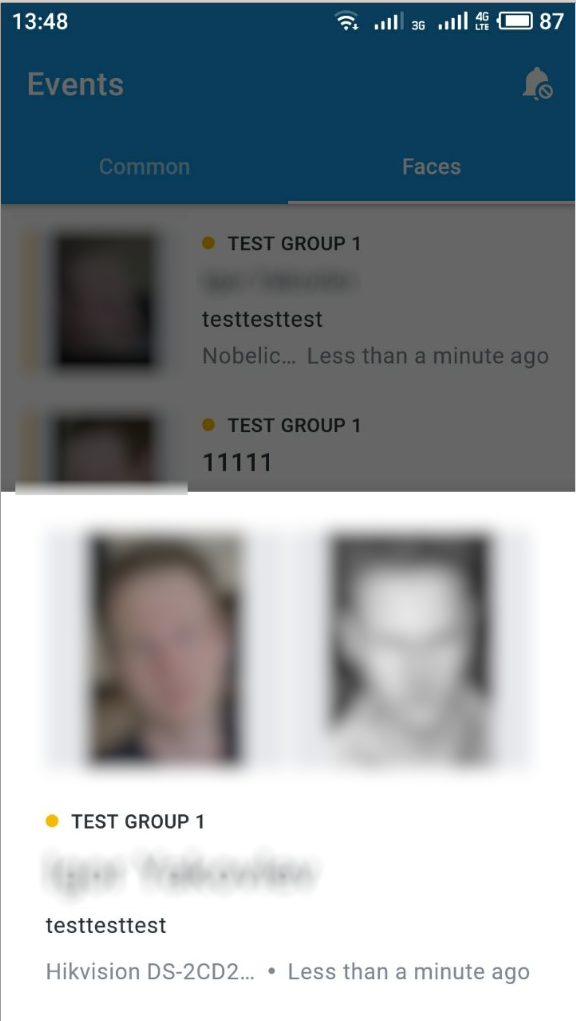 |
Telegram-notifications
1. To configure telegram-notifications, please open the People menu and select the necessary camera in the Notifications column. | | |
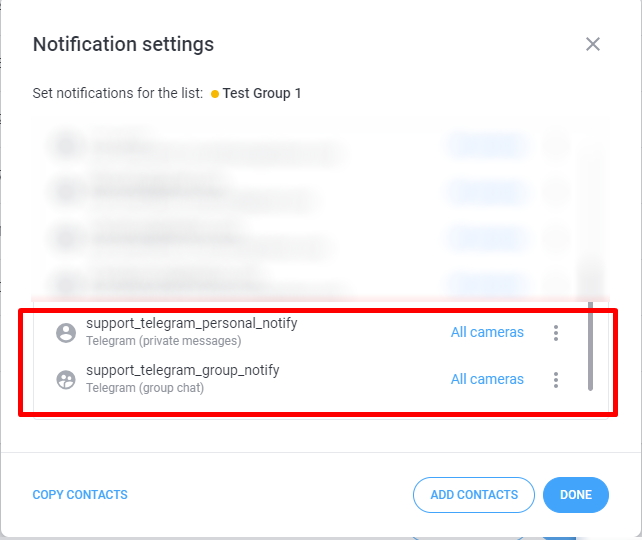
2. Open Add contacts - Create new contact menu, type in new contact's name and choose chat type: personal contact or group chat. | 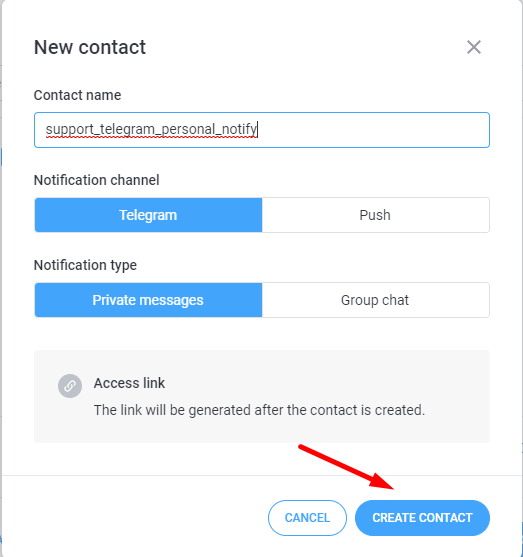 | 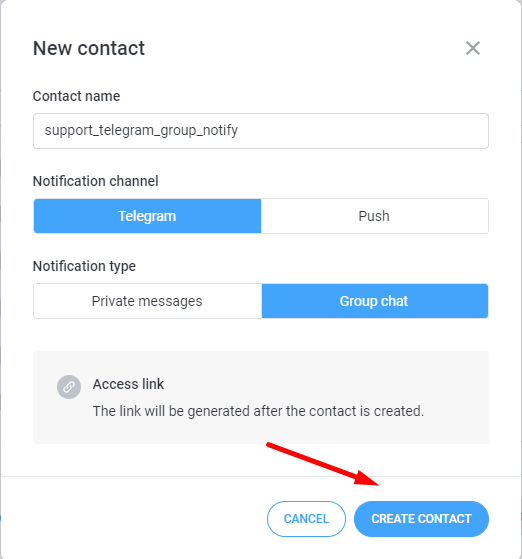 |
3. To add a new notifications channel please open the generated URL. N.B.: URL is opened within Telegram web-application (within some browser), if desktop or mobile application is used, you'll need to open it additionally from the browser, it's not needed to copy the URL itself to the app. | 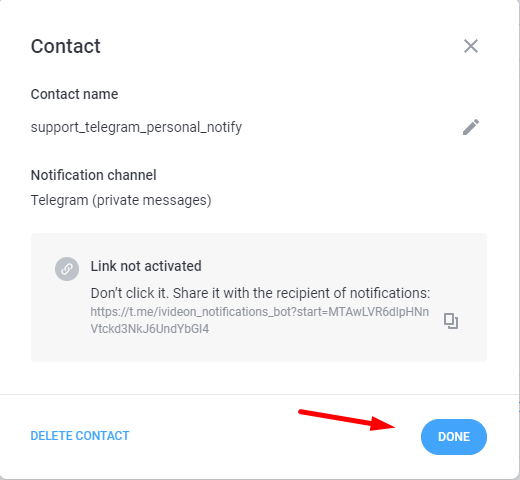 | 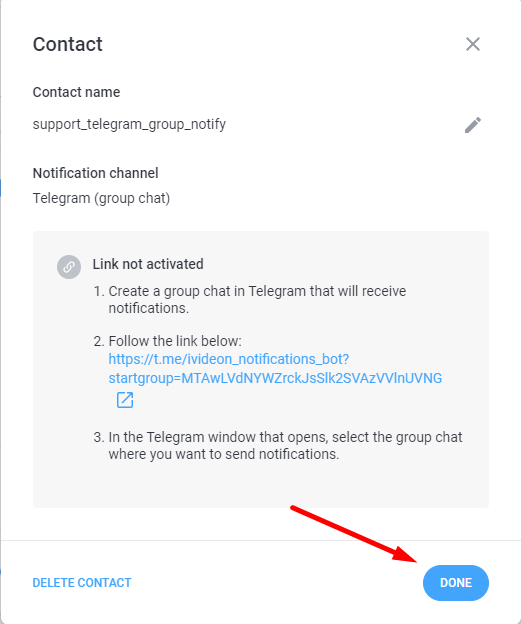 |
4. Added notifications channel with chat-bot should become available within your Telegram application, proper information will be stated within notifications configuration in your personal account. | 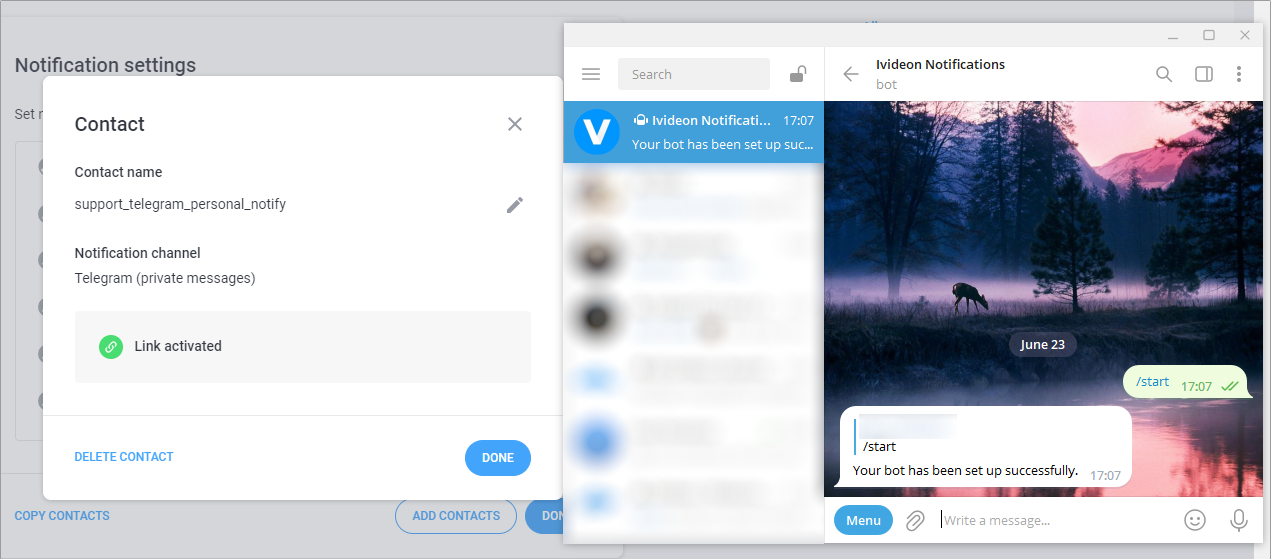 | 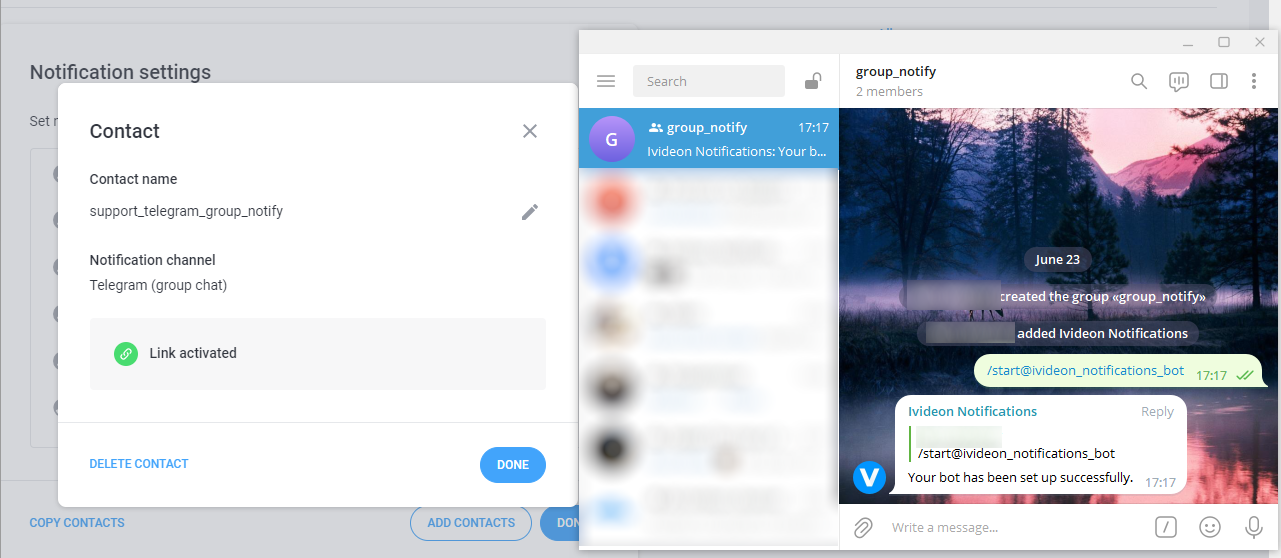 |
5. Newly created events upon face recognition of persons from the chosen recognition lists will appear within notifications channel in Telegram. | 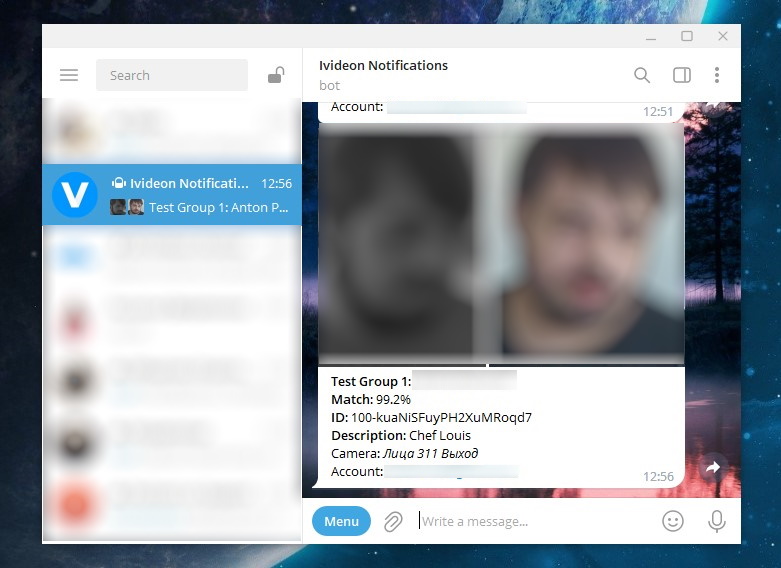 | 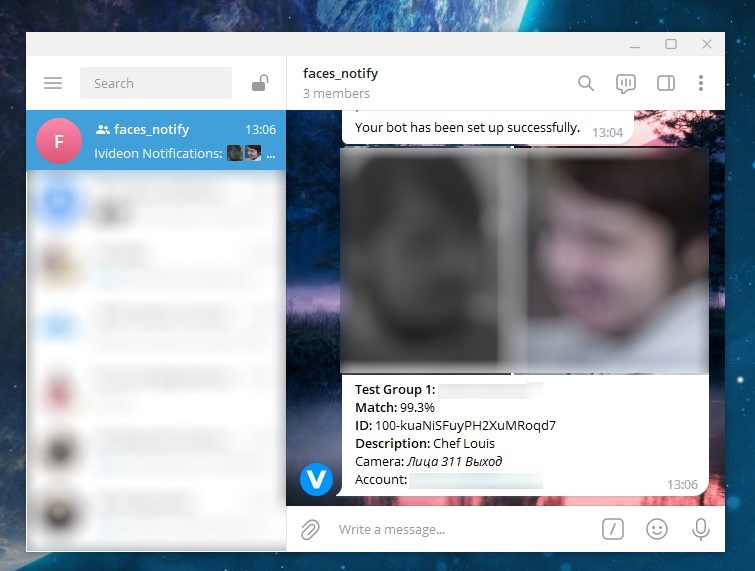 |
If it's needed you can change all notifications settings within the same menu, just choose required contact from the list.
Sound notifications can be configured within recognition list’s options menu, or you can just click the On/Off within the Sound notifications column.