Cameras supporting both the connection via Ethernet cable and via Wi-Fi initially are to be connected to Ivideon via LAN cable while wired to a router (excluding the models able to read the QR code from Ivideon Personal Account/mobile app). After the successful connection of the camera to Wi-Fi via a cable, you would be able to switch it to use Wi-Fi right after adding it to the account or later on via the camera settings.
NB! All the options below require to keep the camera wired to the router at the start of the switch, so that it does not lose its online status.
1. How do I switch my already attached camera to use Wi-Fi instead of Ethernet in my Personal Account?
1. Choose the Cameras tab in your Ivideon Personal Account.
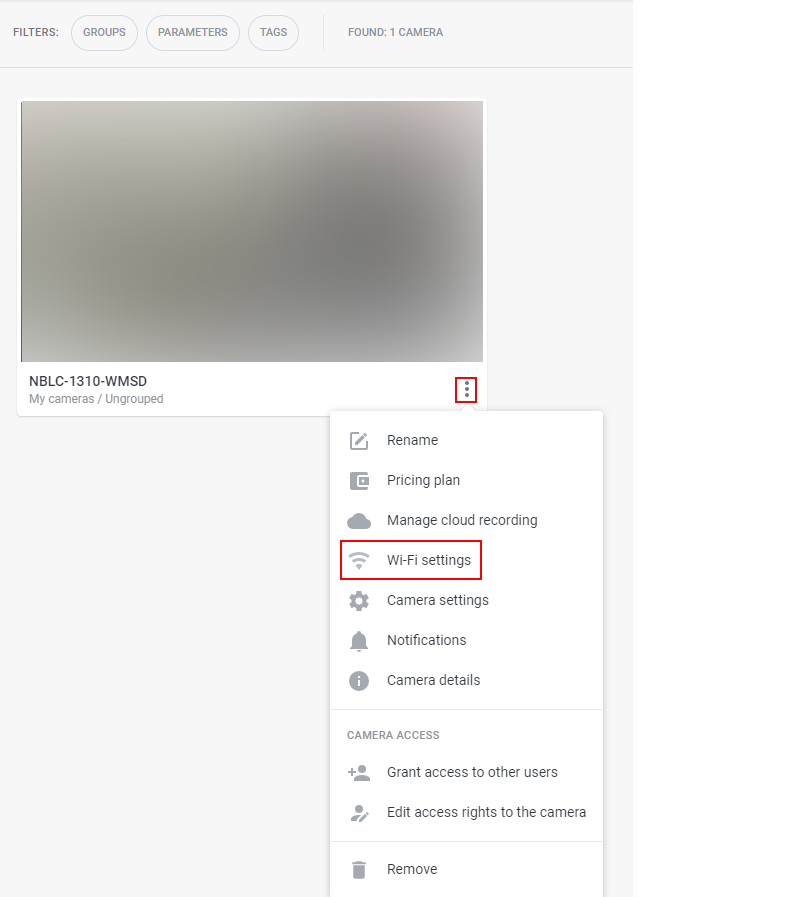
2. Click on the button with three dots under the camera’s preview and choose the Wi-Fi Settings tab from the list that opens:
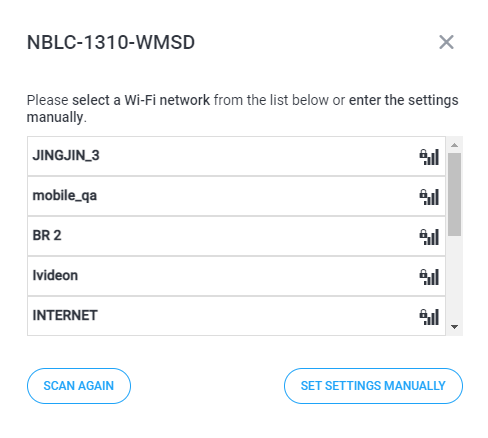
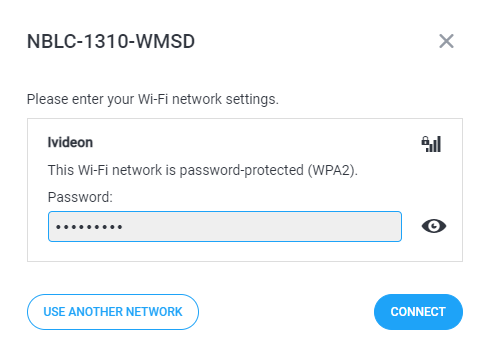
3. The camera will scan Wi-Fi networks available for it. Select the necessary network from the list, type in its password and click Connect.
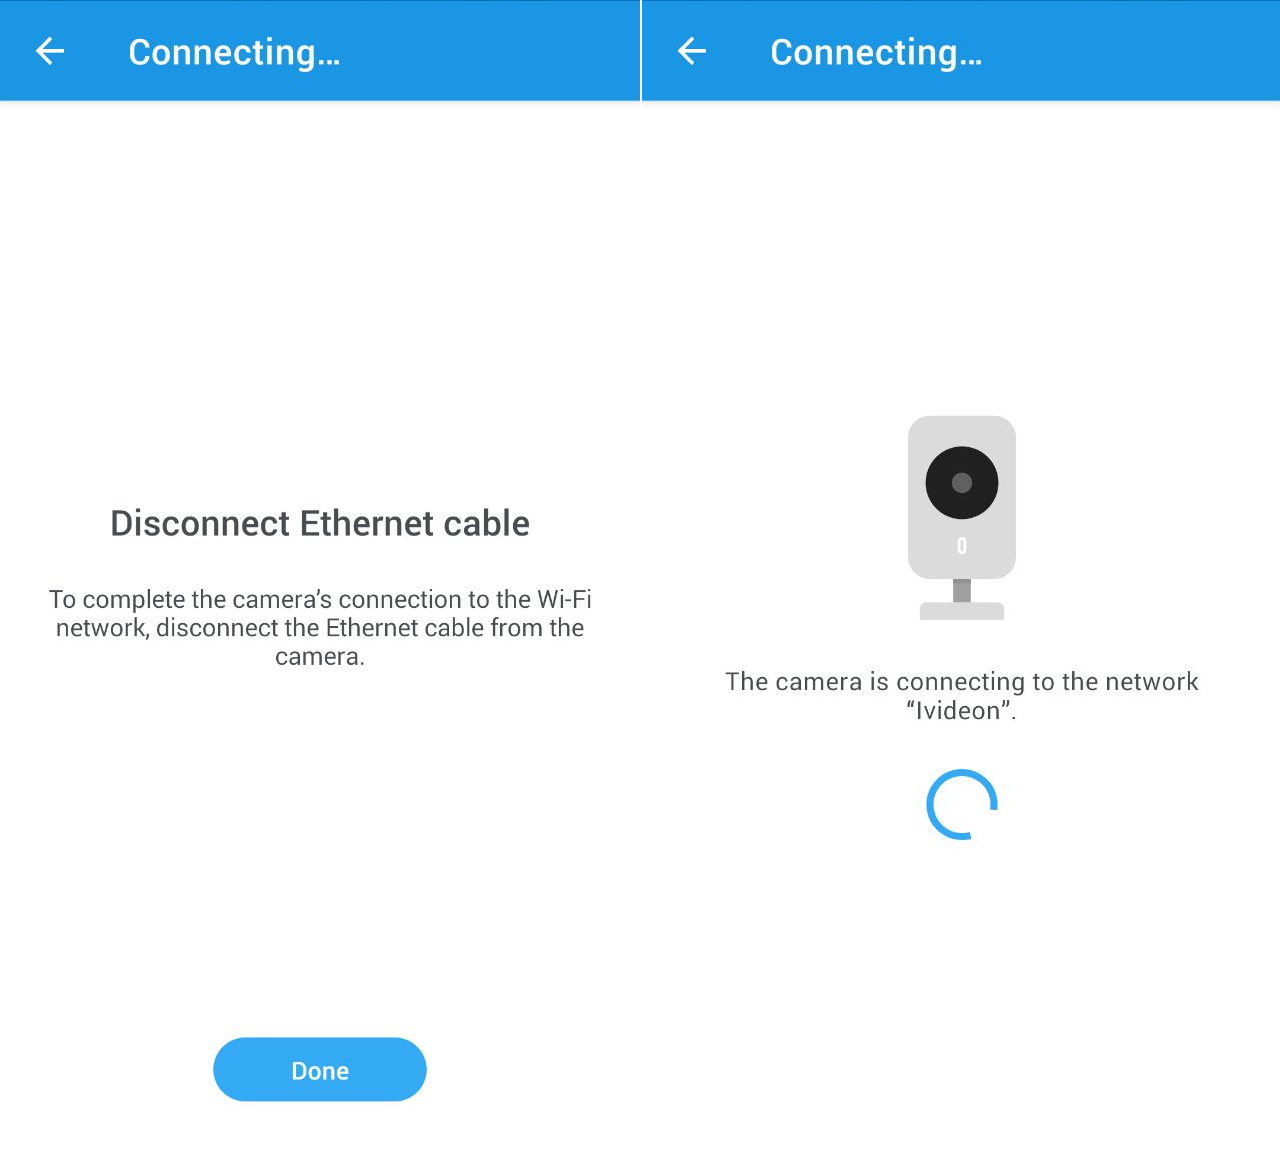
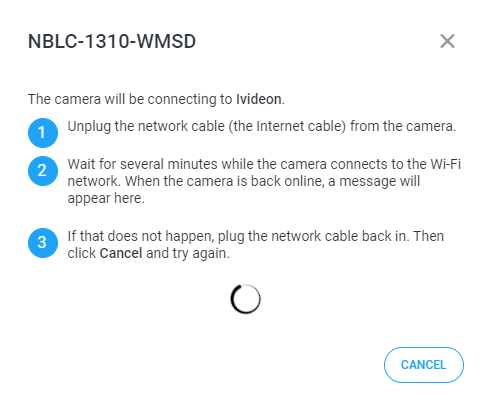
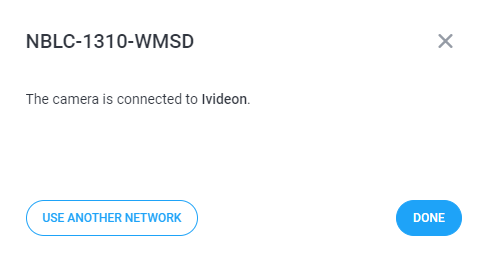
4. According to the instructions appearing on-screen next, please disconnect the Ethernet cable from the camera. Give the camera a minute or two to reconnect. If the attempt is successful, you should get notified about it.
2. How do I switch my camera to Wi-Fi using Ivideon mobile app?
2.1 Switching a newly attached camera
1. Attach a camera to your Ivideon account via an Ethernet cable using the instructions in this article — Connecting a camera with an Ethernet port using its serial number/MAC address.
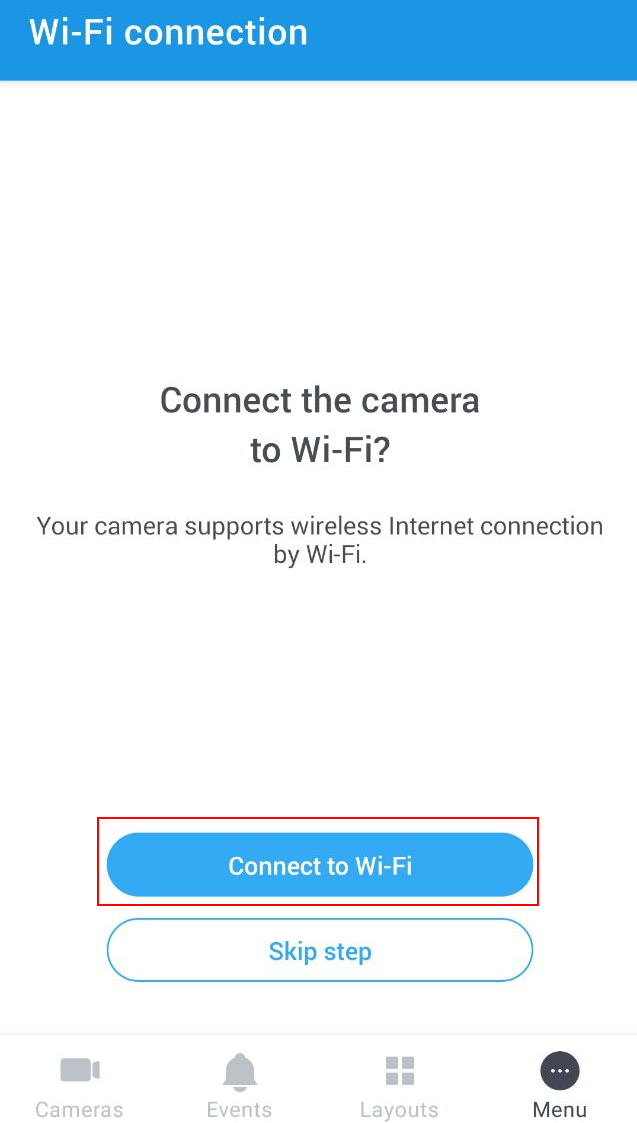
2. After attaching the camera to Ivideon successfully, click on the Connect to Wi-Fi button that appears:
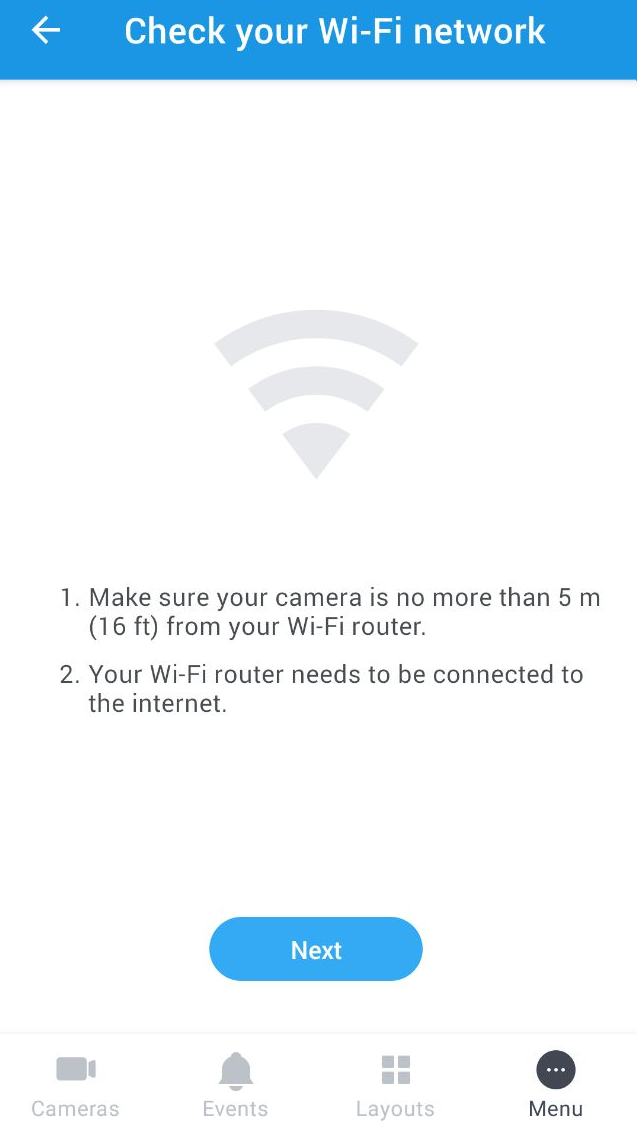
3. According to the instructions given on-screen, make sure of the distance between your camera and the router (it is recommended to place the camera as close as possible to the router), and that the Internet connection is active:
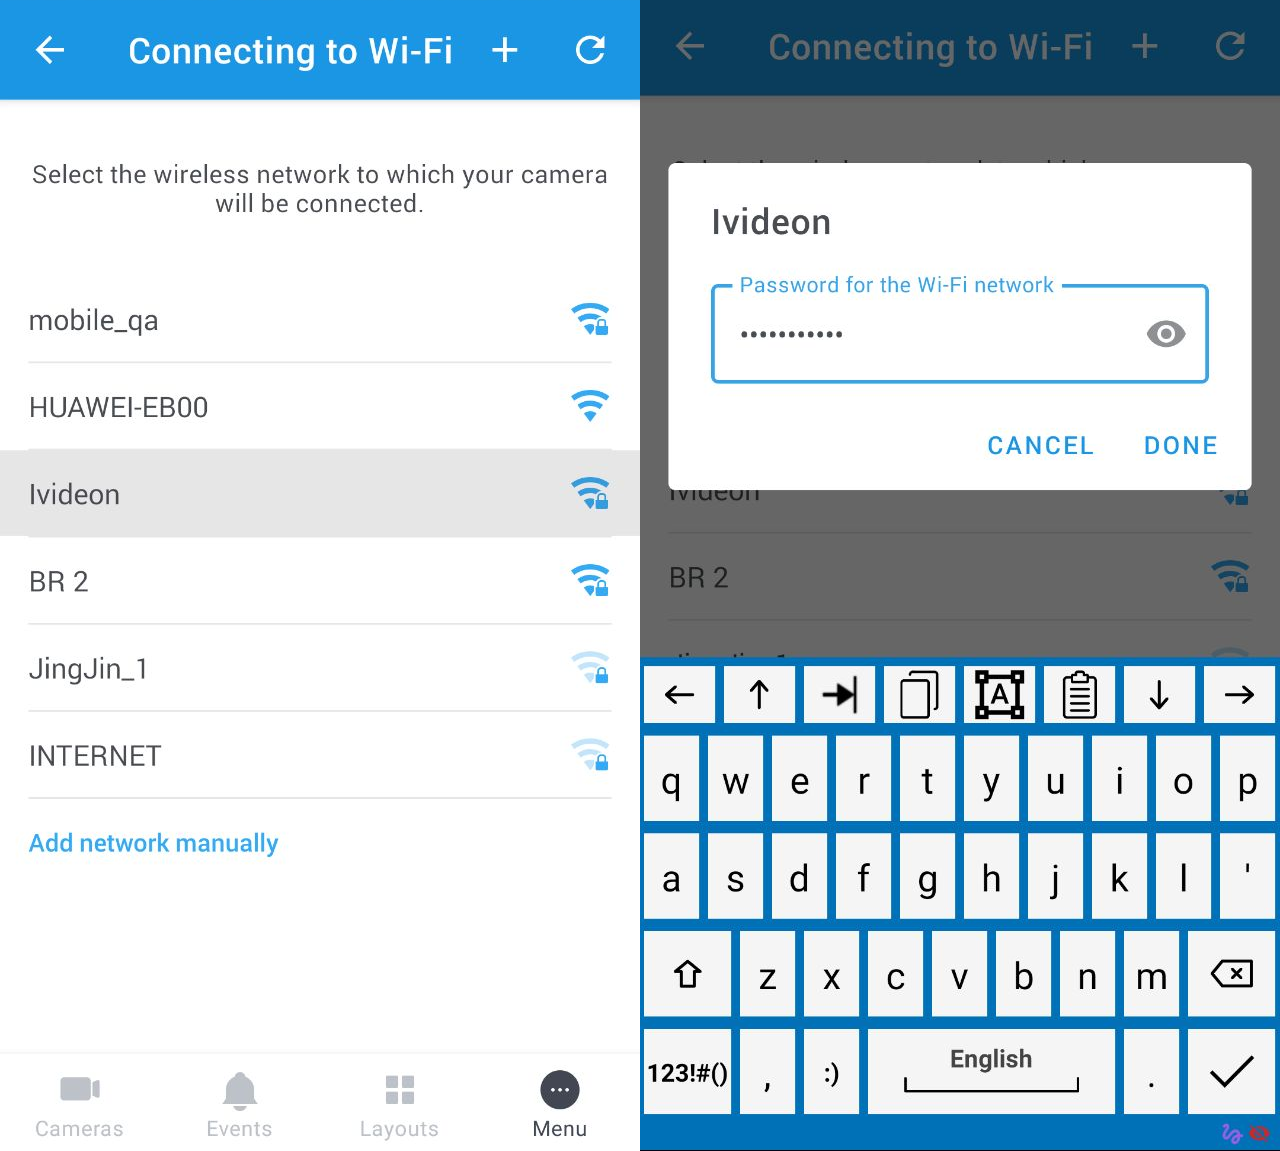
4. Select the necessary network from the list, type in its password and tap Done.
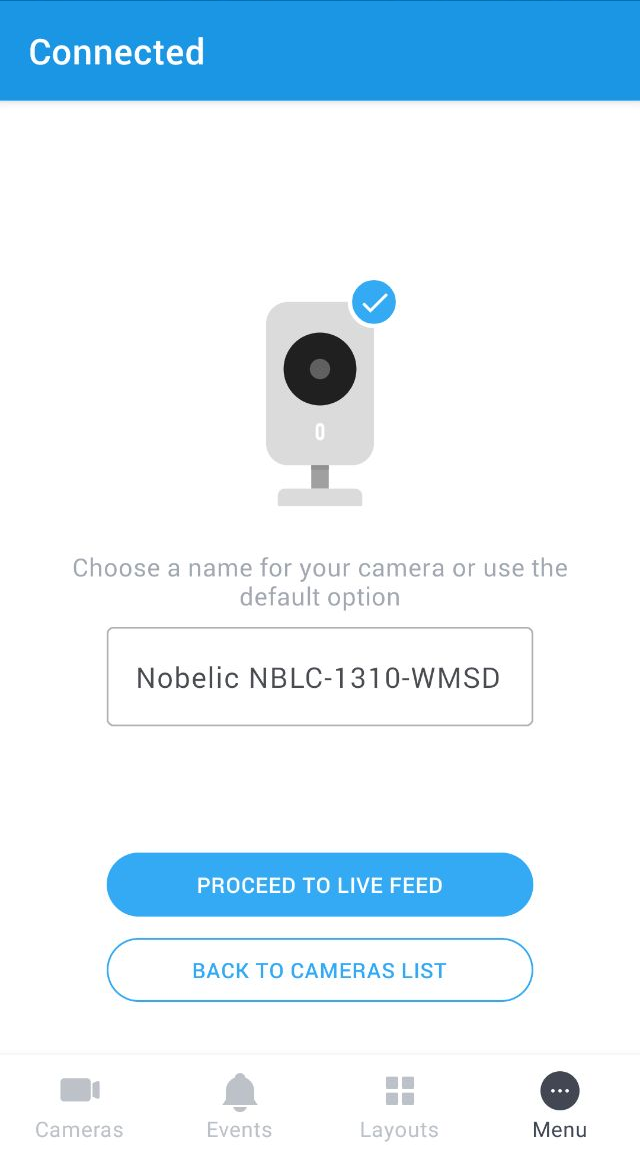
5. Please disconnect the Ethernet cable from the camera and click Done. Give the camera a minute or two to reconnect. If the attempt is successful, you should get notified about it.
2.2 Reconnecting an already attached camera to use Wi-Fi instead of Ethernet
1. Launch the app and choose the Cameras tab.
2. Click on the three dots to the right of the name of the device and pick Camera settings from the list:

OR
1. Go into the live view of the camera in question.
2. Click the gear icon in the top right corner of the screen to get into the Camera settings screen.

3. Locate the General section in the list of settings and pick the Wi-Fi connection option from it.

4. According to the instructions given on-screen, make sure of the distance between your camera and the router (it is recommended to place the camera as close as possible to the router), and that the Internet connection is active:
5. Select the necessary network from the list, type in its password and tap Done.
6. Please disconnect the Ethernet cable from the camera and click Done. Give the camera a minute or two to reconnect. If the attempt is successful, you should get notified about it.