Are there any restrictions upon counting visitors feature usage?
Dependency of passage line width on counter's installation height
What is the Сounting visitors feature needed for?
At the moment, the Counting visitors feature in Ivideon allows you to do the following:
Add a counter to the Ivideon personal account.
Store visitors’ statistics in the Ivideon cloud for 3 years.
Make statistics graphs/tables according to the following parameters: date-time, counters.
Download statistics reports in .csv format.
How does the Counting visitors feature work in Ivideon?
A specific 3D camera is used for counting visitors. It has 2 separate lenses, which make it possible to process a 3D image, that is decoded into a 3D mathematical model. Ivideon Counter uses an algorithm, that finds people on the frame and tracks their movement direction (enter/exit), excluding other false objects (like shadows, bags, carts, etc.). Counter statistics are sent to the service once an hour.
Ivideon Counter has a built-in firmware and works with the service directly, it doesn’t require any additional equipment for installation and configuration (PC or DVR for example), only power supply and Internet connection are needed for its proper work. Counter statistics can be easily checked and exported directly from Ivideon Personal Account via Counting visitors menu.
How to configure a new counter?
1. Before starting work with counting visitors feature, please make sure, that:
You have an account in the Ivideon service with a For business account type. If you don’t have any account in Ivideon, use this link to register a new account. If you already have an account, though its type is For home, you can change its type within account’s settings menu.
You have at least 1 Ivideon Counter 3D camera for installation.
You have inserted an SD-card into the camera in case you want to record Ivideon Counter's feed
2. To connect your new Ivideon Counter, press Connect device button and follow the instructions.
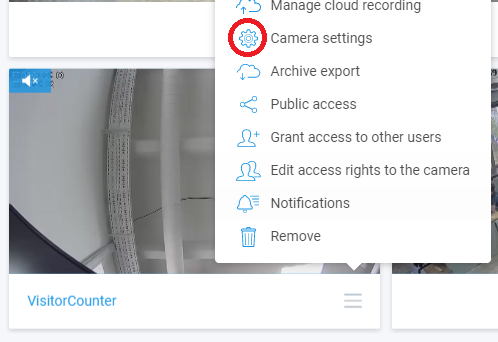
3. Get to Visitors menu do the following:
1. Open Settings tab within Visitors menu and create a new facility via Add facility button. |  |
2. Within this new facility add proper cameras, which should be used with analytics. |  |
3. Choose analytics type for the camera (visitor counter or passer-by counter). |  |
4. Apply proper pricing plan to the camera. |
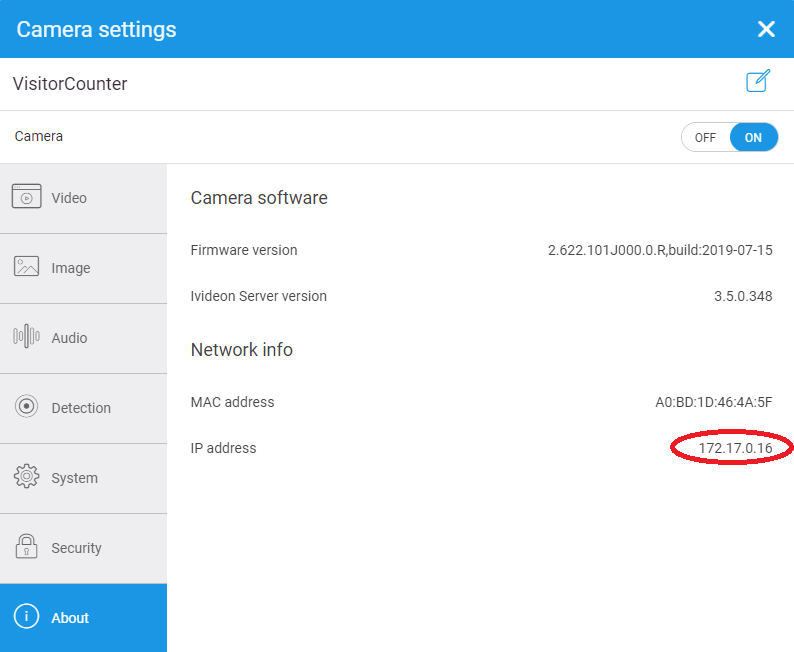
4. Counting visitors feature is configured directly from counter’s web-interface, local IP address of the camera and password are required for this. By default, counter receives the local IP address from the router automatically via DHCP.
Once your counter is connected to your personal account, you can check its local IP address via Camera settings menu.
Current IP address of the camera can be found in the About tab.
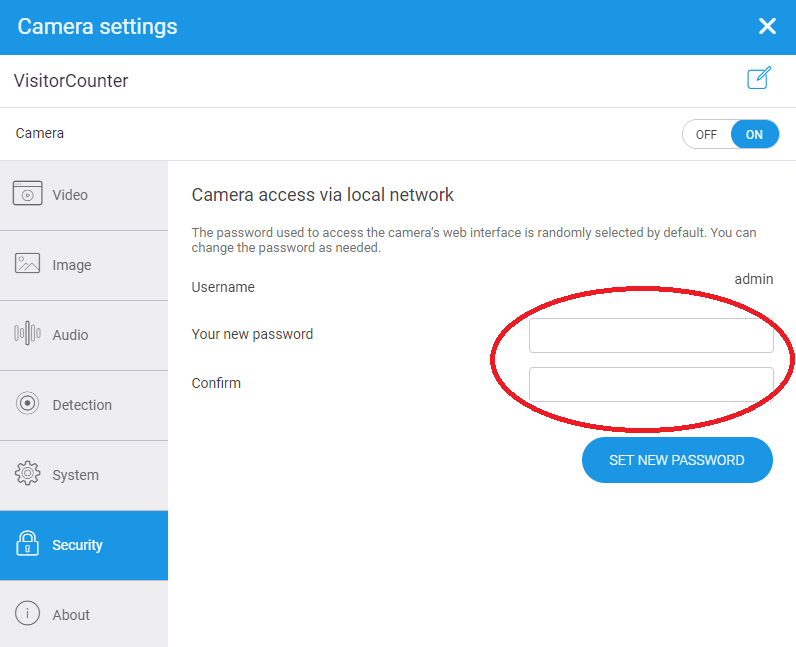
Once a new camera is connected to the service, it gets an automatic system password for local access (a complicated one for security purposes). To get access to counter’s web interface, change its password via the Security tab.
5. Once it’s done, type in the camera’s IP address within address tab of your browser (Google Chrome or Internet Explorer are recommended) and sign in the camera’s web interface.
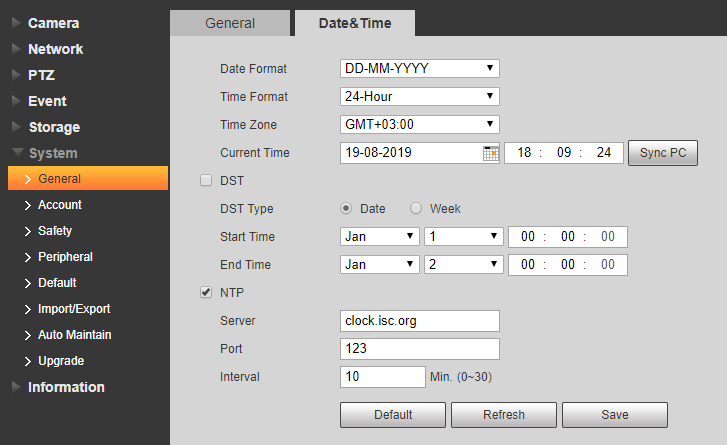
6. It’s necessary to set up correct system date for the camera, thus to receive proper statistics. For this get to Settings → System → General → Date/Time menu, change current time settings and apply them, just click on Save button. System date settings example:
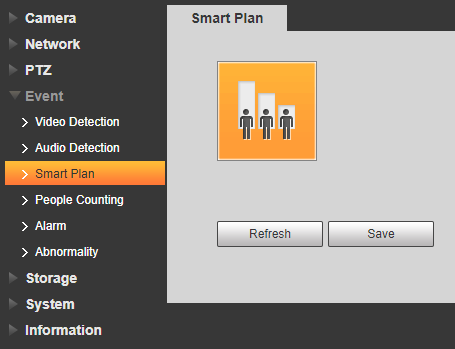
7. Enable counting analytics: Settings → Event → Smart Plan.
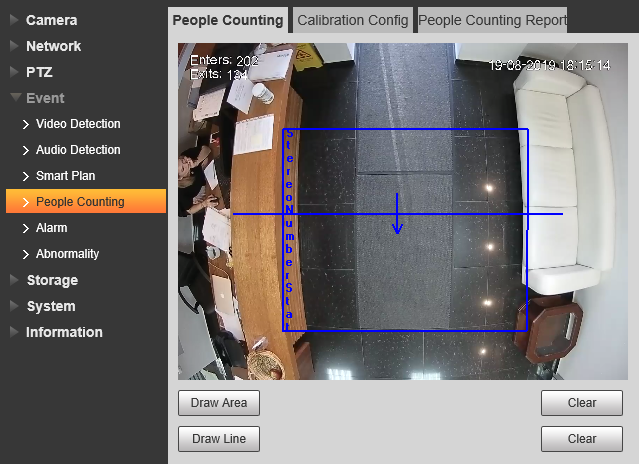
8. Main configuration is done within Settings → Event → People Counting menu. Enable StereoNumberStat rule for proper statistics, also choose OSD parameters (enter/exit numbers). It’s also possible to change counter’s sensitivity and adjust height/width filters within this menu.

9. Use Draw Area and Draw Line buttons to create a counting zone and an intersection line. The intersection line should overstep the borders of the counting zone.
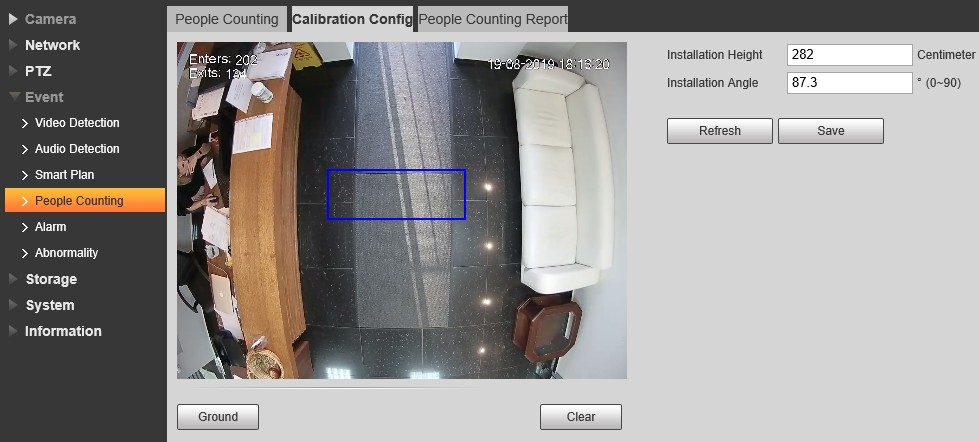
10. Adjust installation height and angle parameters of your counter in Calibration Configuration menu:
a) click on Clear button;
b) click on Ground button and draw a proper zone;
c) click on Save to start automatic calibration of the counter (proper height and angle parameters will be adjusted automatically);
d) check updated settings.
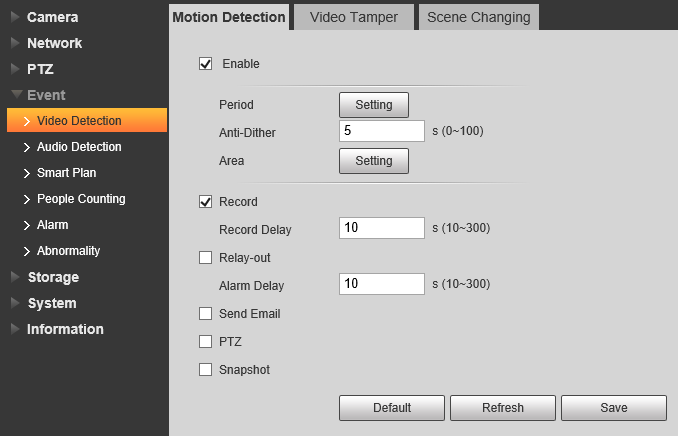
11. To get local archive recordings, enable motion detector within Event → Video Detection menu:
Counter installation requirements
The counter works properly if the following installation requirements are met:
The counter should be installed at a height from 8.2 to 12.5 feet (2.5 – 3.8 m).
There should be no reflective surfaces in the counter's field of view (glass, mirrors, polished surfaces, etc.).
People walk along the same line (i.e., it is better not to mount the counter at the intersection of people flows). The ideal situation is when the flow of people is perpendicular to the counting line.
The installation place is sufficiently lit.
Are there any restrictions upon counting visitors feature usage?
Counting visitors feature is available only for those Ivideon accounts, that meet the following requirements:
1). Account should have the latest billing version (the 5th billing, it refers to current pricing plans from ivideon.com website);
2). Account should have Business type.
Dependency of passage line width on counter's installation height
The counter should be installed at a height from 8.2 to 12.5 feet (2.5 – 3.8 m). Recommended height for installation – 10.5 feet (3.2 m).
Installation height, ft/(m) | Passage line width, ft/(m) | Passage line length, ft/(m) |
|---|---|---|
8.2 ft (2.5 m) | 4.7 ft (1.4 m) | 0.9 ft (0.3 m) |
10.5 ft (3.2 m) | 9.2 ft (2.8 m) | 1.8 ft (0.5m) |
12 ft (3.8 m) | 13 ft (4.1 m) | 8.5 ft (2.6 m) |