Before starting work with Cloud counter feature, please make sure, that:
You have an account in Ivideon service with current pricing plans. If you do not have an account in Ivideon, use this link to create it. If you already have an account, though its current type is For home, you can switch to the current plan within account’s Settings tab.
You have at least one camera that is added to your account and set up correctly according to the installation tips.
To configure Cloud counter feature, follow the instructions below:
1. Open Settings tab within Visitors menu and create a new facility via Add facility button. |  |
2. Within this new facility add proper cameras, which should be used with analytics. |  |
3. Choose analytics type for the camera (visitor counter or passer-by counter). | 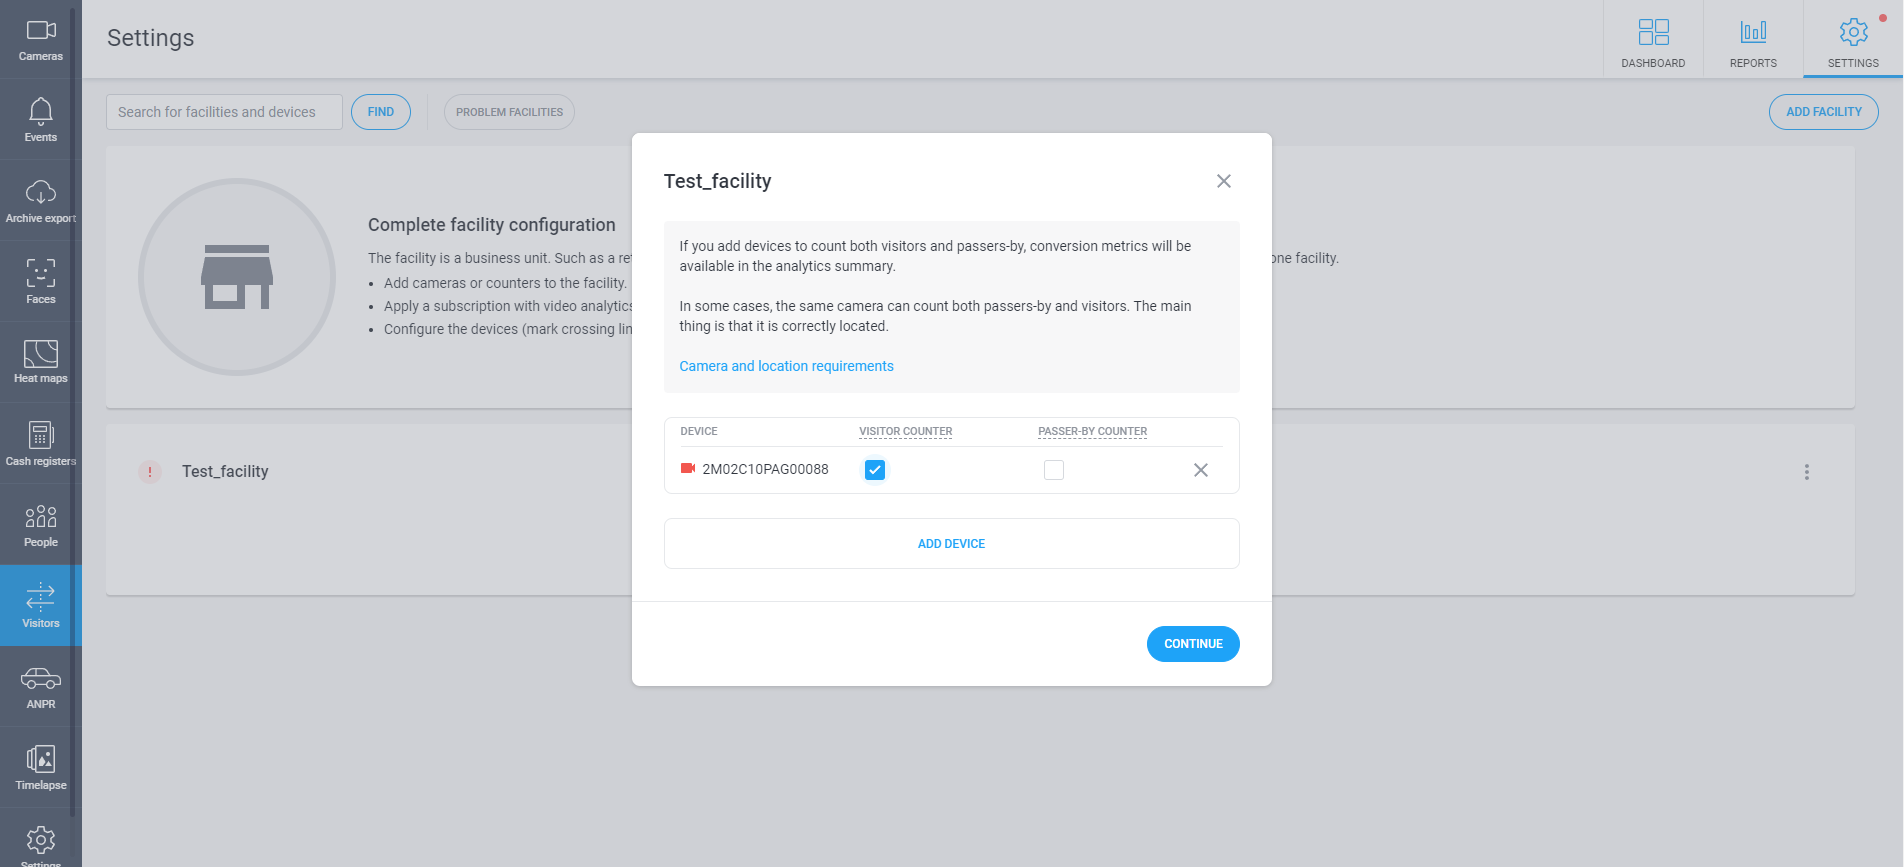 |
4. Apply proper pricing plan to the camera. | |
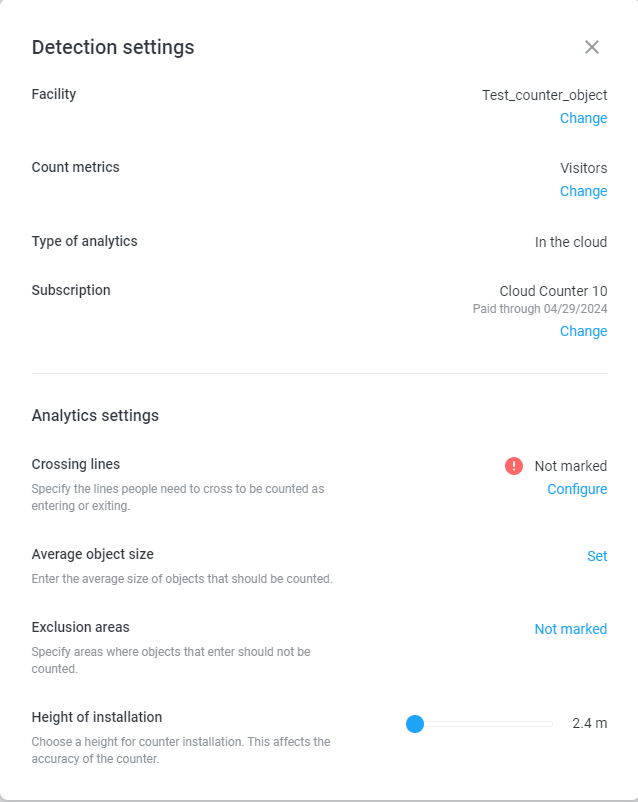
5. Open settings menu of the camera to configure its analytics system (click on a cogwheel button). |  |
In the Cloud Counter menu the following settings are available at the moment: Crossing lines, Average object size, Exclusion areas, and Height of installation.
Crossing lines To add a new line, click Add new line. To confirm the changes, tap Done and then Save. | 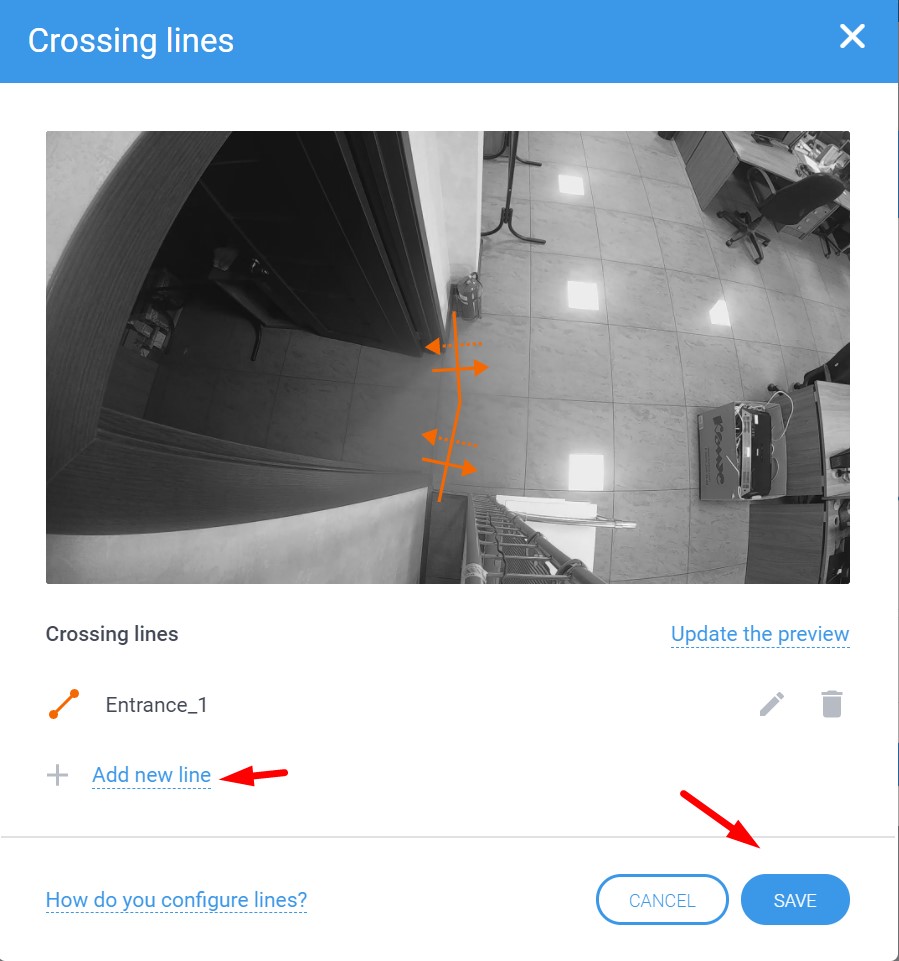 |
Average object size In this menu, you can set the average object (person) size that will be counted. To set it up correctly, you can wait till a person appears in the camera view and update the preview from the camera. To confirm the changes, tap Done and then Save. | 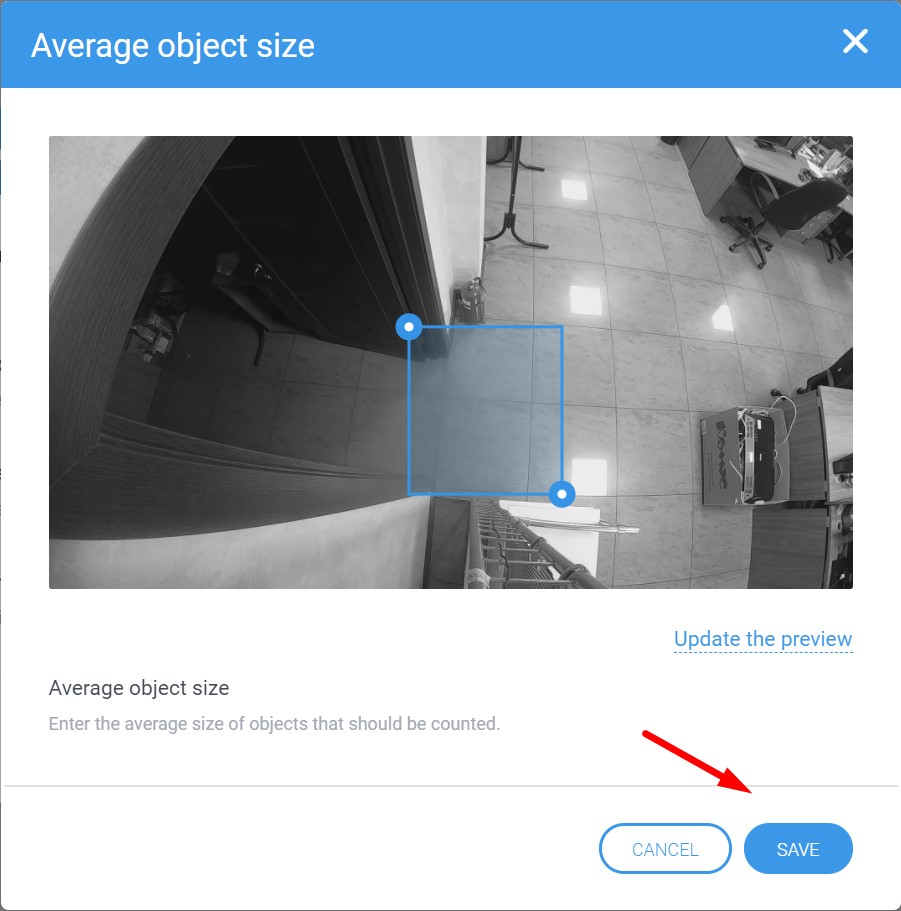 |
Exclusion areas In this menu, you can set up the areas that will be ignored by the analytics module (people will not be counted in these areas). To add an exclusion area, click Add new area. To confirm the changes, tap Done and then Save. | 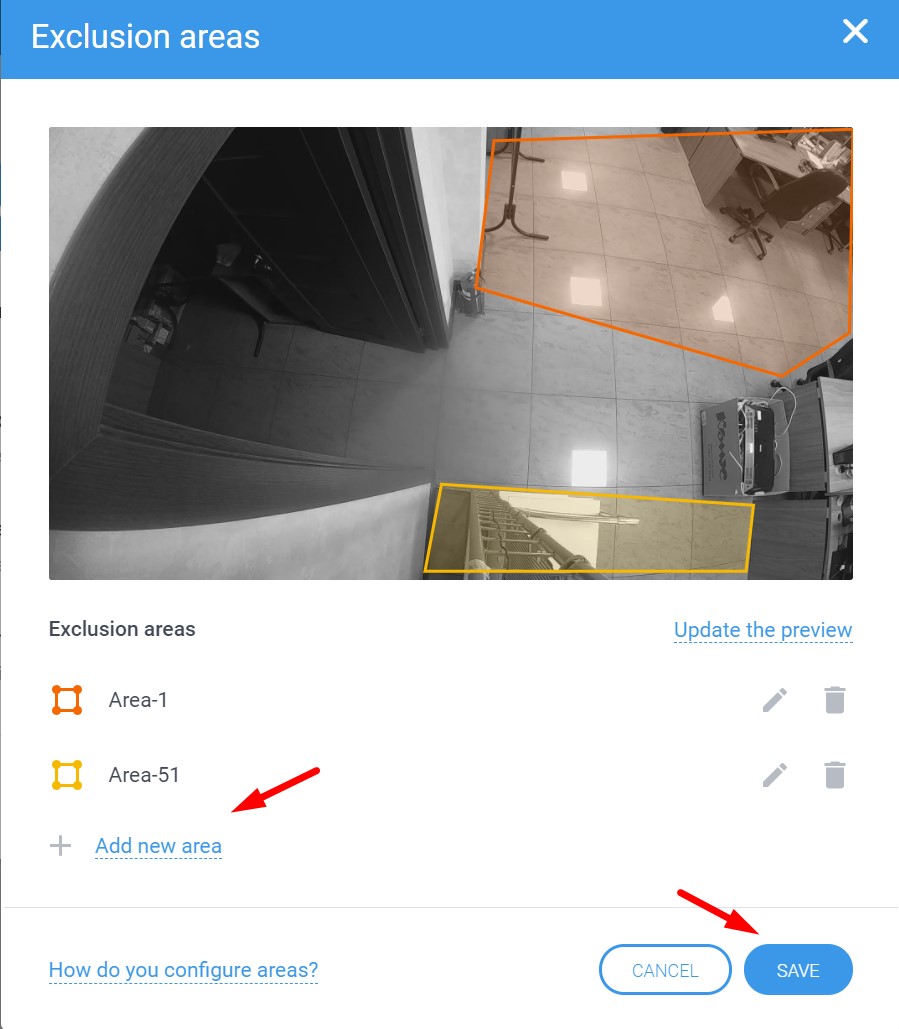 |
Height of installation For the analytics modules to work correctly, you need to toggle the switch to the right height the Counter is installed at. Height of installation can vary from 2.3 m to 6 m. | 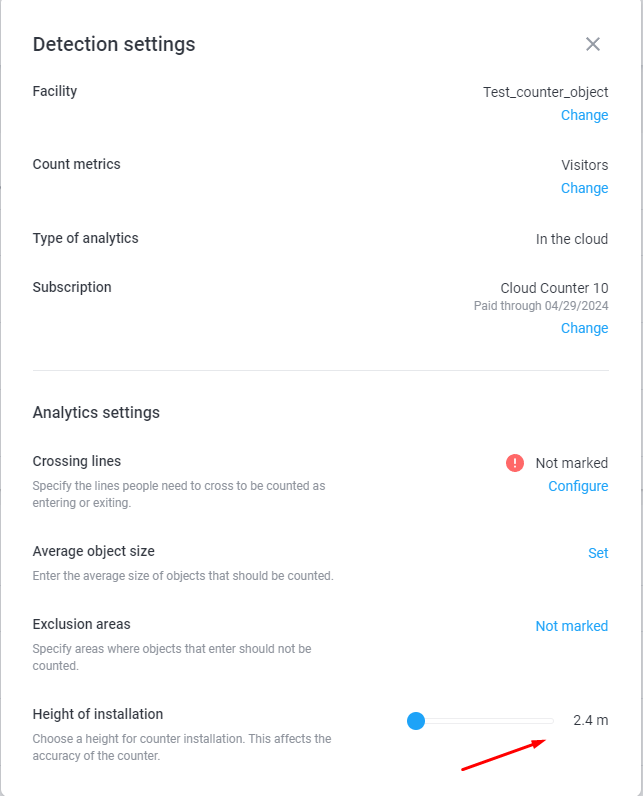 |
Click Done to complete the Cloud counter configuration. If it was configured correctly, the camera will transmit video to the cloud and the analytics module will count people crossing the set-up line (enters/exits separately). |