To connect a DVR or an HVR to Ivideon Bridge, please do the following:
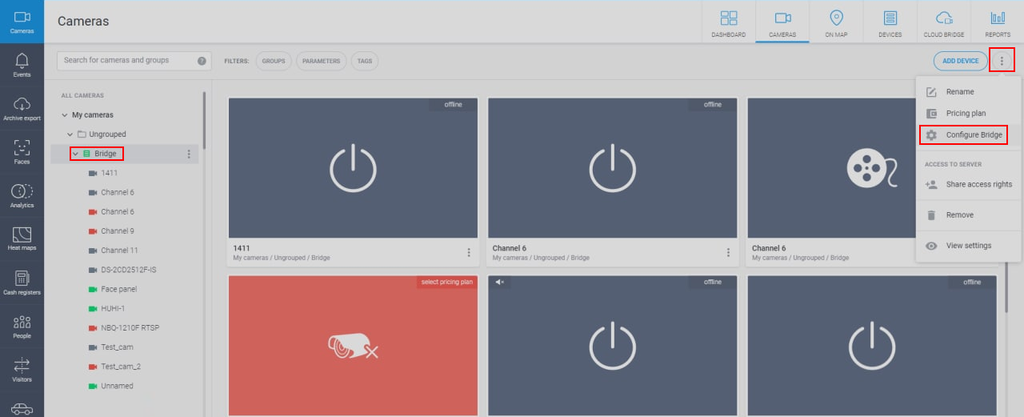
1. Open the Bridge settings window. To do so, click on the name of the Bridge in the list on the left-hand side of the screen, then press the button with three dots at the top right of the page. Choose the Configure Bridge option from the list:
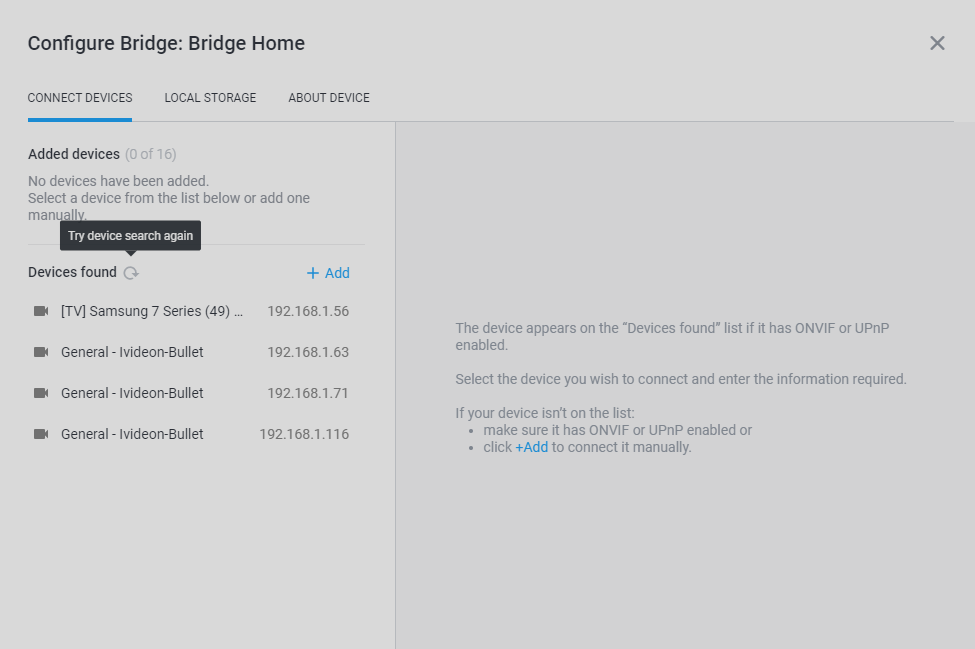
2. When opening the Bridge settings window, the Bridge device automatically scans the network it is connected to for any available devices.
NB!
The device search is done using UPnP and ONVIF protocols. During the search, Bridge may also find other devices supporting UPnP, even if they have nothing to do with video surveillance.
To successfully find a recorder, the Bridge device needs to be in the same local network with it; additionally, broadcast transmission should be enabled for this network.
If necessary, you can repeat the search by pressing the Try device search again button.
The next steps of the connection process will depend on the video streaming protocol used, as well as whether the DVR/HVR was found automatically or connected manually:
1 How do I connect a DVR/HVR using ONVIF, Dahua or Hikvision ISAPI protocol
1.1 In case the recorder was found automatically:
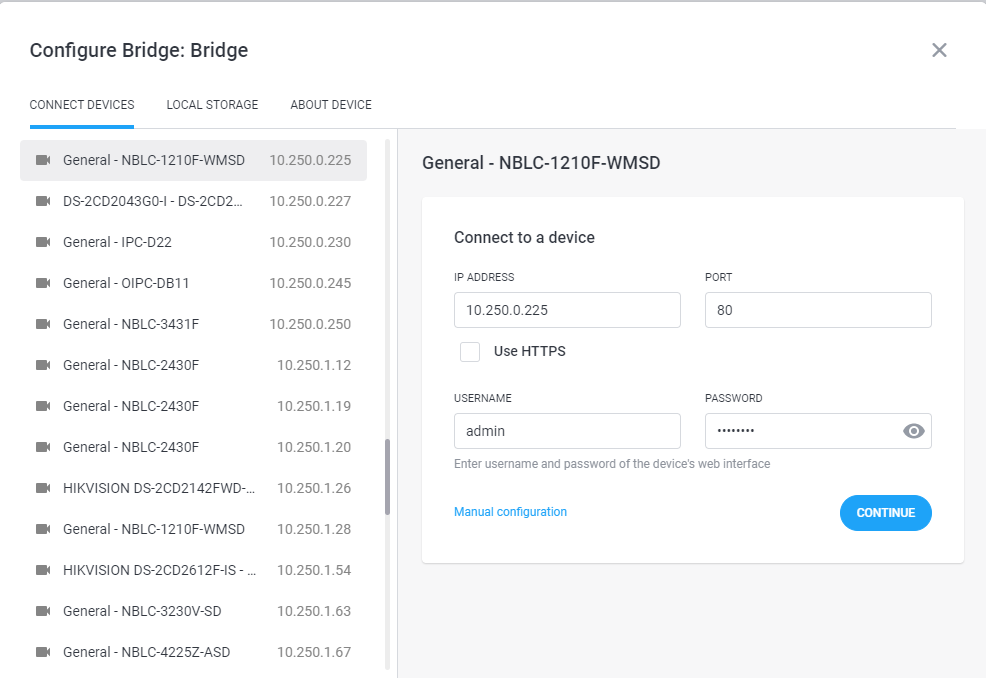
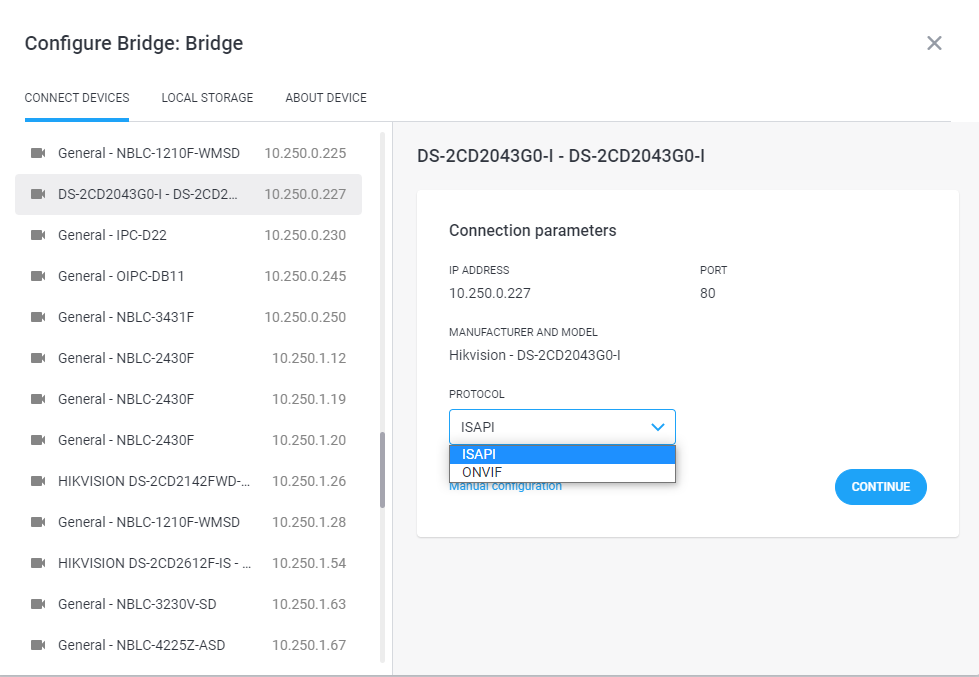
1. Tap the name of the DVR/HVR to open its connection pane;
2. Check that the IP address marked down for it is correct (please consult the manufacturer about how to find out the IP address of your recorder), enter the username and password from the device’s web-interface and click Continue:
3. After connection check, you will see a list of protocols available for connecting this DVR (ONVIF, Dahua, or ISAPI). Choose the necessary protocol and click Continue:

NB!
The way/protocol of connecting a device has influence on what features it will support in Ivideon.
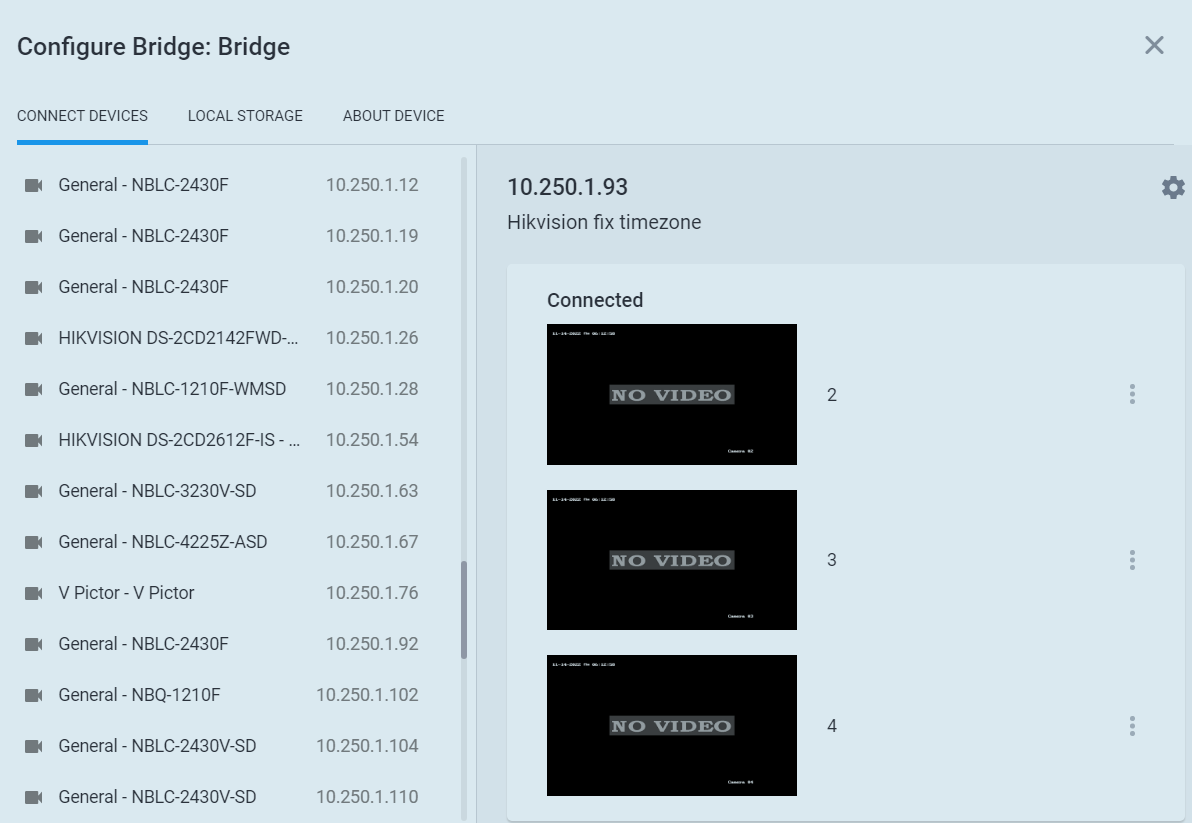
When connecting a Hikvision DVR/HVR, we recommend choosing Hikvision (timezone fix) as a manufacturer for it, because if you add it using a different manufacturer, the local archive from the recorder might be shown with a time offset. Hikvision (timezone fix) can be selected when such a recorder is connected via RTSP.
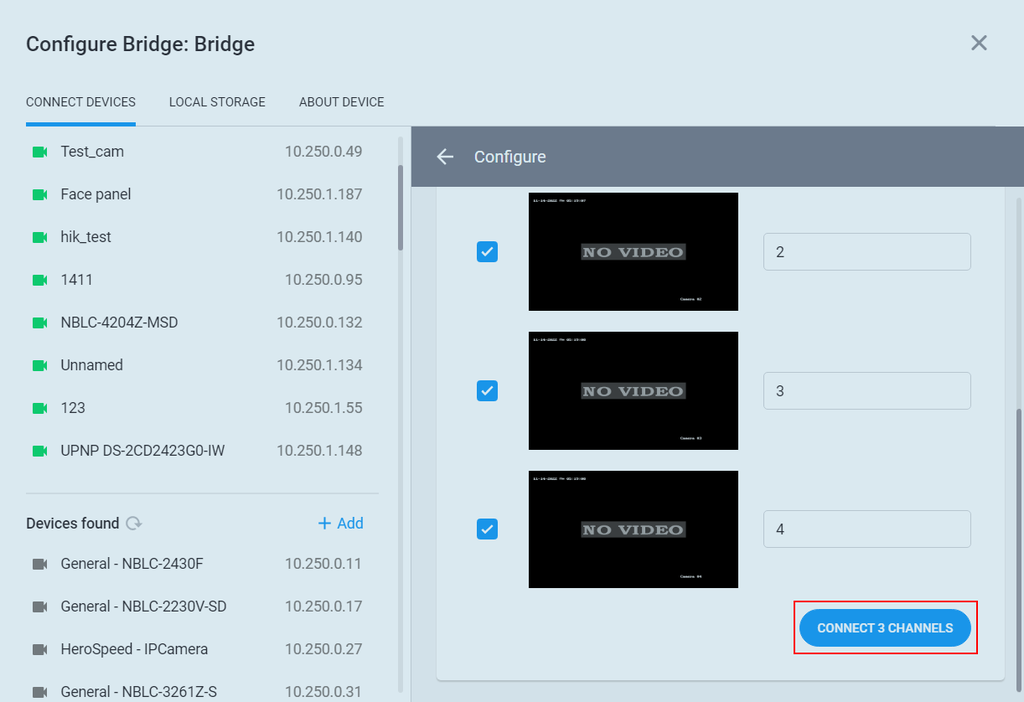
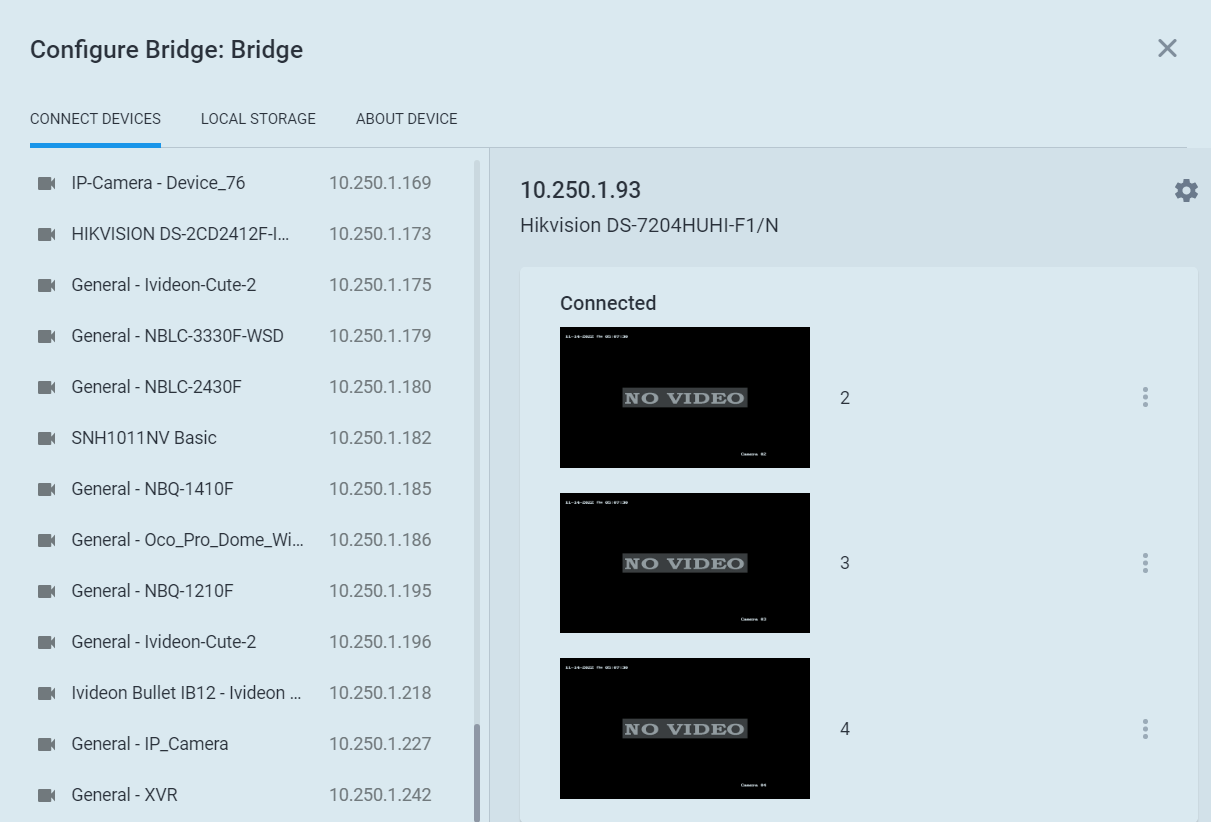
4. Make sure that the camera previews show up correctly, put checkmarks next to the previews of the channels you would like to connect, and name them. After you are done, click Connect channels:

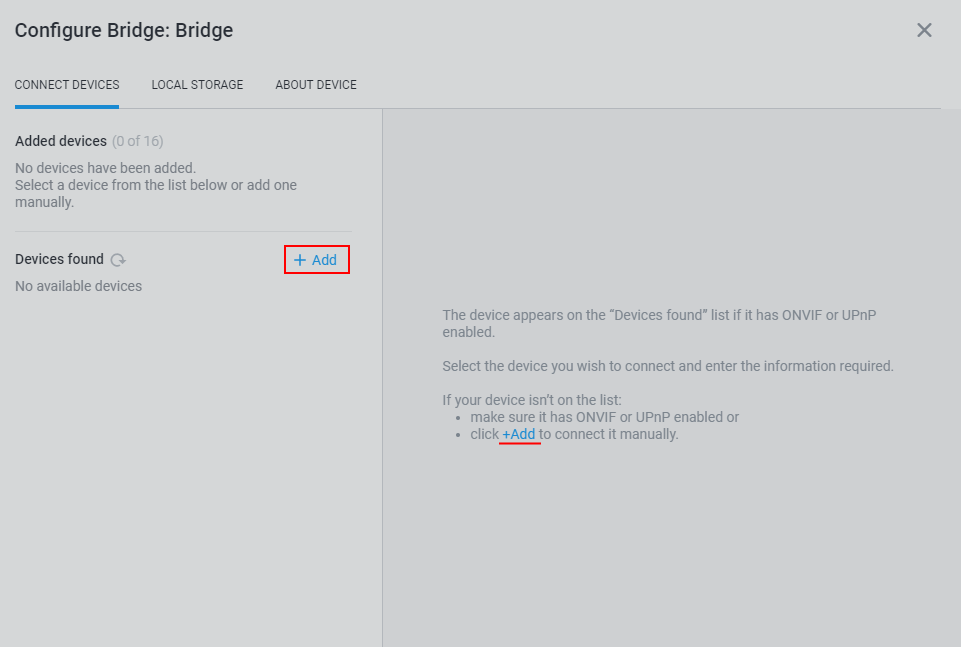
1.2 In case the recorder was not found automatically:
1. Click the + Add button;
2. Write down the current IP address of your recorder (please consult the manufacturer about how to find out the device’s IP address), username and password of its web interface and click Continue:
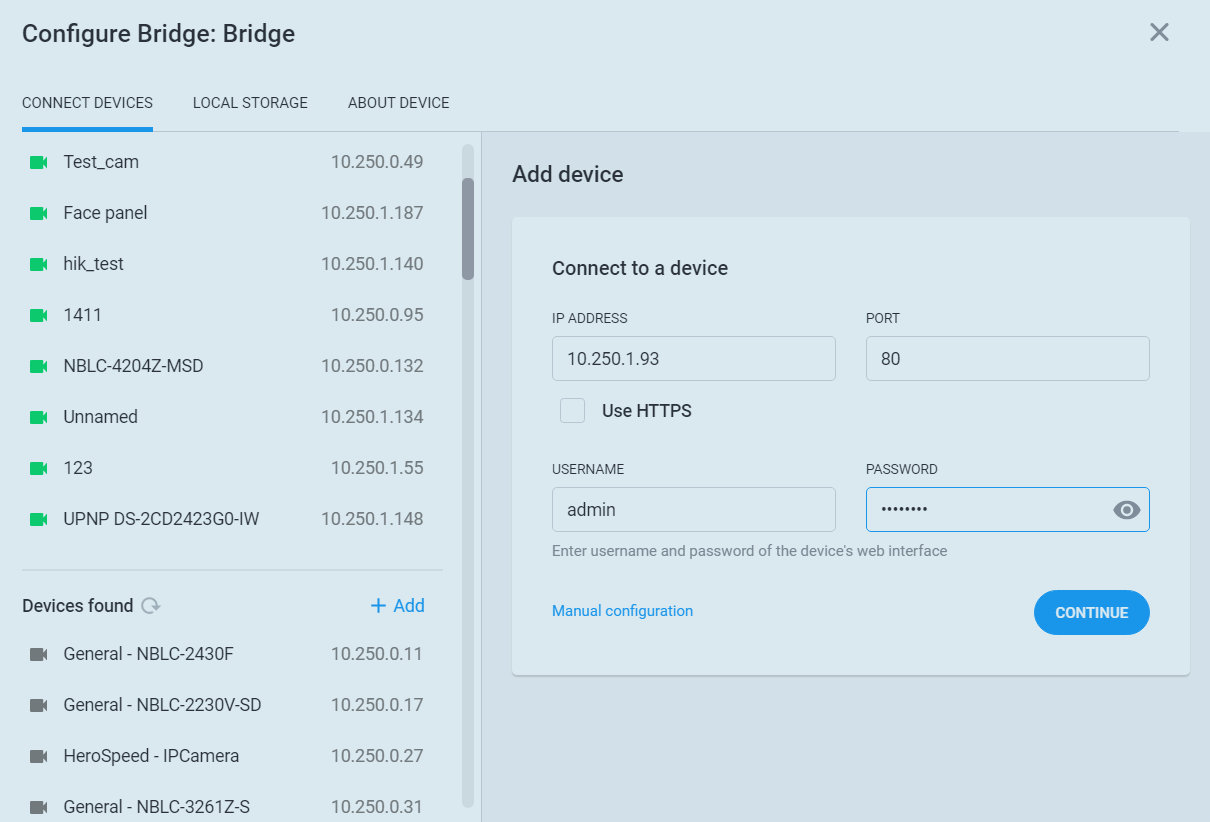
3. After connection check, you will see a list of protocols available for connecting this DVR (ONVIF, Dahua, or ISAPI). Choose the necessary protocol and click Continue:
NB!
The way/protocol of connecting a device has influence on what features it will support in Ivideon.
When connecting a Hikvision DVR/HVR, we recommend choosing Hikvision (timezone fix) as a protocol for it, because if you add it using a different protocol, the local archive from the recorder might be shown with a time offset.
4. Make sure that the camera previews show up correctly, put checkmarks next to the previews of the channels you would like to connect, and name them. After you are done, click Connect channels:


2 How do I connect a DVR/HVR using RTSP protocol
2.1 In case the recorder was found automatically:
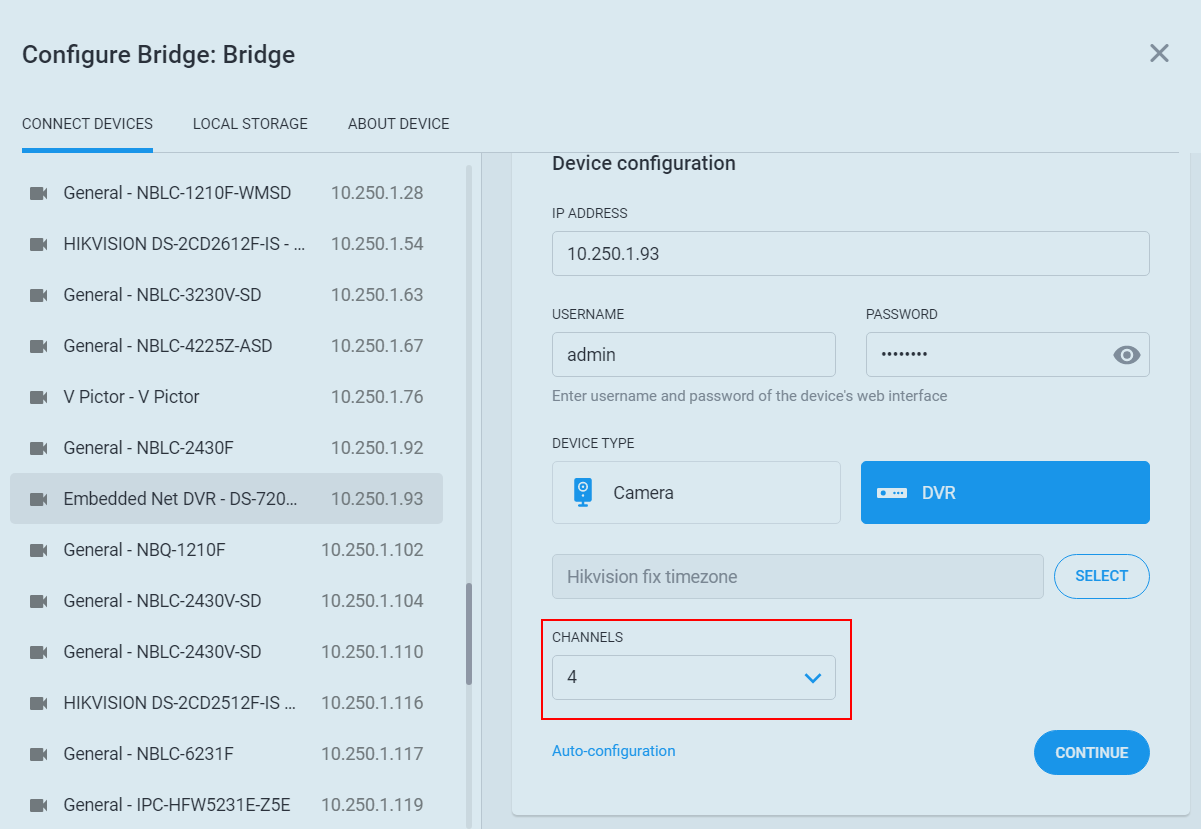
1. Click on the name of the DVR/HVR in the list on the left side of the Bridge settings window to open its connection pane, and then on Manual configuration.
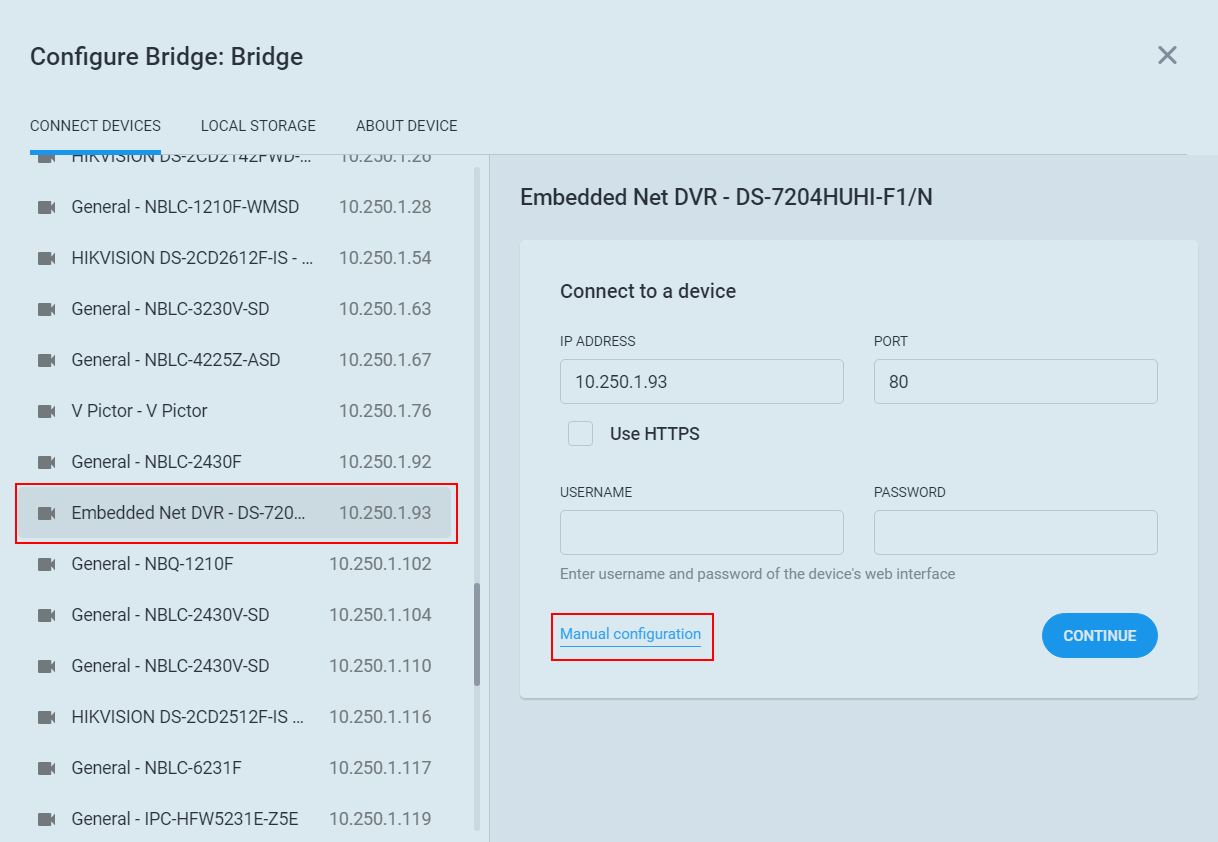
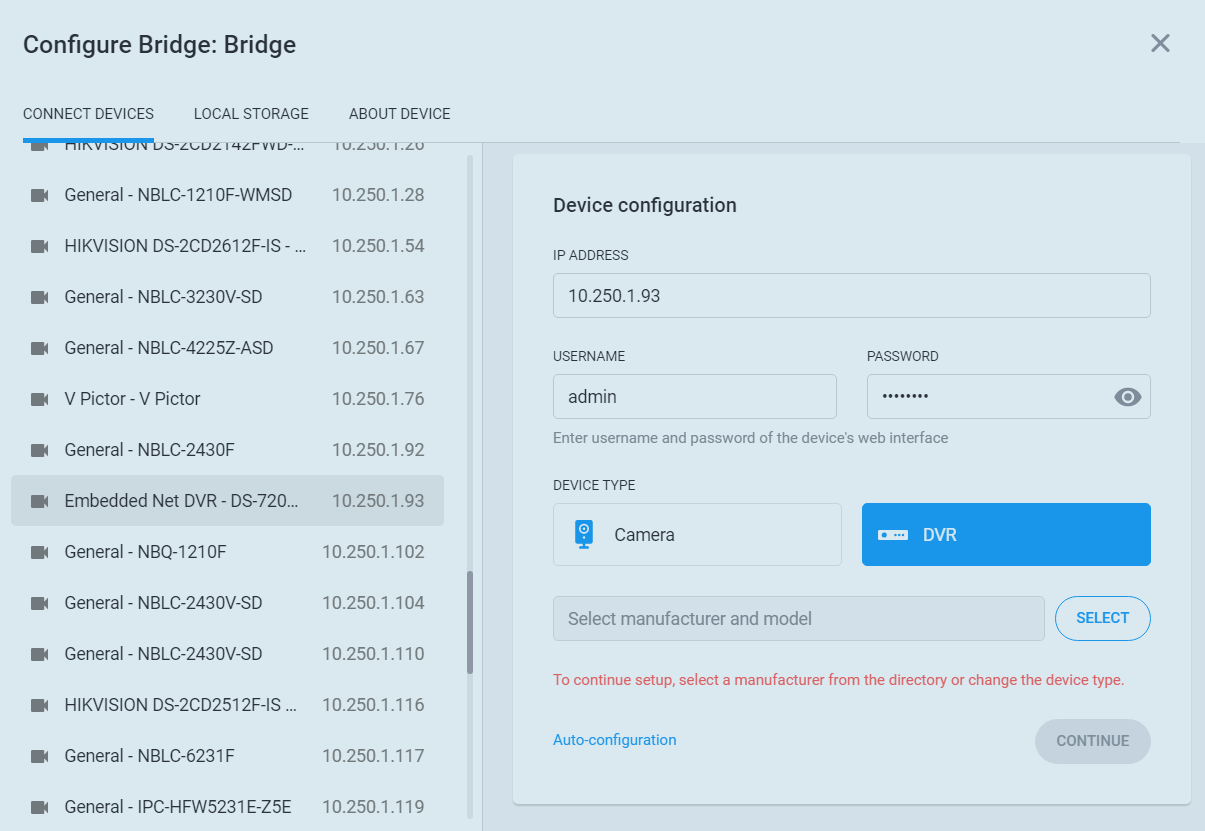
2. Fill in the current IP address of your recorder (please consult the manufacturer about how to find out the device’s IP address), username and password of its web interface and pick DVR as device type.
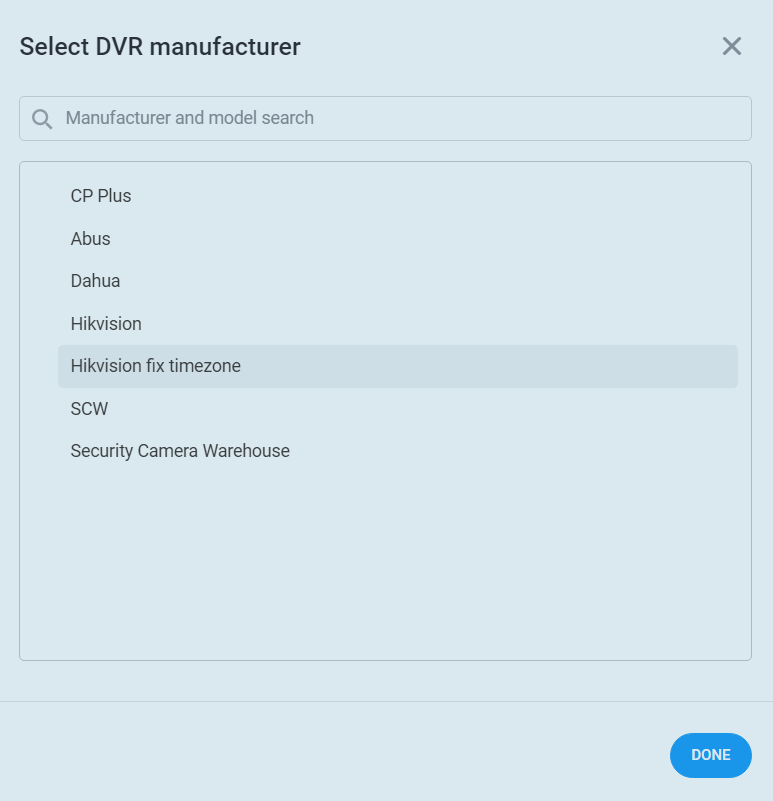
3. Tap the Select button. In a window that opens, find and choose the manufacturer of your video recorder, then click Done:
NB!
The way/protocol of connecting a device has influence on what features it will support in Ivideon.
When connecting a Hikvision DVR/HVR, we recommend choosing Hikvision (timezone fix) as a manufacturer for it, because if you add it using a different manufacturer, the local archive from the recorder might be shown with a time offset. Hikvision (timezone fix) can be selected when such a recorder is connected via RTSP.
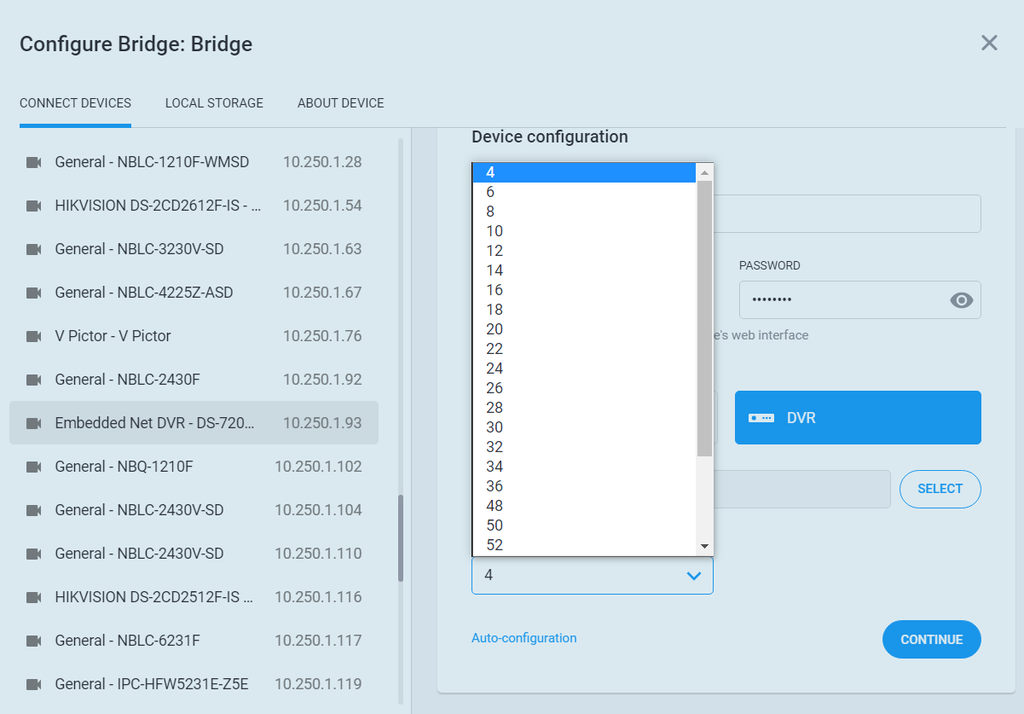
4. Under Channels, choose the number of channels you would like to connect from the dropdown list and click Continue to proceed:
5. Make sure that the camera previews show up correctly, put checkmarks next to the previews of the channels you would like to connect, and name them. After you are done, click Connect channels: