NB!: events only upon detection of persons from special "PACS" list can be retrieved via face terminal within the service. It's impossible to link other named lists to face terminal, it's also impossible to get any events upon detections of "unknown" persons as this data is not stored within terminal system in any way. |
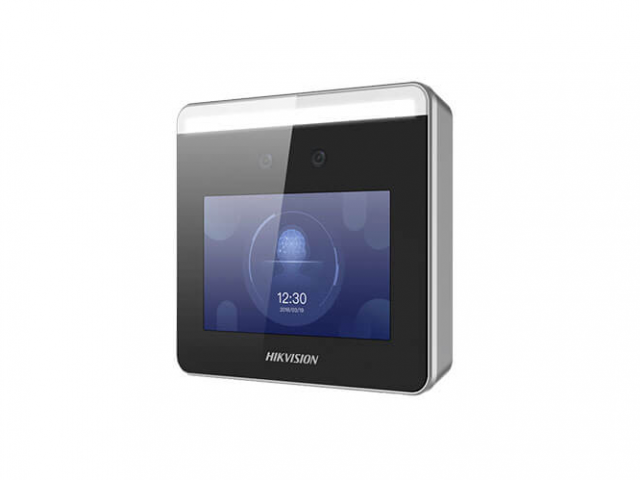 | 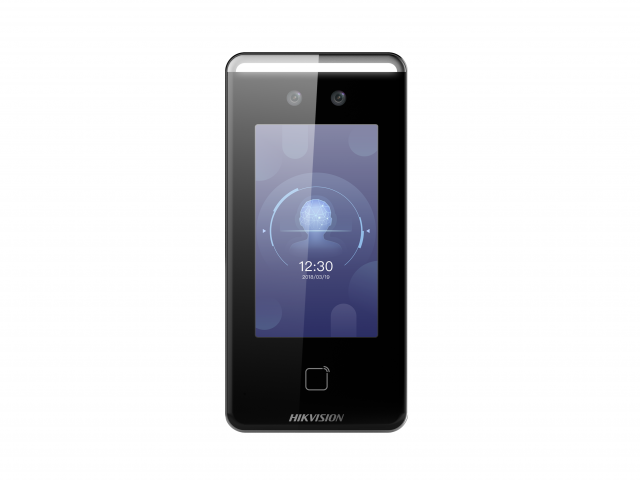 |
DS-K1T331 / DS-K1T33W | DS-K1T341AM / DS-K1T341AMF |
How to connect a Face recognition terminal to your personal account?
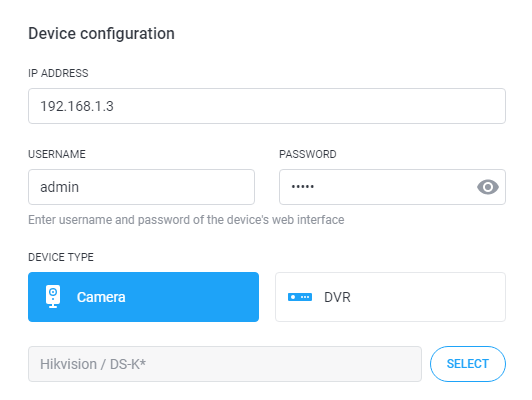
You can connect a Face recognition terminal to your personal account via Ivideon Bridge. To connect the terminal to Bridge please choose Hikvision / DS-K* as manufacturer / model.
After you connect the first terminal to the personal account, the system automatically creates a list named “PACs”. All of your terminals will automatically be added to this list. Please note that you can't add other IP cameras to this list, whereas a face terminal can't be connected to other lists.

NB! The name and color of PACs list can't be changed.
NB! You can set up only Push- and Telegram-notifications for PACs lists. Sound notifications in web-browser can`t be enabled for PACs lists.
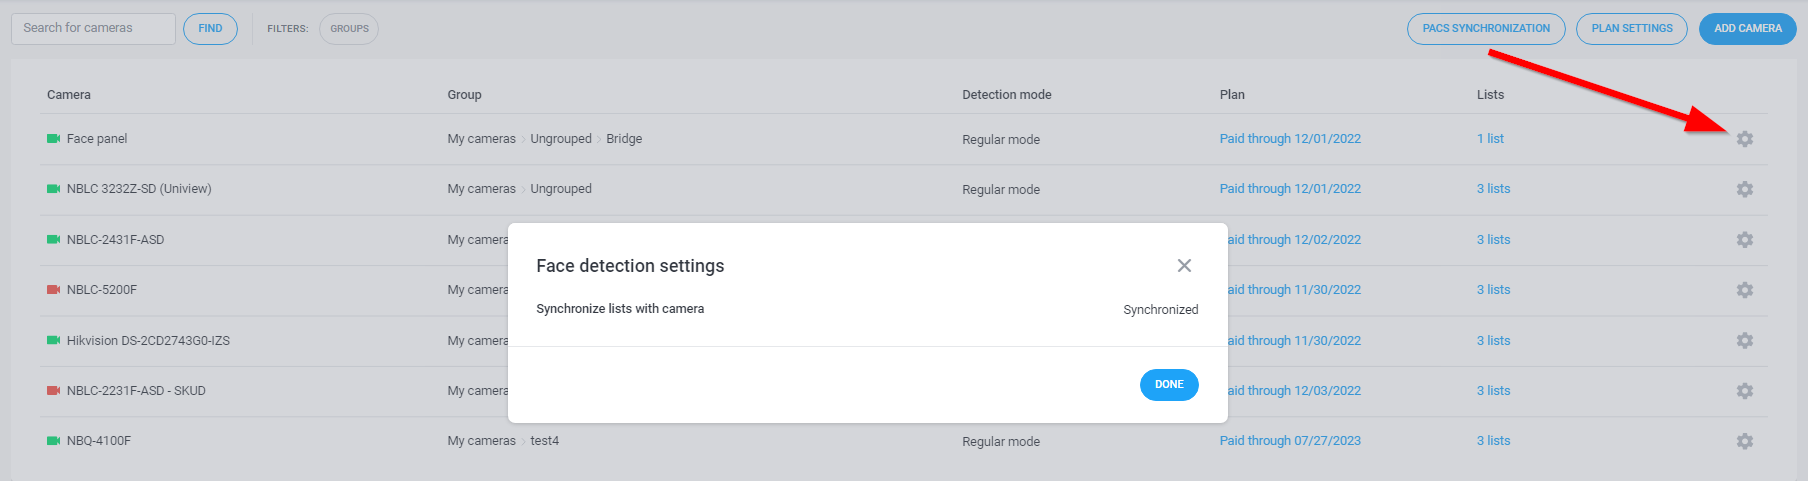
Open the Settings page to find the new button PACS SYNCHRONIZATION

If there are new face terminals on the account, which are not synchronized yet, the button will be red. There will also be a red indicator on the Settings folder. Press the button to update the list of persons.

Please note that all the face recognition settings are made on the web interface of the device, they are not available in the personal account. You can synchronize the plate`s settings with the personal account by pressing the Settings button.
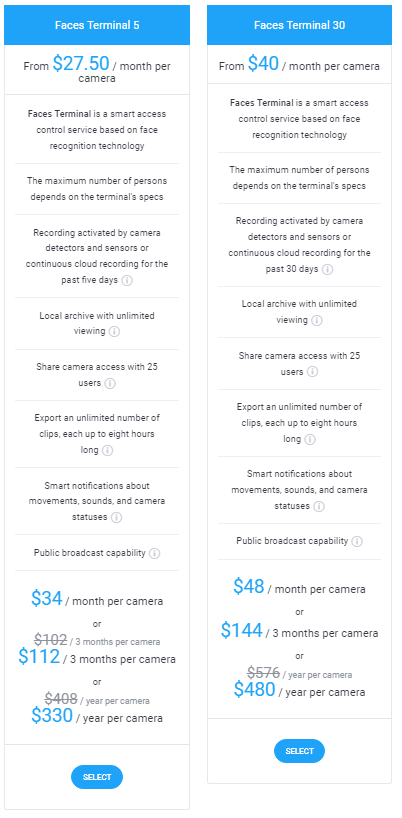
NB! There are special subscription plans for face recognition terminals.
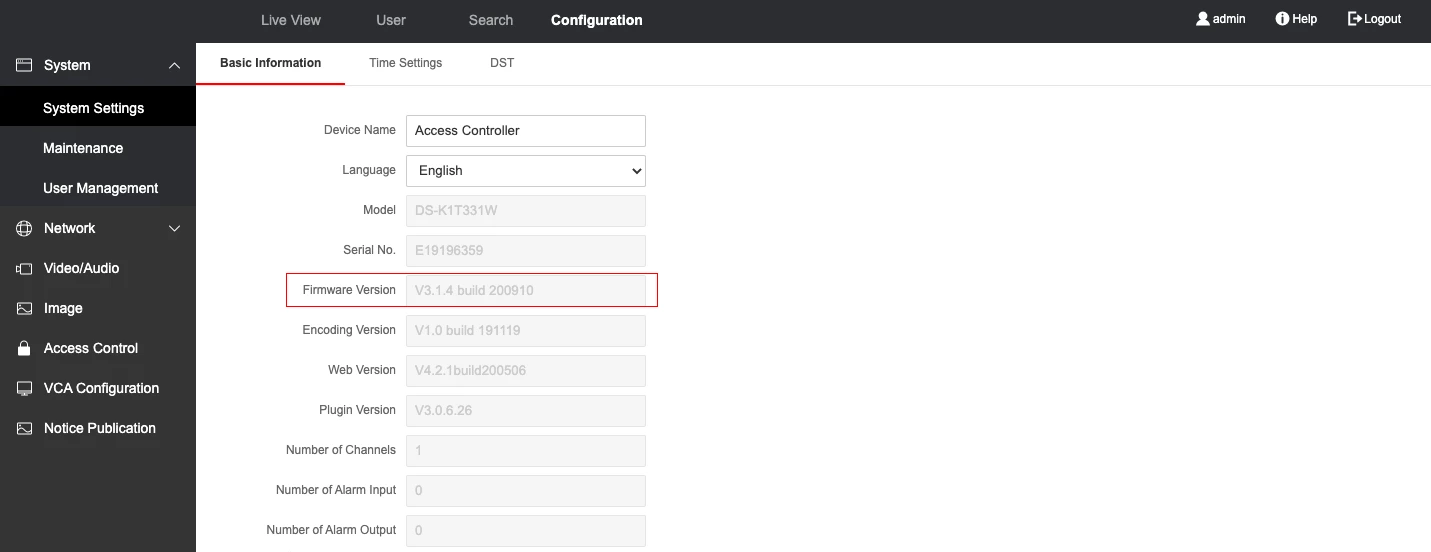
Settings via Web Interface on DS-K1T331
1. Enter the device IP address in the address bar of the web browser, and enter the device username and the password. Click Login.
2. Enter Configuration.
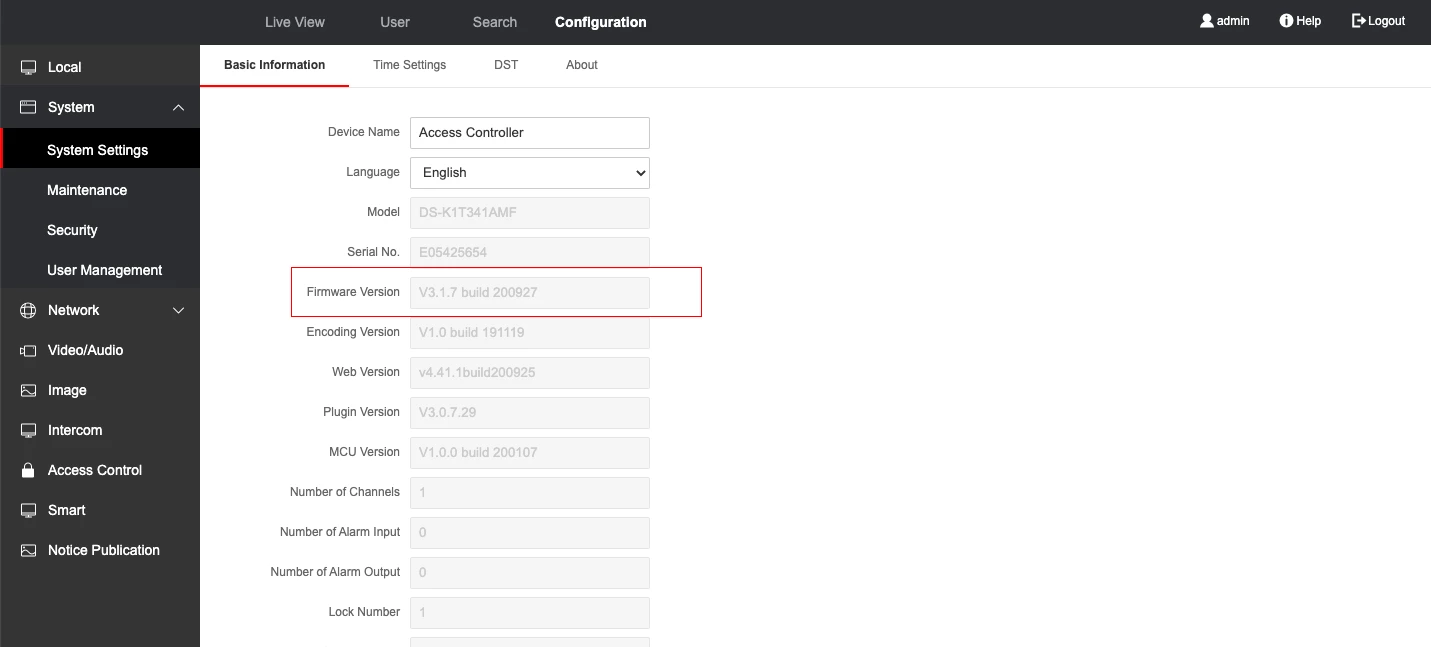
3. Click System tab → System Settings. Open the Basic Information tab and check the firmware version. It should be V3.1.4 build 200910 (DS-K1T331) or V3.1.7 build 200927 (DS-K1T341AM).
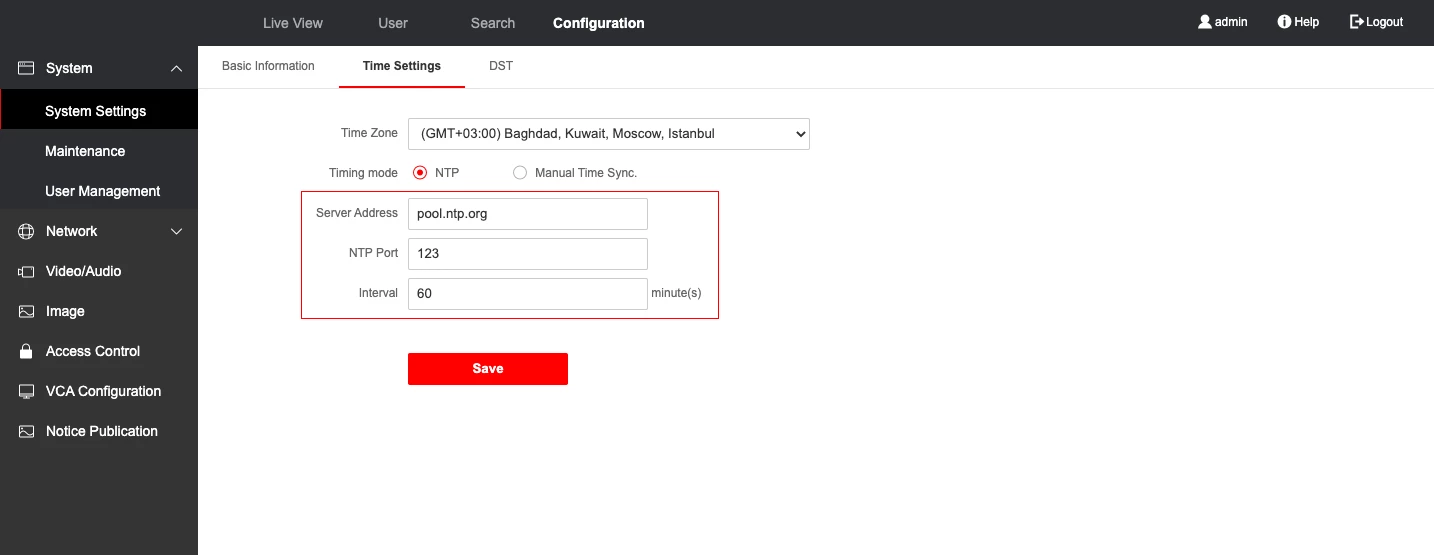
4. Click Time Settings and enter the time synchronization settings:
Server Address: pool.ntp.org
NTP Port: 123
Interval: 60
Press Save.

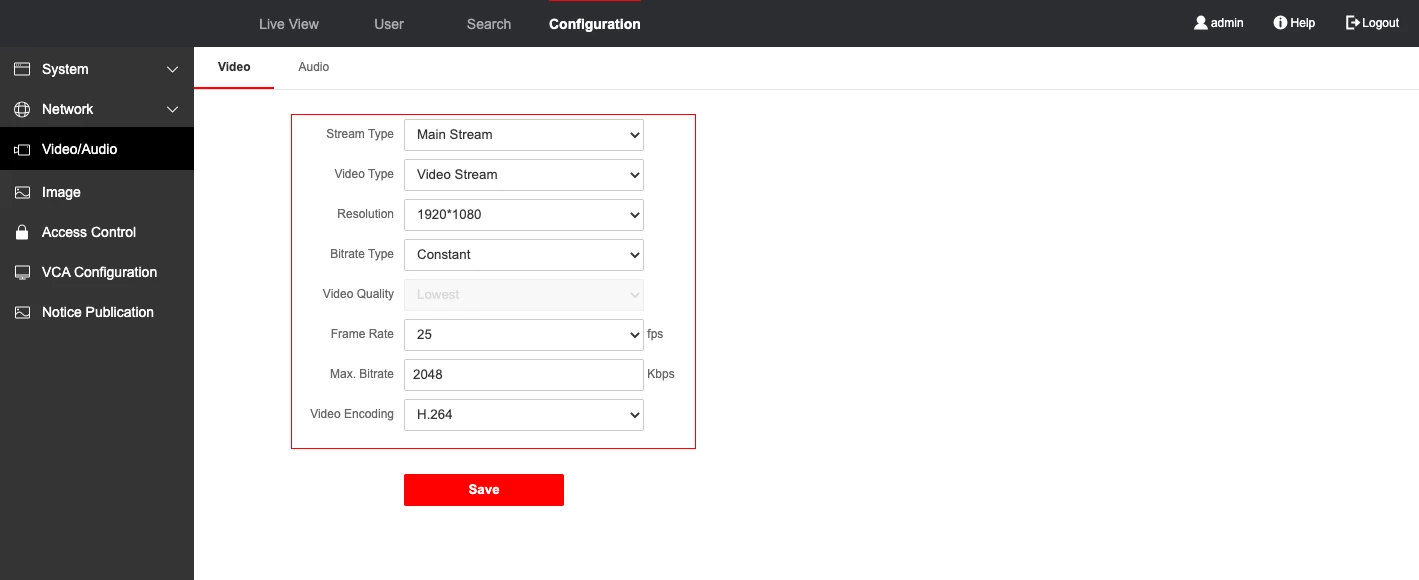
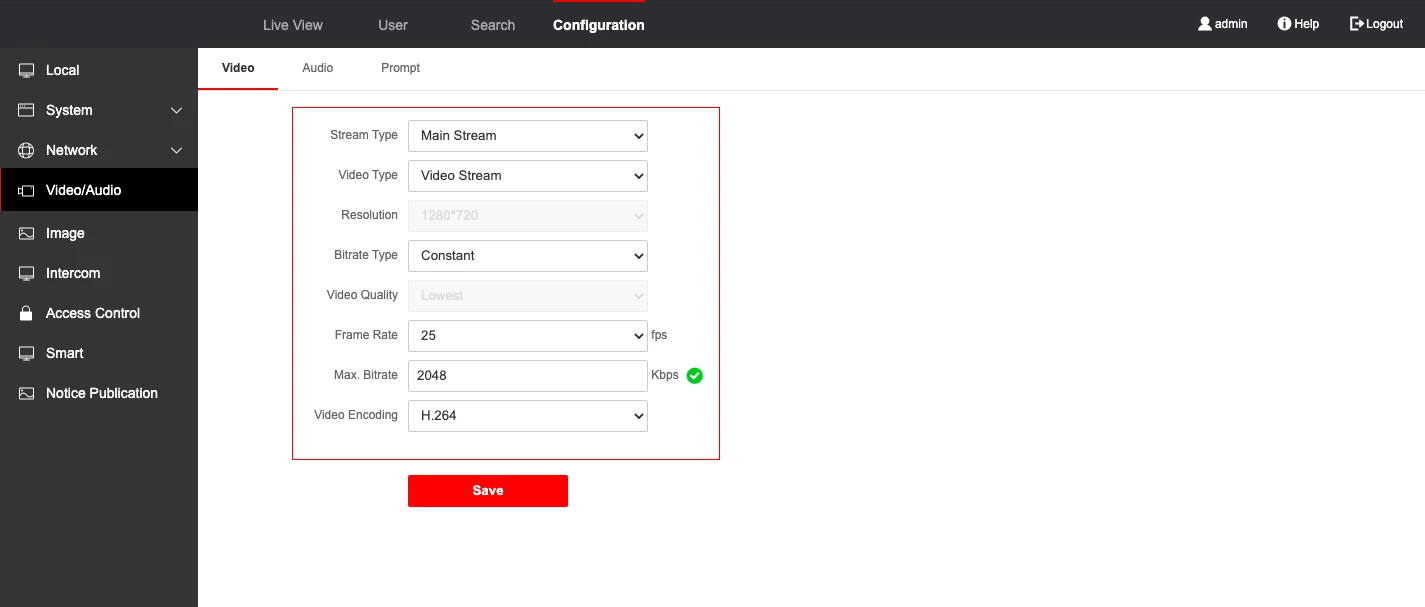
5. Click Video/Audio → Video and enter video settings:
Stream Type: Main Stream
Video Type: Video Stream
Resolution: 1920*1080
Bitrate Type: Constant
Frame Rate: 25 fps
Max. Bitrate: 2048 Kbps
Video Encoding: H.264
Press Save.
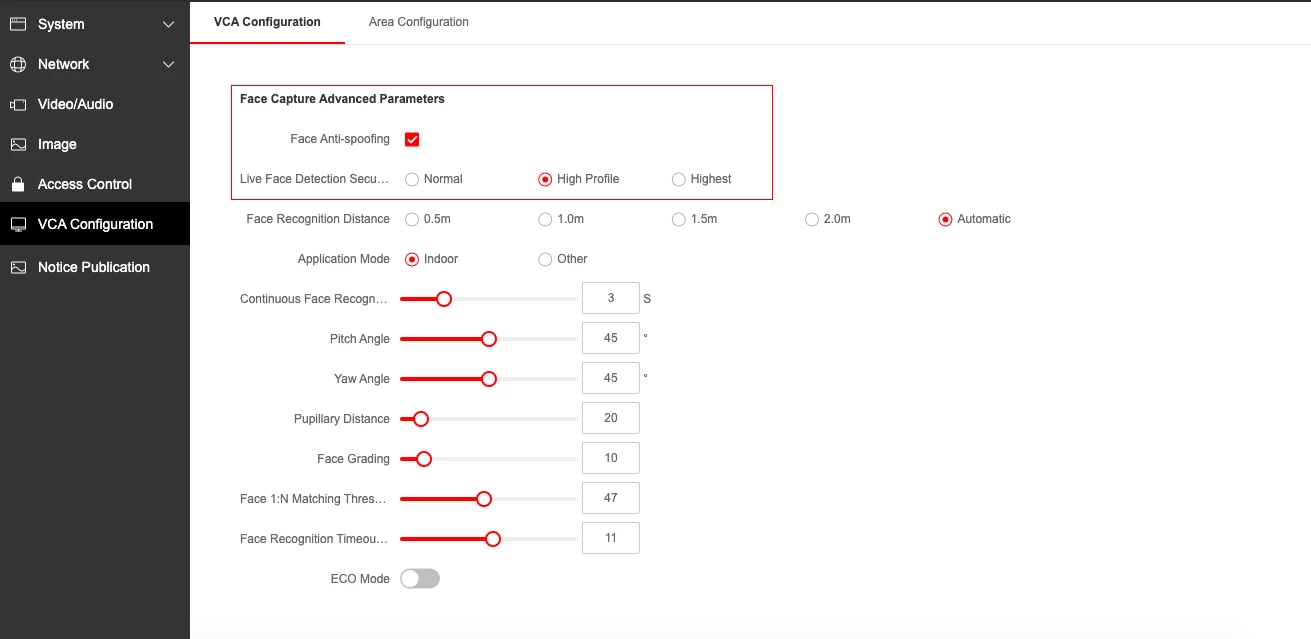
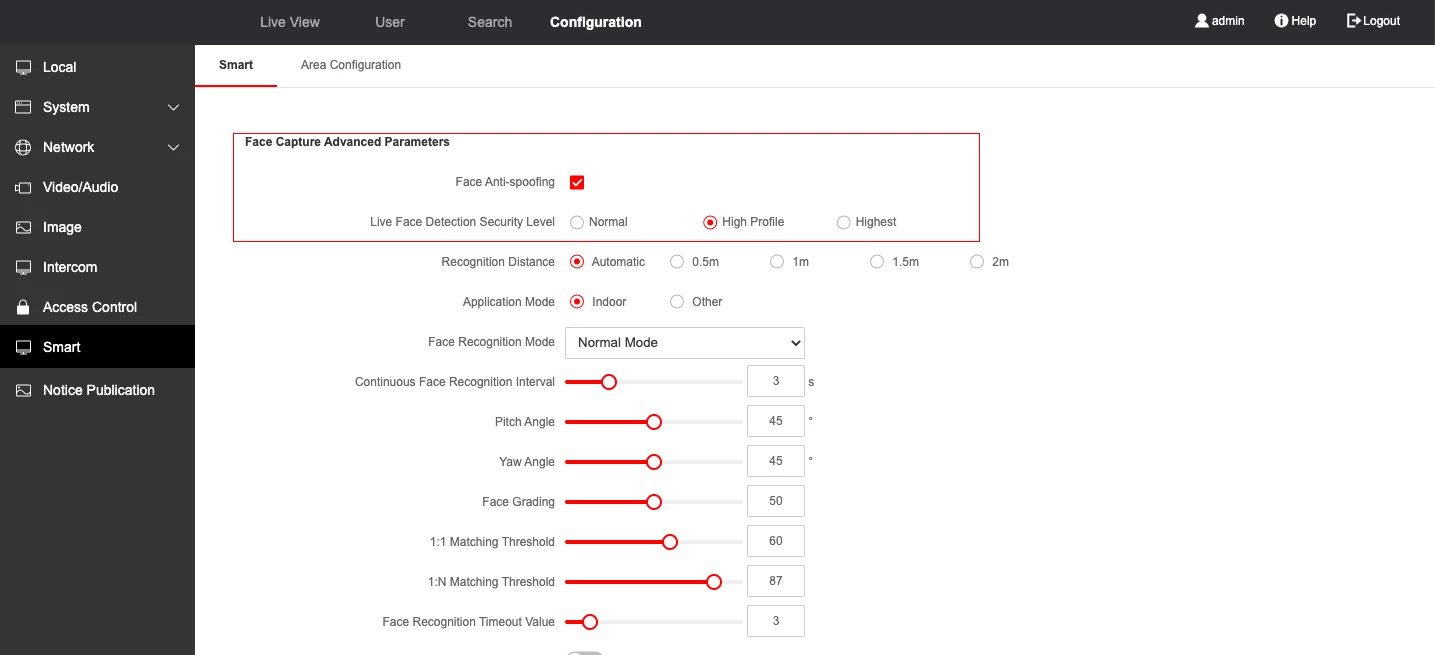
6. Click VCA Configuration and enable Face Anti-spoofing, choose High Profile and press Save.
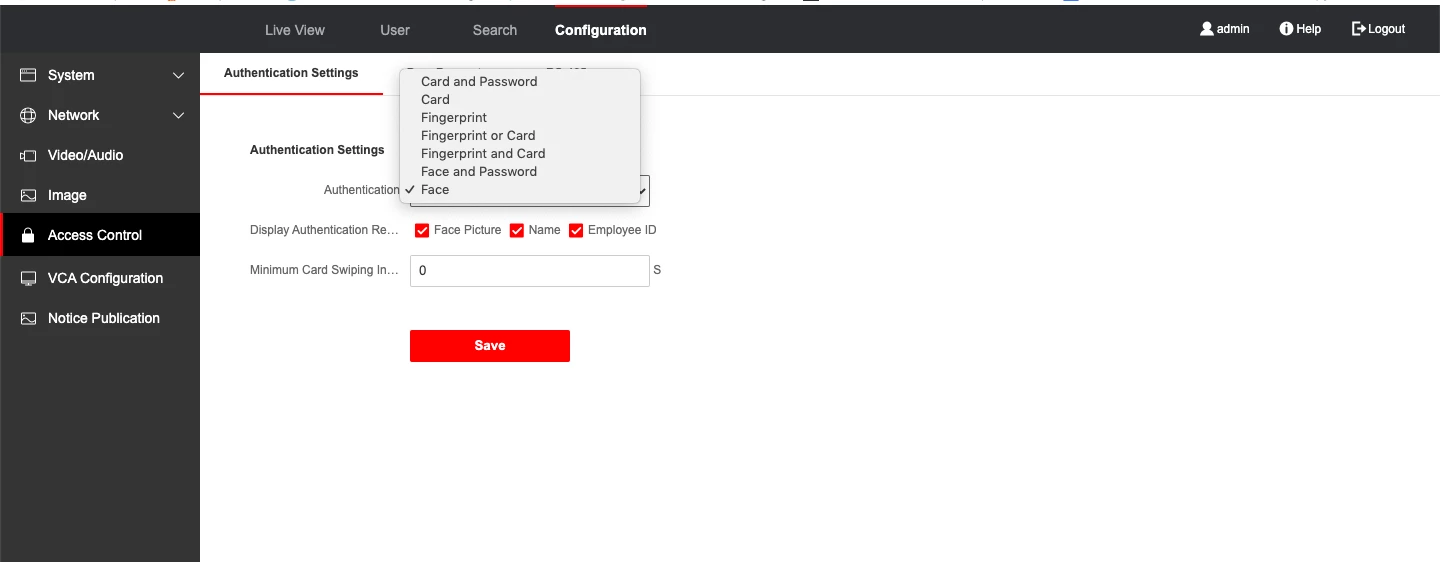
7. Click Access Control → Authentification Settings, choose Face in Authentification and check Face Picture, Name and Employee ID. Press Save.
Settings via Web Interface on DS-K1T341AM
1. Enter the device IP address in the address bar of the web browser and enter the device username and the password. Click Login.
2. Enter Configuration section.
3. Click System → System Settings. Open the Basic Information tab and check the firmware version. It should be V3.1.7 build 200927 (DS-K1T341AM).
4. Click Time Settings and enter the time synchronization settings:
Server Address: pool.ntp.org
NTP Port: 123
Interval: 60
Press Save.
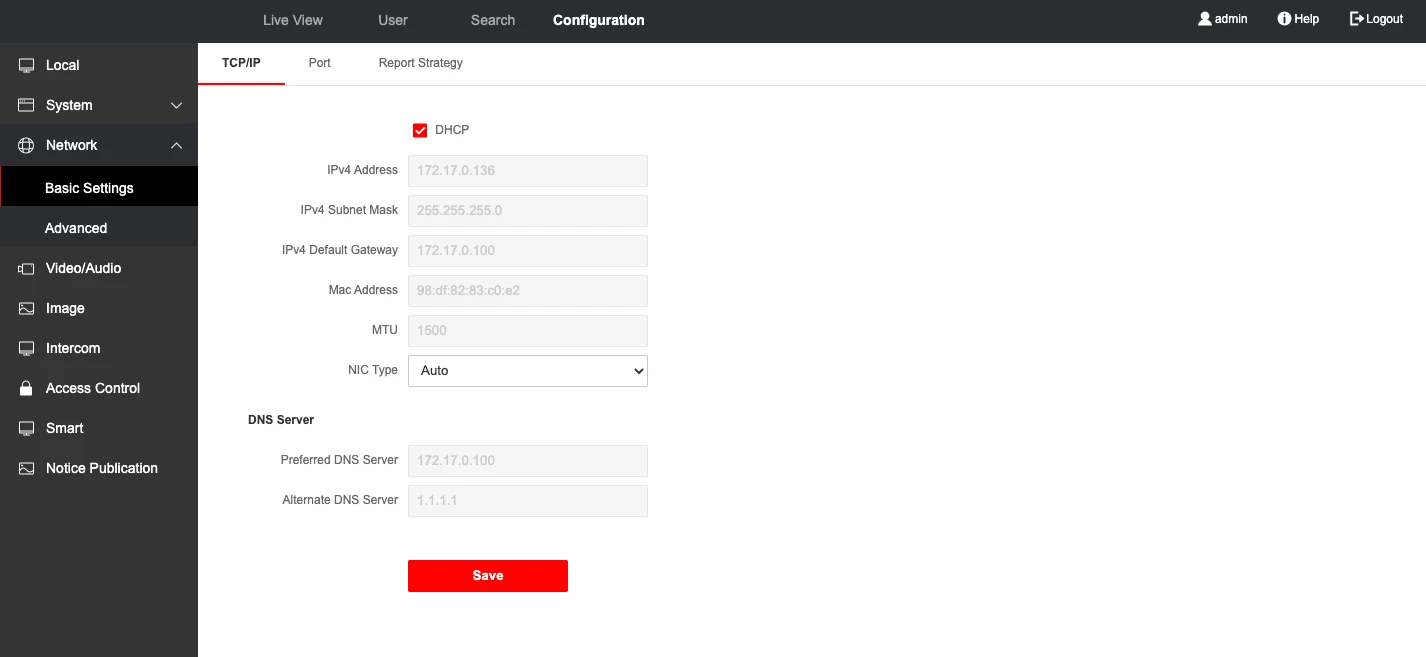
5. Click Network → Basic Settings → TCP/IP and check DHCP. Choose Auto for NIC Type. Press Save.
6. Click Video/Audio → Video and enter video settings:
Stream Type: Main Stream
Video Type: Video Stream
Bitrate Type: Constant
Frame Rate: 25 fps
Max. Bitrate: 2048 Kbps
Video Encoding: H.264
Press Save.
7. Click Smart → Smart and enable Face Anti-spoofing, choose High Profile and press Save.
8. Click Access Control and choose Card or Face or Fingerprint for Authentification. Check the following:
Face Picture
Name
Enable the following:
Enable Tampering Detection
Upload Picture After Linked Capture
Save Pictures After Linked Capture
Press Save.
