When cloud storage is enabled, the following recording modes are available:
- Recording by detectors and sensors: The archive records 24/7, but only when the camera's detector is triggered (motion, sound or alarm sensor). Recording continues until the activity stops, plus a few seconds of post-event recording.
- Continuous recording: The archive records 24/7, regardless of detector activity.
- Scheduled recording: Allows flexible combination of the previous two modes (e.g., continuous recording during the day, detector-based at night). You can also choose time intervals when recording is paused.
- Delayed recording (upload): Designed for local recording (on SD card of the camera or a DVR's HDD). The local archive is uploaded to the cloud at pre-set times (e.g., at night).
You can configure the recording mode in your personal account and mobile app (delayed recording mode setup is only available in the personal account).
How to configure the recording mode in your personal account?
1. In your personal account, go to the Cameras section, click the settings button (three dots) under the camera preview, and select Manage cloud recording. | 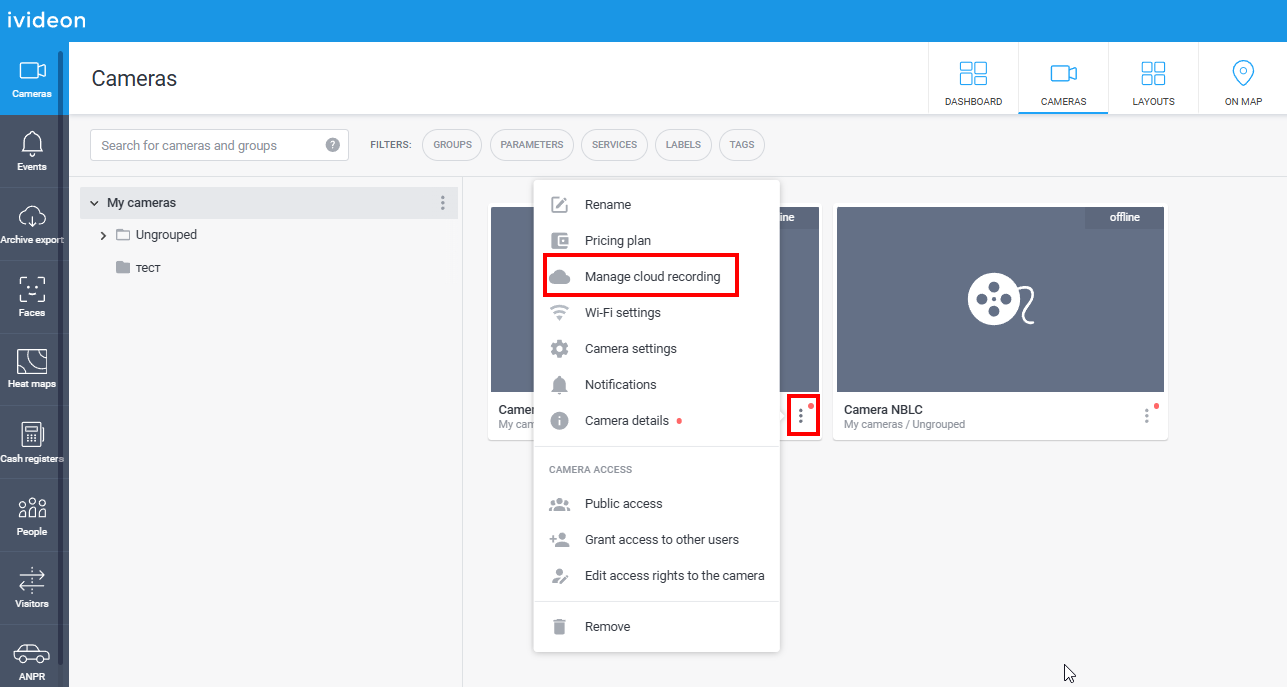 |
2. For detector-based or continuous recording, select the desired mode and click Done. | 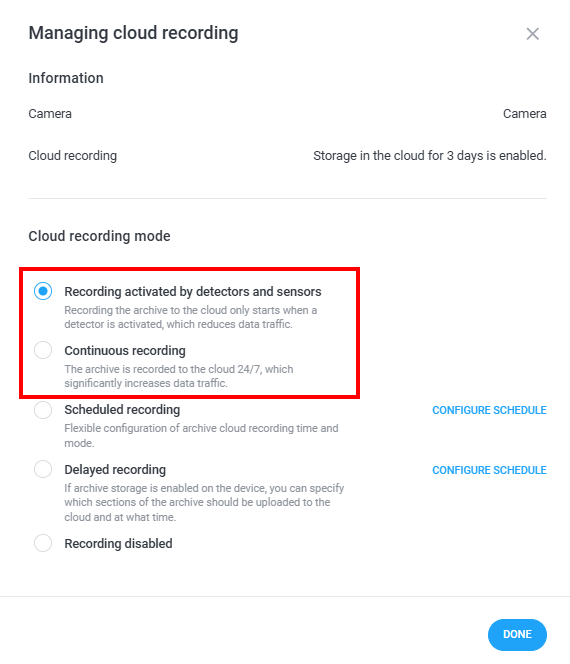 |
3. To use a schedule, select the mode Scheduled recording and click Configure schedule. In the window that opens, specify the time intervals and modes for recording.
After setup, click Save and then Done. You can immediately copy the schedule to other devices by clicking Apply to other cameras and choosing the desired cameras. | 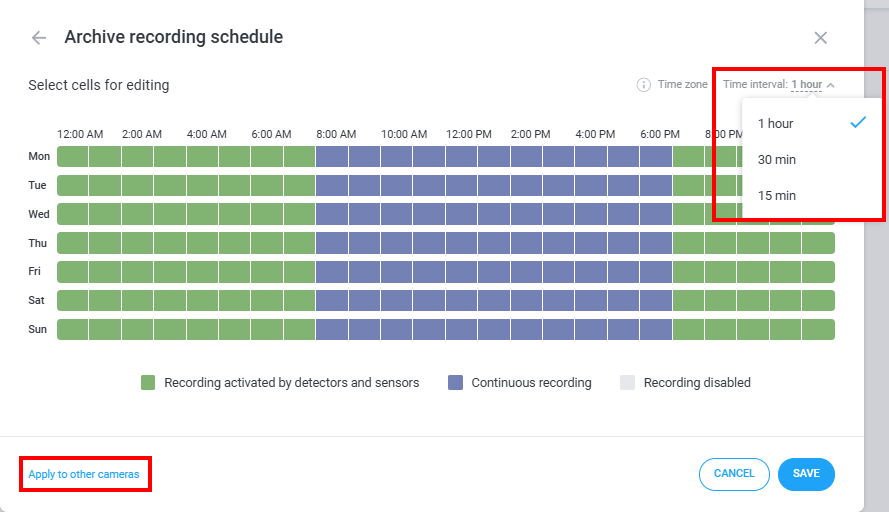 |
4. To use Delayed recording, select this mode and click Configure schedule in the window that opens. Then:
After setup, click Save and Done. Then ensure Delayed recording is selected and click Done again. | 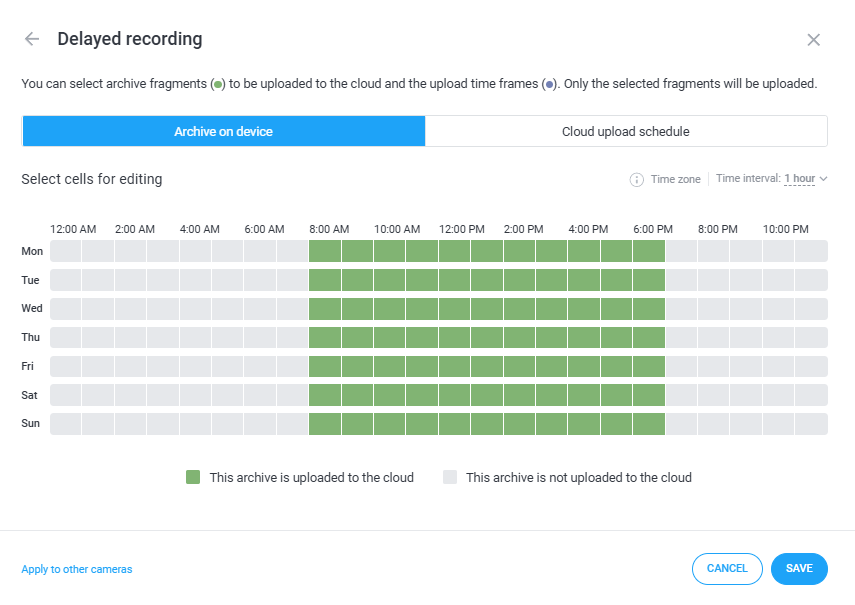 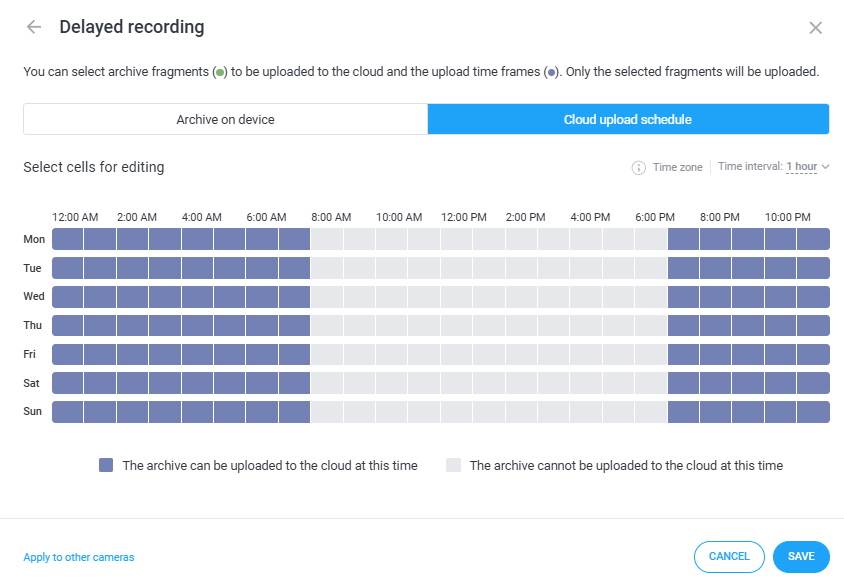 |
5. To manually pause cloud recording for a period, select the Recording disabled mode and click Done. | 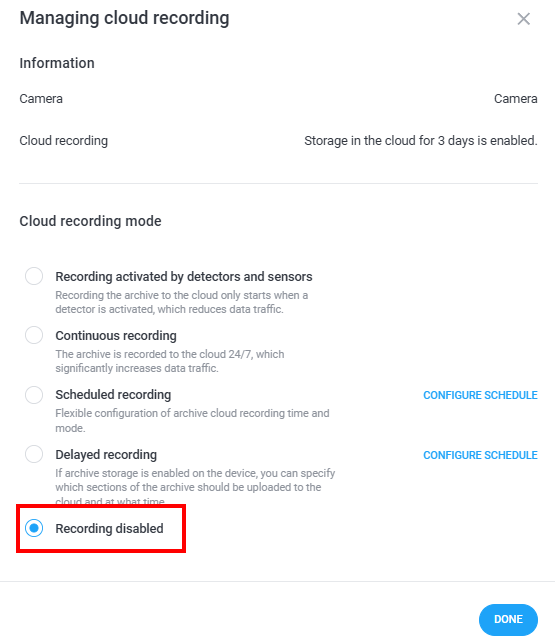 |