1. Formatting the SD card
In order for a Dahua camera to start recording footage to a card correctly, before starting the recordings, it is necessary that the camera formats the SD card in question.
Depending on the model of the camera, it may have an option to format the camera manually via the web interface of the device or in automatic mode.
a. Formatting the SD card automatically
This method of formatting is available for the following models of Ivideon-ready cameras:
Nobelic NBQ-1110F, NBQ-1210F, NBQ-1310F, NBQ-1410F, NBLC-1110F-MSD, NBLC-1210F-WMSD, NBLC-1310F-WMSD, NBLC-1410F-WMSD, NBQ-4100F
Oco HD, Oco Motion, Oco Simple
Dahua DH-IPC-A15P
To have the SD card be formatted automatically by the camera, please do the following:
In case the card is already installed in the camera, power the camera down and take the SD card out of it;
Before inserting the card into the camera (or reinserting it after taking it out) power the camera on;
Install the card into the SD card slot on the camera while it is operational;
Reboot the camera by unplugging it from power for a few seconds. During the reboot, the camera is supposed to format the card.
b. Formatting the SD card manually via the web interface of the camera
This way of formatting a local storage unit is available for all models of Dahua cameras, as long as they have an embedded web interface. In case a camera’s web interface is inaccessible, a similar way of formatting the SD card in it would be available for it via the desktop SmartPSS application (see here, section 10).
To format your SD card manually via the camera’s web interface, please perform the following:
1. Open the web interface of the camera.
2. Proceed to Setup → Storage → Destination → Local tab.
3. Choose the card and click on the Format button. After this, it should automatically reboot, and the formatting should be finished as soon as it reboots.
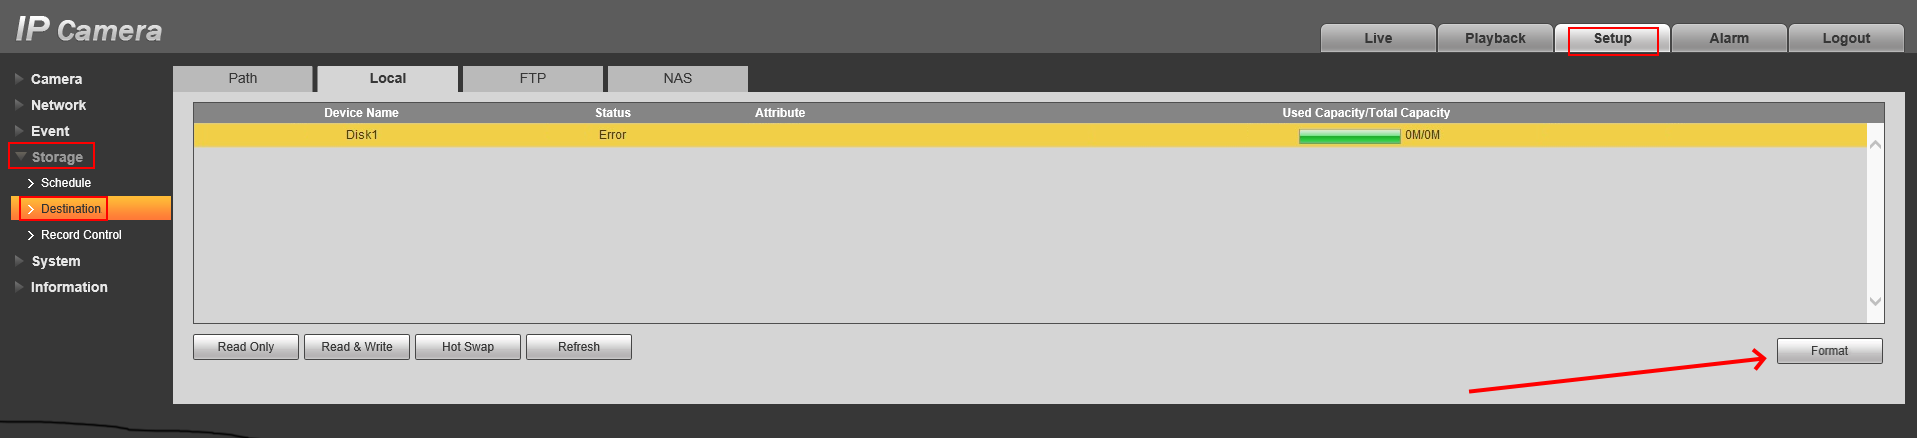
After the reboot you can check the status of the card in the Local tab again – it should now be shown as Normal. To ensure the recordings are being made, create motion in the frame of the camera and then check the availability of recordings on the timeline in live view mode within your Personal Account or Ivideon Client desktop/mobile apps.
Note that there is a standard delay in uploading the playback information about the recordings to our cloud. Please give the camera about 3-5 minutes to do so.
2. Setting up a recording schedule
After the SD card is formatted, the recordings to it will be made in accordance with the recording schedule set up for the camera. By default, a camera will make detection-based recordings 24/7 (a camera like this should have motion and sound detection enabled by default, in case it has both of these detectors).
If necessary, the local recording schedule can be changed in the following way via the web interface (also can be done using SmartPSS if your camera does not have a web interface; see here, section 10):
1. Go to Setup tab → Storage → Schedule → Record Schedule;
2. Highlight the time periods when you would like the camera to record. This can be done using two following ways:
a) Click and hold over the specific part of the timetable to have it highlighted. The different colors refer to the different modes of recording: green, named General, is for continuous recording, yellow (Motion) – detector-based recording, red (Alarm)— alarm trigger-based recording.
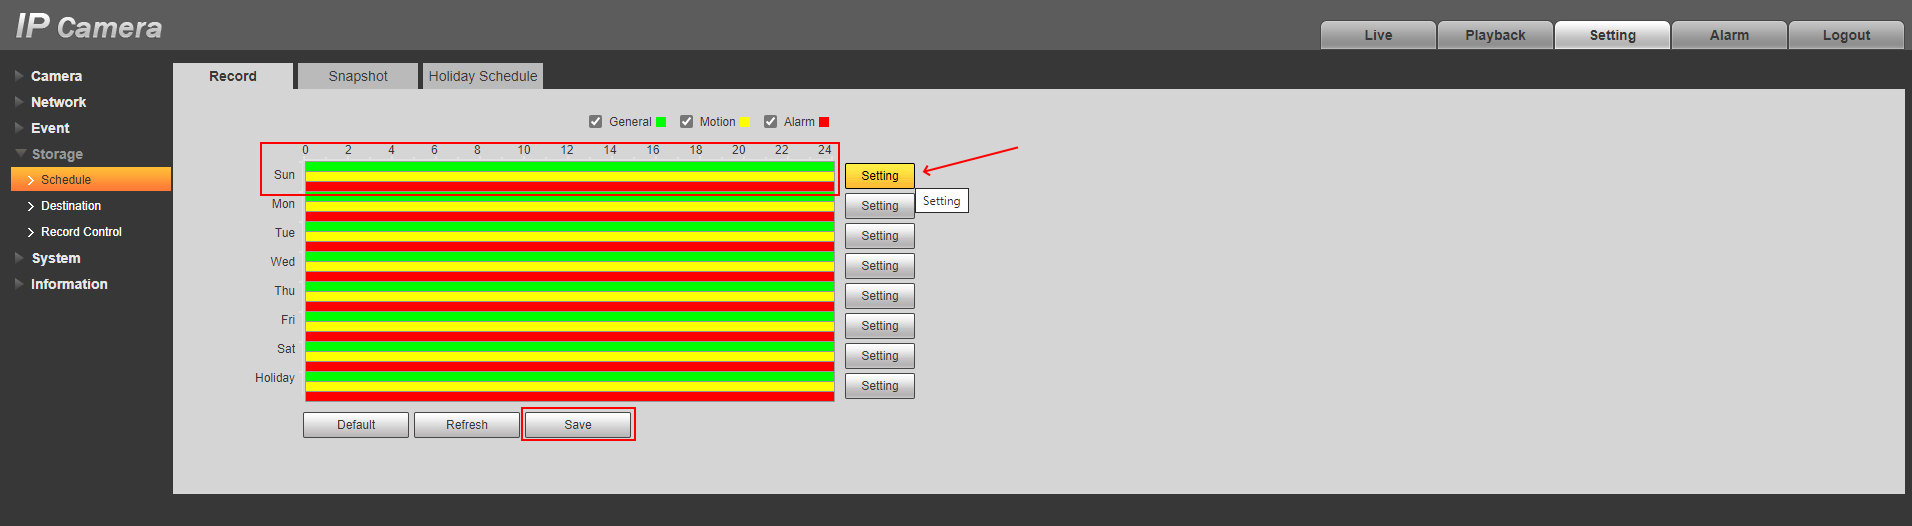
b) Click one of the Setup buttons next to the timetable. In the window that appears:
Enter the periods of time when the recordings should be made. Setup for each of the days can have up to 6 separate time periods with their own recording mode(s);
Put checkmarks next to the chosen recording modes to have them for the entered time period;
Check the All option at the top of the window to have the entered time periods set up for every day, or pick the specific days instead (specific weekdays or holidays, if they are set up for your device).
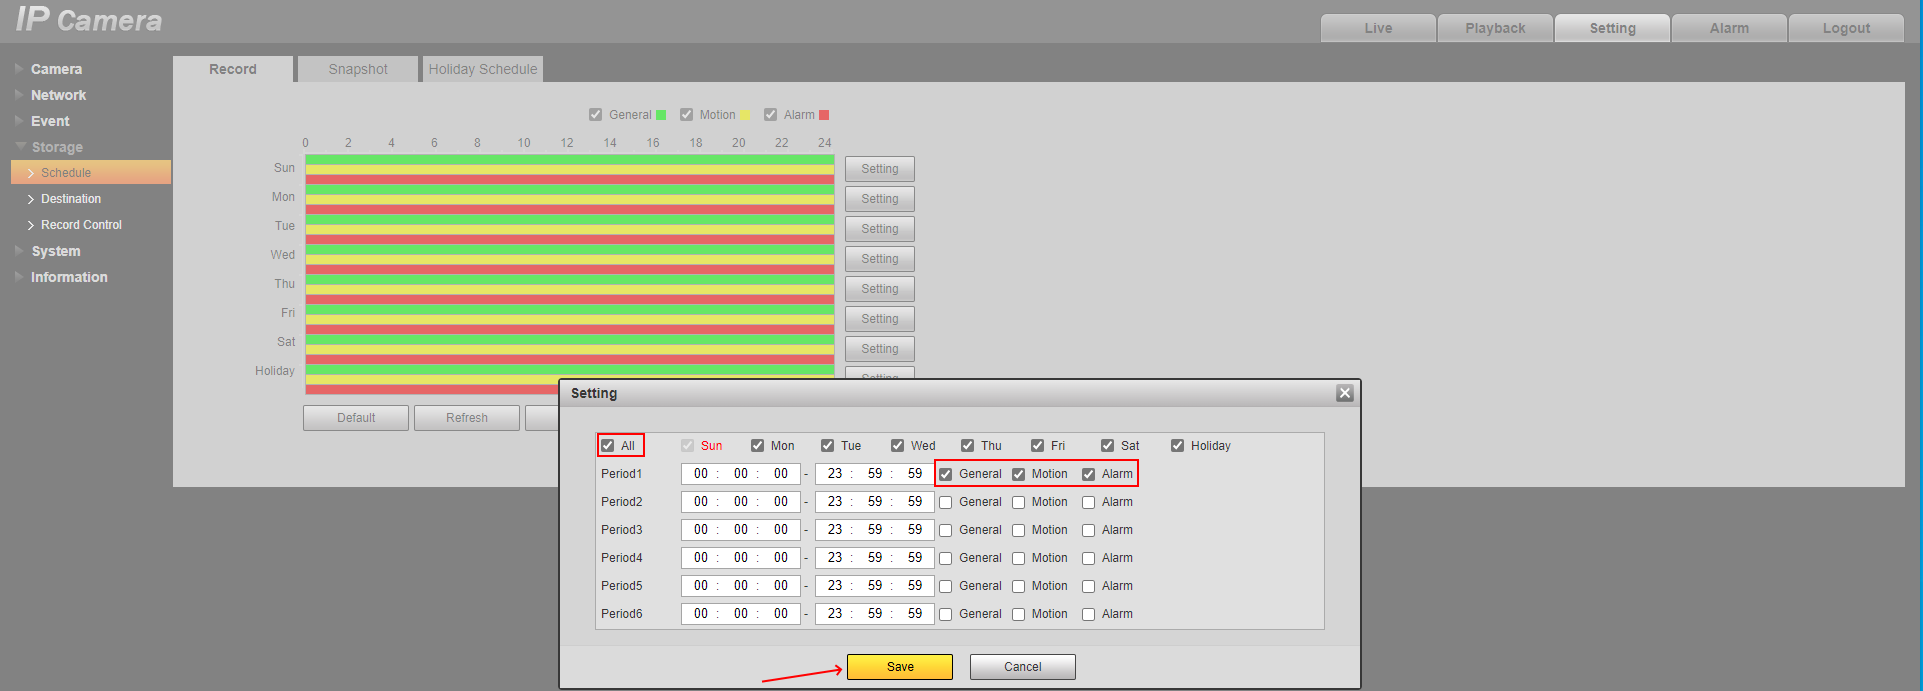
(do not forget to save the settings by clicking the Save button, both in the Setup window, in case you use it, and under the timetable).
By default, Dahua cameras also have overwriting enabled. This means that if the volume of archive on the SD card reaches its full capacity, the oldest recordings on it will start to gradually be replaced with the newest ones, thus helping to avoid having to reformat the card. However, reformatting the card can be used in case it would become necessary to delete all recordings from the card (please see the instructions above on how to format the card).
NB! Deleting a specific part of the archive from the card is not supported by the system of these cameras. Taking the card out of your camera to delete specific files from it may cause issues with playback availability of any existing recordings on it, as well as with making new recordings. The way to fix these issues is to completely format the SD card using the one of the aforementioned options.
If it is mandatory for you to delete only a part of recordings from the card, you can save all the most important recordings from it using the archive export function, then delete the rest by formatting the card.